Creating a 2-Dart Block (using your 1-Dart Block)
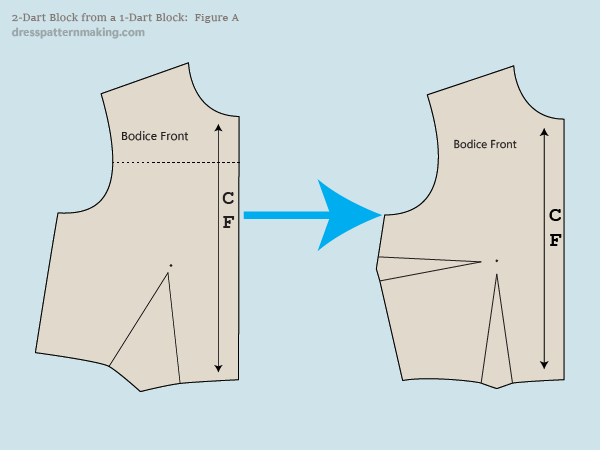
If you have created a 1-Dart Block for your patternmaking, you may need to create a 2-Dart Block. The instructions here use the pivoting method.
Example: Outcome
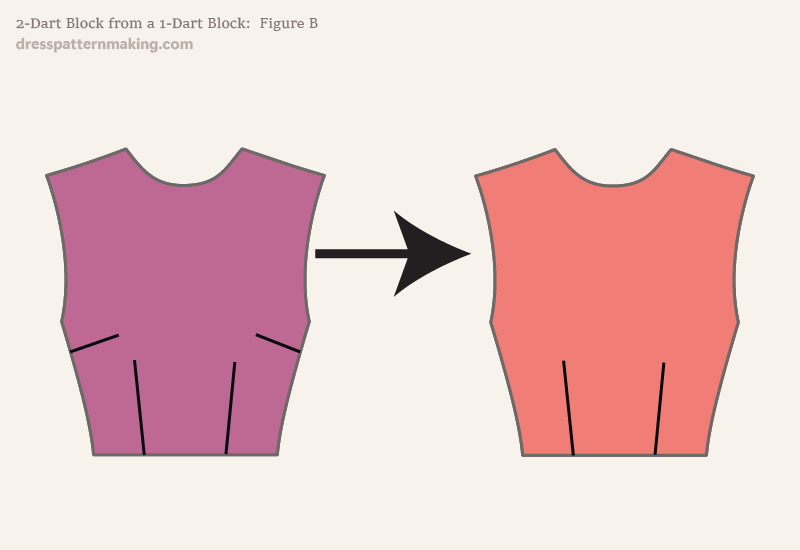
Figure A above shows the starting block (1-Dart Block) and the 2-Dart Block you will be creating, by pivoting some of the waist dart into the side seam. Figure B shows what the Technical Flats would look like.
2-Dart Block from 1-Dart Block: Figure 1
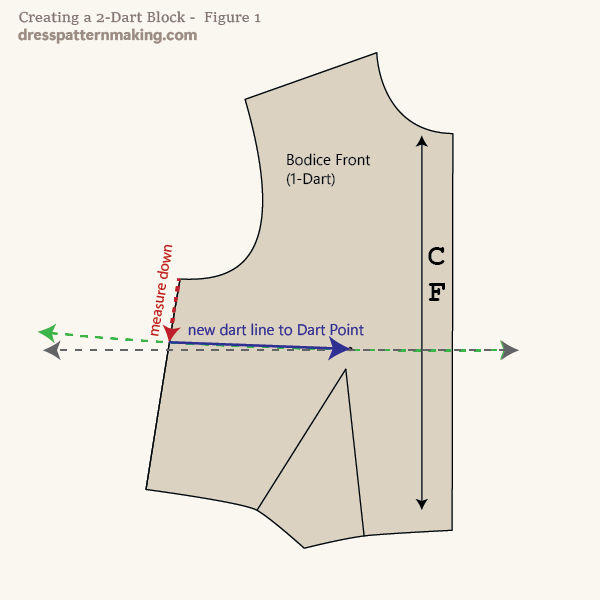
Note that the bust line is not straight across the block at right angles to the Center Front, as indicated by the dashed grey line, but more of a curve, as indicated by the dashed green line. The side seam dart should be placed approx 2 inches to 2.75 inches down from the underarm point on the side seam line. Using the amounts given in the Side Seam Dart Placement page (this will open in a new window):
- Measure down from the underarm point on the side seam line, and mark the placement of the side seam line
- Draw a line from that point to the Bust Point
2-Dart Block from 1-Dart Block: Figure 2
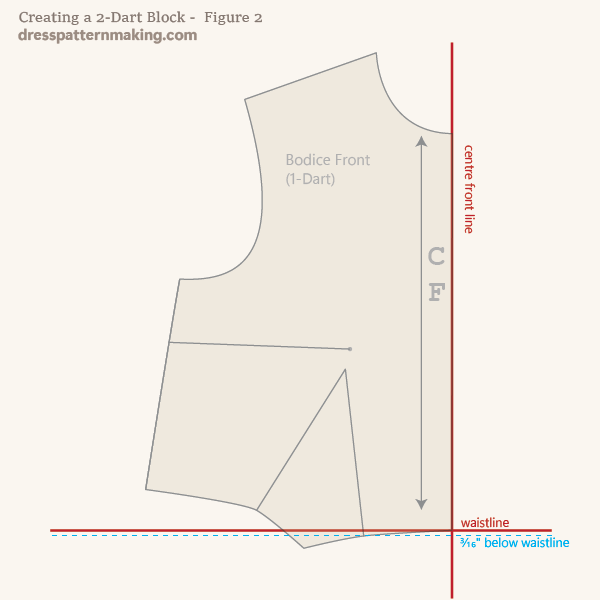
Although we can just trace around the block, we will just make sure our Center Front line is straight, and draw that line with the ruler.
- Using your block as a guide for placement on your cardboard, draw the following lines with your ruler:
- Center Front Line
- Waistline - making sure this is at right angles to the Center Front Line
- Draw another line 3/16-inch below the waist line
2-Dart Block from 1-Dart Block: Figure 3
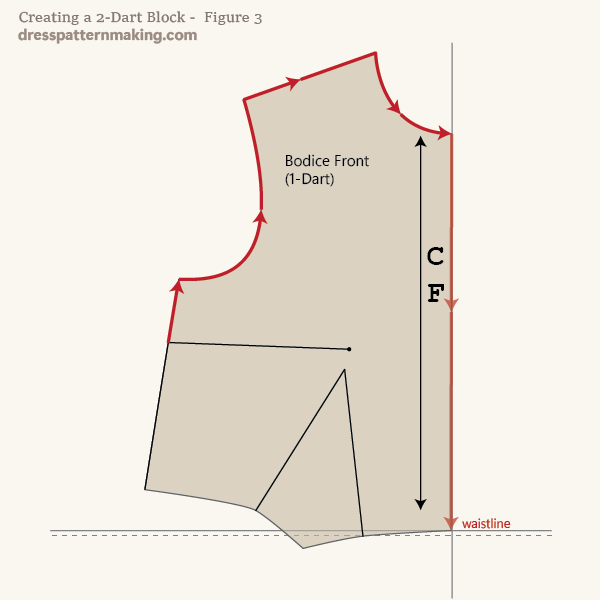
- Place your block on the cardboard, lining it up on the Center Front and Waist lines (note that the first dart leg should end up on the line 3/16-inch below the waistline).
- Trace around the block from the new side seam dart line, around to the waist. (Though from the neck to the waist is redundant, as we drew the CF line)
- Your block should have a hole punched through the Bust Point; make sure you put a pencil tip in the hole and transfer that point to the cardboard underneath.
Note: It is not shown here, but you could mark the Across Chest placement line (dashed line just below the Block Name). This is useful information to have on both blocks.
2-Dart Block from 1-Dart Block: Figure 4
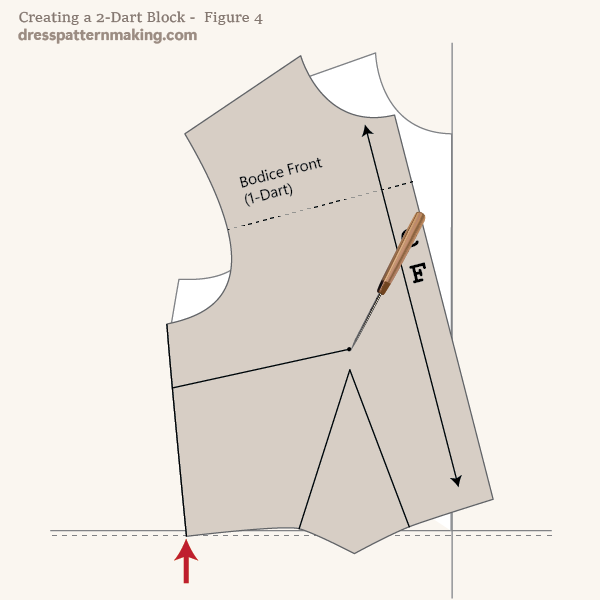
- Using an awl or a sharp pencil, hold down the block at the Bust Point and rotate it so that the side seam waist corner touches the guide-line that is 3/16-inch below the waist. (If you use something with a large surface to hold down the block while rotating it, the turn will not be as precise).
- Hold the block firmly in place and put down the awl.
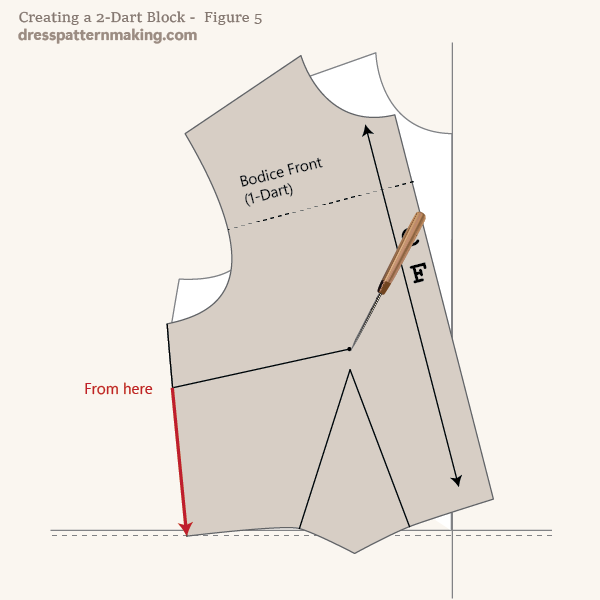
2-Dart Block from 1-Dart Block: Figure 5
- Trace the remainder of the side seam line; from the new side seam dart line to the waist corner.
- You can now remove your block
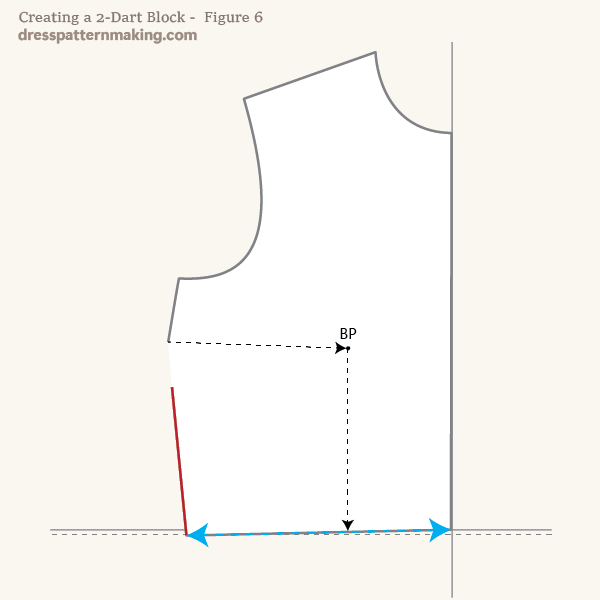
2-Dart Block from 1-Dart Block: Figure 6
- Draw lines from the top side-seam dart point (A) to the Bust Point and from the Bust Point to the waist (point E). (We will do the side seam dart last as we may need to open that up a bit...)
- Measure the waist from the CF to the sides seam (from point C to D) = x.
- Refer to your measurement chart for the waist measurement (y) needed for your block: (waist measurement + 1-inch ease) ÷ 4 = y.
- Calculate: x - y = z. (Where z is the superfluous amount in between C & D, and is the dart value).
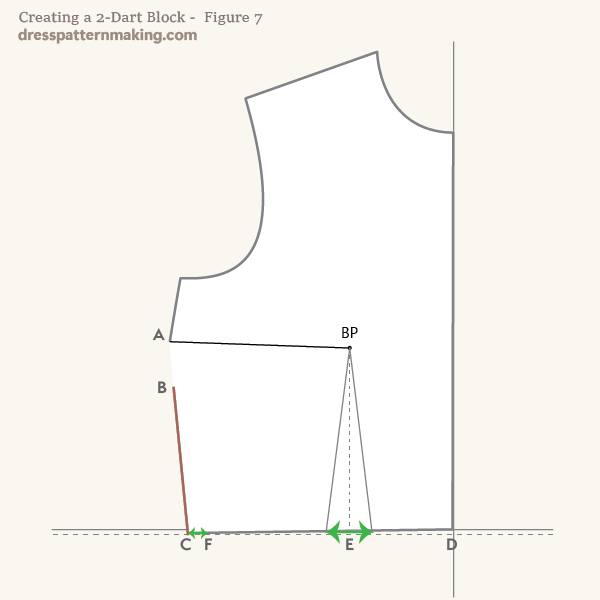
2-Dart Block from 1-Dart Block: Figure 7
We will create the waist dart now; the value of the waist dart will depend on the amount left over (z, the dart value, from above). If the amount left over is 1.75 inches or less, it is taken out in the waist dart. If it is more than 1.75-inches, then the waist dart should be 1.75 inches, and the rest is taken off the side seam. (You could, if you prefer, just have the whole value in the waist dart, but be aware that large darts create distortion).
- Draw the waist dart width on the dashed line 3/16-inch below the waist line, with point E as the center.
- If you need to put some in the side seam, measure from C towards the CF line, and mark the point F.
In this case, I will be creating a waist dart 1.75-inches wide, with .85-inch taken off the side waist.
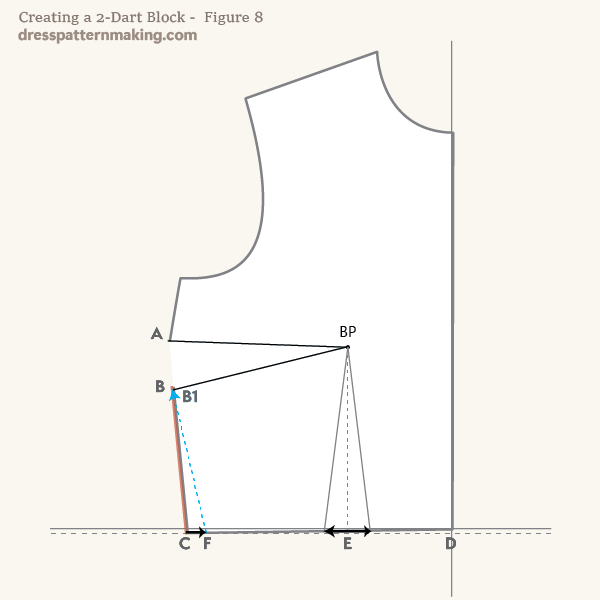
2-Dart Block from 1-Dart Block: Figure 8
If you have taken some off the side waist:
- Measure from B to C.
- Using that measurement, measure up from F, towards B, and mark point B1.
- Draw a line from BP to B1
If you did not need to take any off the side waist, then draw a line from BP to point B. (To clarify: If you did not take some of the dart value from the side waist, your side seam is from B to C, if you did take some off the side waist, your side seam is from B1 to F).
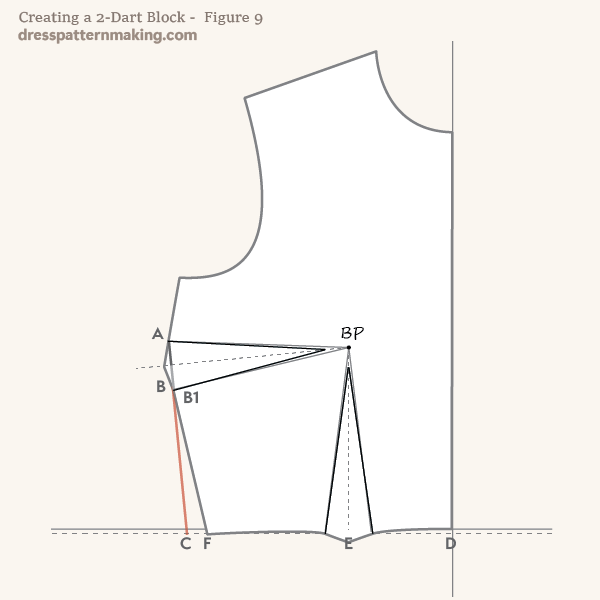
2-Dart Block from 1-Dart Block: Figure 9
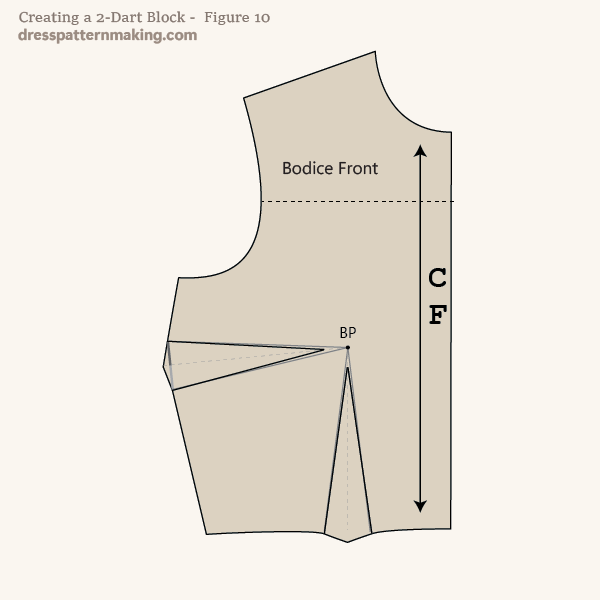
- Finish outlining the block
- Finish off the darts.
Remember that the Dart Points finish before the Bust Point. See the page Bust Point to Dart Point for measurements (this will open in a new window).
2-Dart Block from 1-Dart Block: Figure 10
Finish off your block:
- Cut out
- Mark CF and grainline
- Label
- Notch
- Pierce BP and Dart Points.
- Mark Across Chest line.
If you are unsure about how to shape the waist or finish off the darts, see the pages under the Garment Elements Menu: Finishing off Darts & Shaping the Waist.
