Bodice Front Style 08
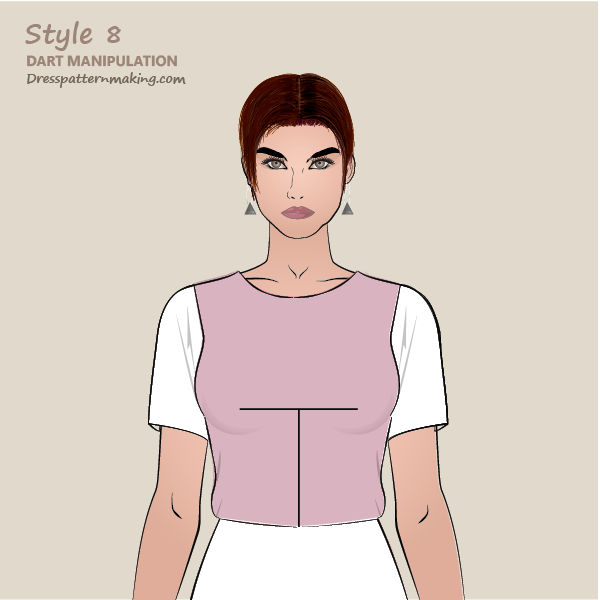
The bodice of this garment has one dart (for the half-block) in the CF at the bust level. In order to have the dart in this position, this requires a seam from either bust point down to the waist, or from the bust level up to the neck. In this case (Style 08), the seam is down to the waist.
Example: Outcome
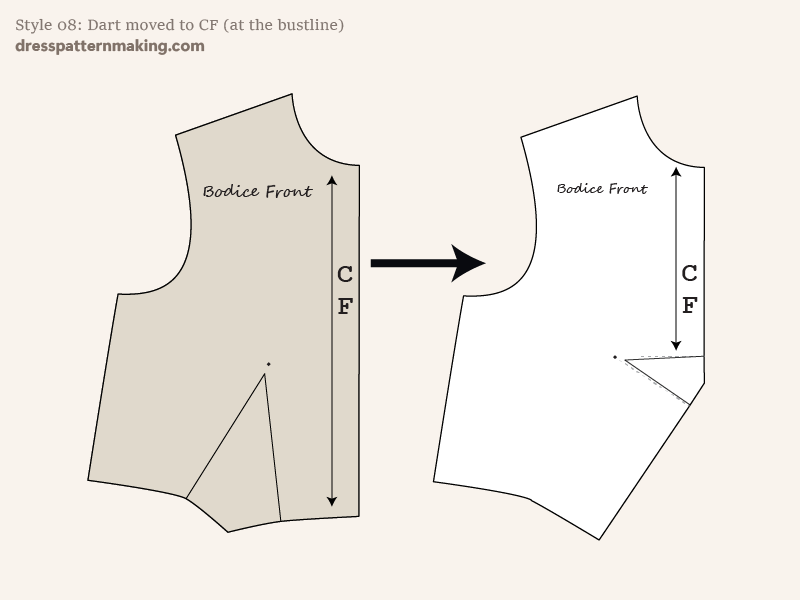
Figure B shows the starting point (the block) and the outcome (the final flat pattern after the dart manipulation).
The focus of these instructions is covering the theory and practice of manipulating darts and the exercise finishes after the dart manipulation has been done. For production ready patterns you would need to take further steps to add seam allowance, pattern labels, pattern piece numbers, the grainline, etc.
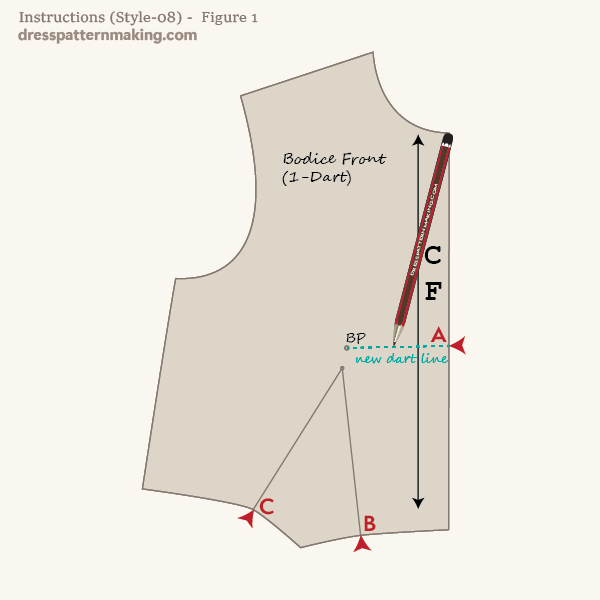
Instructions (Style-08) - Figure 1
In these images I have used color for emphasis only. Use a hard pencil (4H-6H) when hand drafting patterns.
- Draw the new design line on your block; from the side seam to the Bust Point (not the Dart Point!).
I have marked the points A, B & C on the block to assist in the instructions. You do not have to write these on your block. Note that A, B & C relate to the points where the dart leg meets the edge of the block, as shown by the arrow tips.
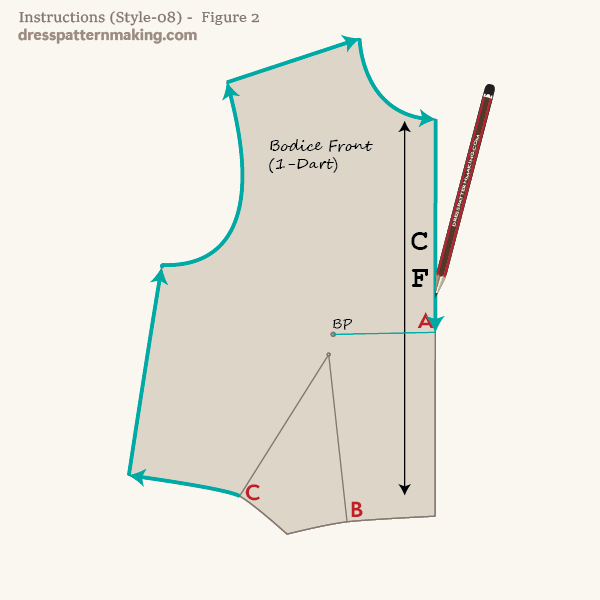
Instructions (Style-08) - Figure 2
- Holding the block firmly in place so that it doesn't move, trace around the block in a clockwise from point A (the new dart line) to point B (the first waist dart leg).
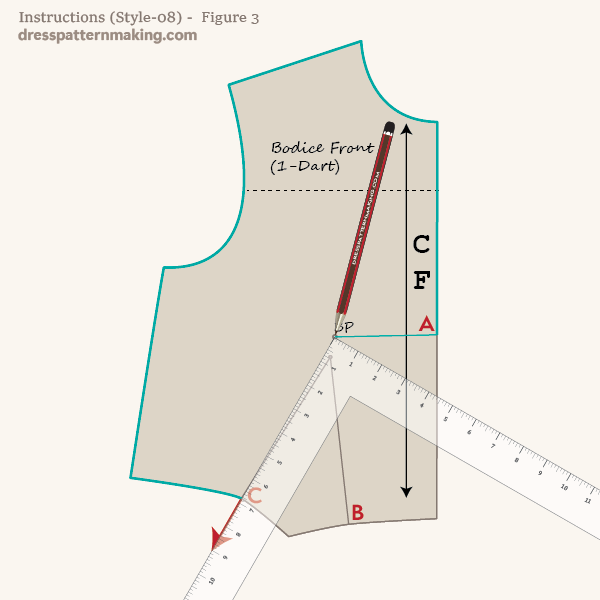
Instructions (Style-08) - Figure 3
- Mark the Bust Point on the paper underneath the block by putting your pencil tip through the BP hole.
- Extend the dart leg line (B) past the edge of the block. To make sure the line true, use a ruler to line up the Bust Point and the dart leg on the edge of the block, and continue that line beyond the block onto the paper (shown by a red arrow in the image).
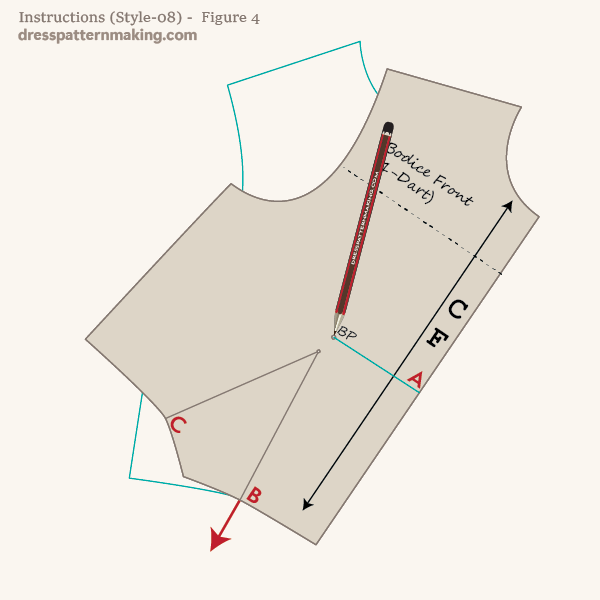
Instructions (Style-08) - Figure 4
- Holding the block down at the Bust Point, pivot the block clockwise until the waist dart is closed. (i.e. Dart leg C reaches the line you drew in the last step - the red arrow in the image).
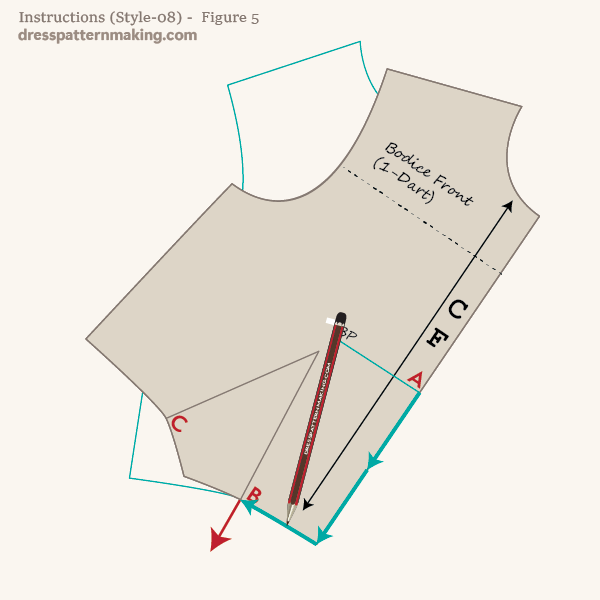
Instructions (Style-08) - Figure 5
- Making sure the block doesn't move, finish tracing the remainder of the block from A to C.
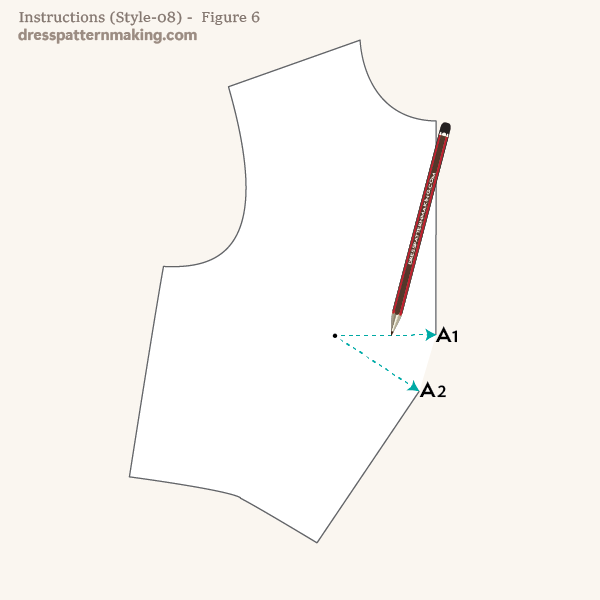
Instructions (Style-08) - Figure 6
You can lift up the block now and put it aside. We will now see what we have on the paper underneath.
- Draw the new dart legs from the Bust Point to points A1 and A2. (They should be the same length, but check to make sure).
- Finish off the dart, remembering that the Dart Point stops some distance before the Bust Point.
If you are unsure about how to finish off the dart, see the pages on Finishing off Darts, which gives a few step-by-step examples.
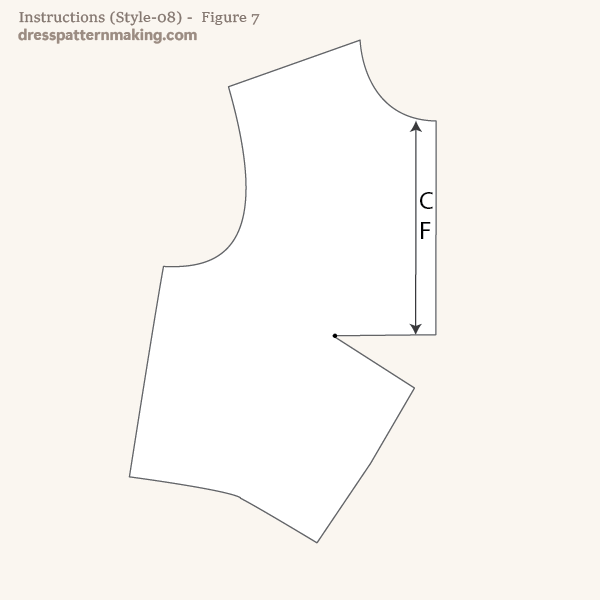
Instructions (Style-08) - Figure 7
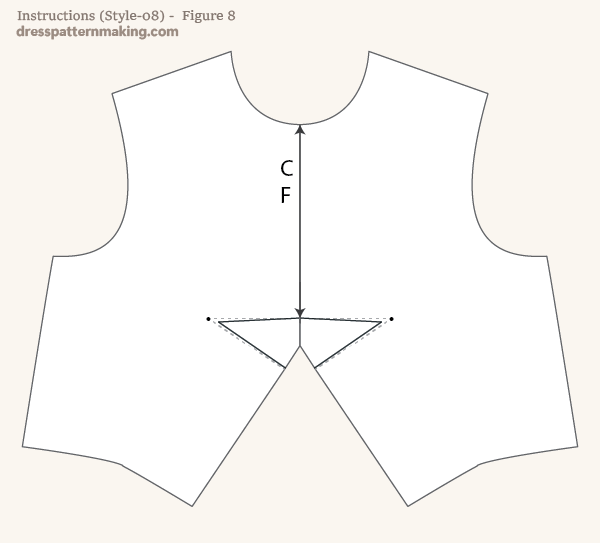
This is the final pattern after the dart manipulation is finished. (See Figure 8 for a final note).
- If this was a production ready pattern, you would need to label the pattern piece, add seam allowance, cutting instructions, grainline, note the pattern piece number and the total number of pattern pieces, etc.
Instructions (Style-08) - Figure 8
As previously mentioned, I am not writing cutting instructions etc on these pattern pieces. I just want to bring to your attention that the final pattern piece would look like this if a full pattern piece was created. The other option is to mark 'cut on fold' on the pattern piece above.
