Half Circle Skirt
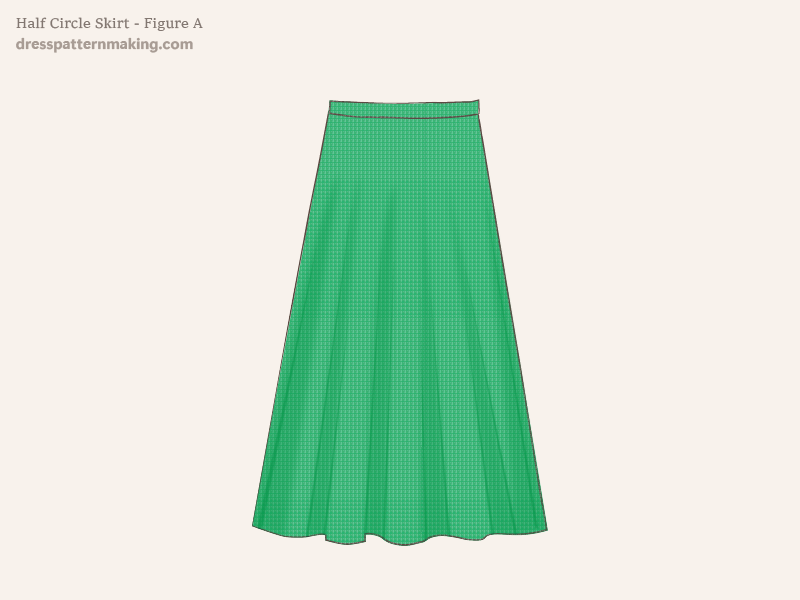
No Blocks are needed to draft the circle skirts, you only need your waist measurement, including ease.
Example: Outcome
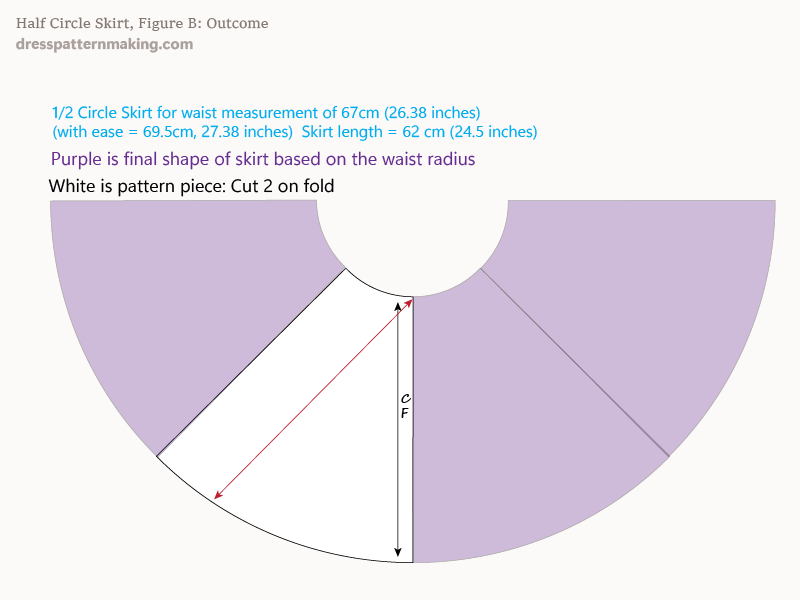
Figure B shows the end shape of garment in purple, like a circle with a quarter wedge removed. The white shows the final pattern piece, which is a quarter of the yellow shape.
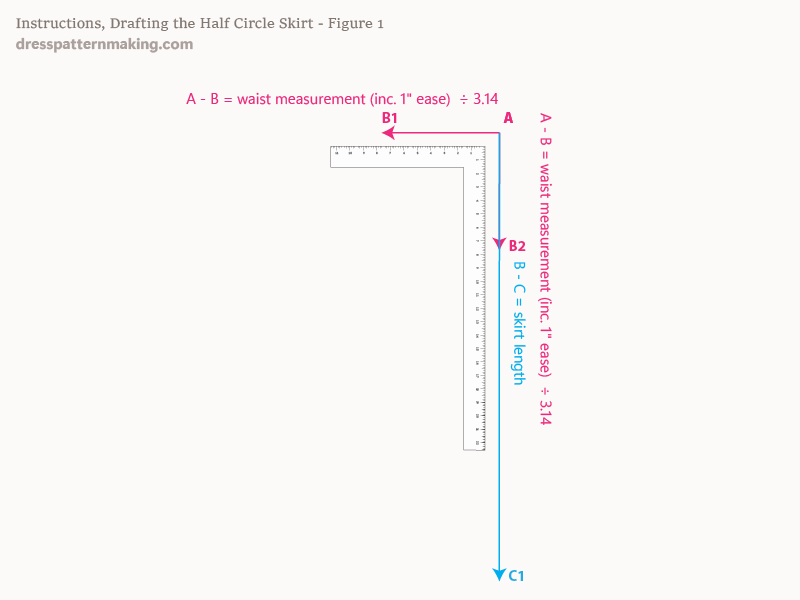
Instructions: Drafting 1/2 Circle Skirt - Figure 1
- Draw a horizontal line from A to B1: the length of this line is your waist measurement (including 1 inch ease), divided by 3.14*
- Measure from B1 to C1, your desired skirt length
- Measure the same distances vertically down from A, to B2 and C2 making sure that the vertical line is at right angles to the horizontal.
*The waist measurement I am using (including ease) is 27.38 inches. My skirt length is 24.5 inches.
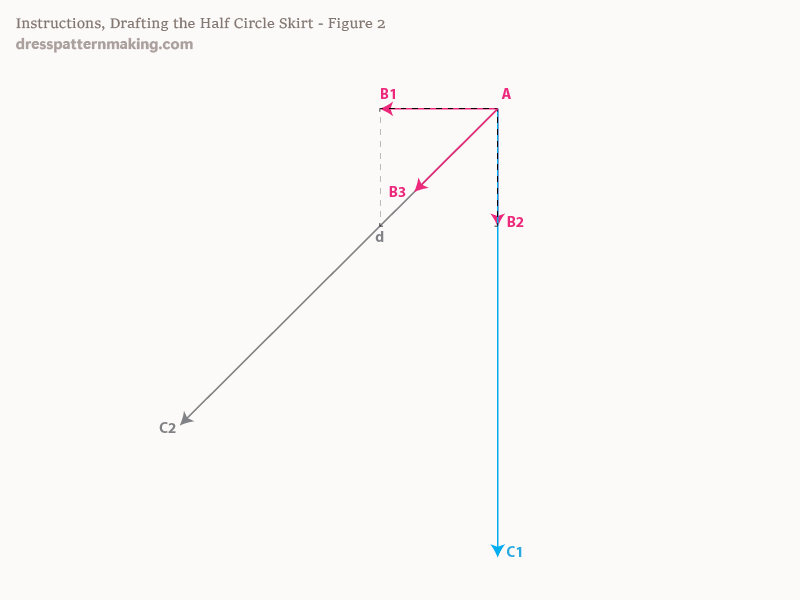
Instructions: Drafting 1/2 Circle Skirt - Figure 2
We want to draw a line at 45 degrees to the A~C lines:
- Square down and across from points B1 & B2 to make a perfect square: A, B1 and B2 are three points of the square.
- Mark the fourth point of the square D.
- Draw a line from A and through D. Make this line the same length as the length A~C1 & A~C2. Mark the end point C3.
- Measure along the A~C3 line, and mark B3, which is the same distance as A~B1 & A~B2.
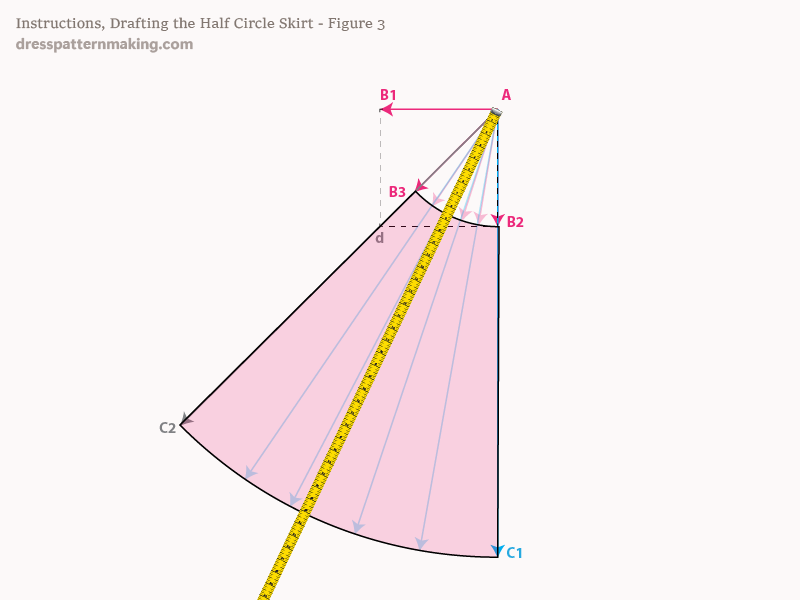
Instructions: Drafting 1/2 Circle Skirt - Figure 3
- Draw a semi-circle shape from B3 to B2.
- Draw a semi-circle shape from C2 to C2.
The way to create the correct circular shape:
- Measure the A to C distance with a tape measure, then swing the tape measure around (pinned at A) and mark that measurement at various points. Blend with a curved ruler.
- Repeat to create the waist curve. (Measure from A to B3, then swing the tape measure around....)
Instructions: Drafting 1/2 Circle Skirt - Figure 4
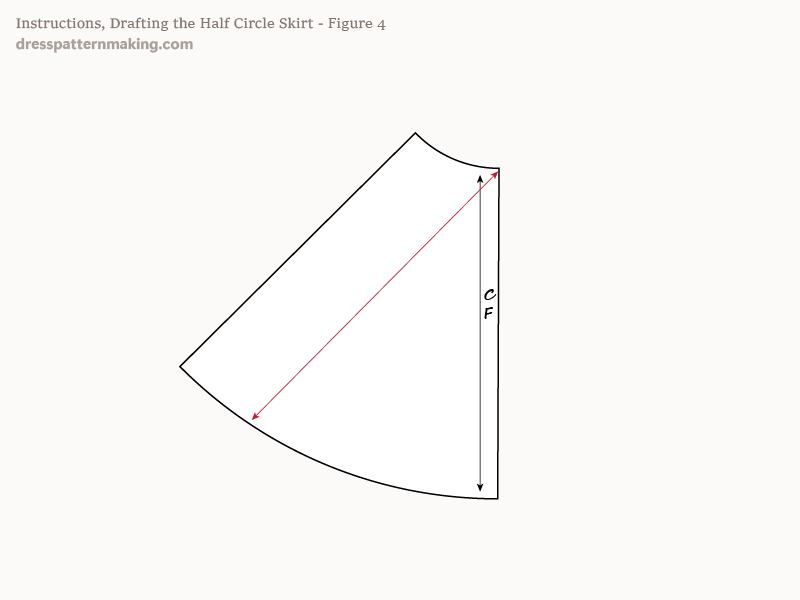
- This is the final (working) pattern piece (i.e. seam allowance, cutting instructions still need to be added, etc).
- You could cut 4, or cut two on fold.
The grainline can be placed on the straight grain or the bias, depending on how you want the flares to sit around the hem.
