Peter Pan Variations: Cut & Lap

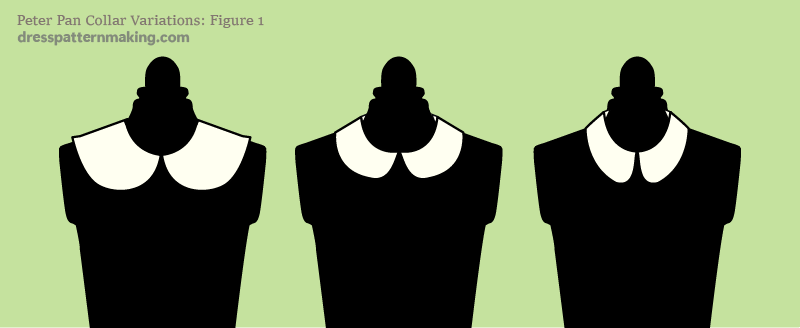
The instructions for the Peter Pan collar ends up creating a collar with a low stand. While the Peter Pan collar is generally considered a low-stand collar, it can actually have a high stand of 1-inch, a low stand of 1/8-inch, and anything in between. Refer to the image above to give an indication of what difference changing the stand makes. The lower the stand, the flatter the collar. The higher the stand the higher it goes up the neck.
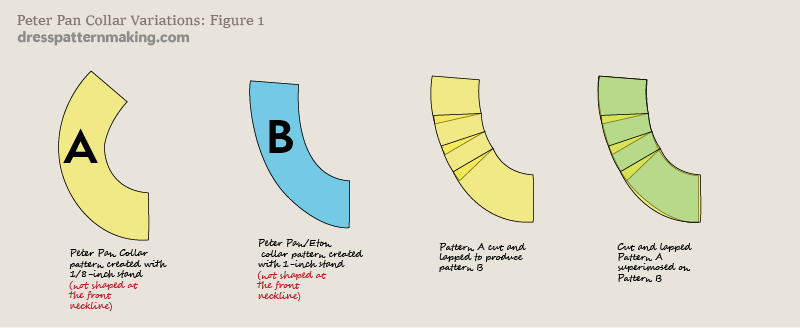
Now you can create these three different collars from scratch. The instructions for the Peter Pan collar are for creating a low 1/8-inch stand (the flattest collar). If you want to create the 1-inch stand variation from scratch, you can go to the instructions for the Eton Collar, and at the end just change the shape of the front. (The Eton Collar is basically the Peter Pan with a 1-inch stand and a pointed rather than rounded shape). However, if you wanted to create the three styles, there is no need to do so from scratch. If you have created the basic flat Peter Pan with a 1/8-inch stand, you can then create the others by cutting and lapping that basic collar. Below is an example showing what this means:

Peter Pan: Cut & Spread Amount
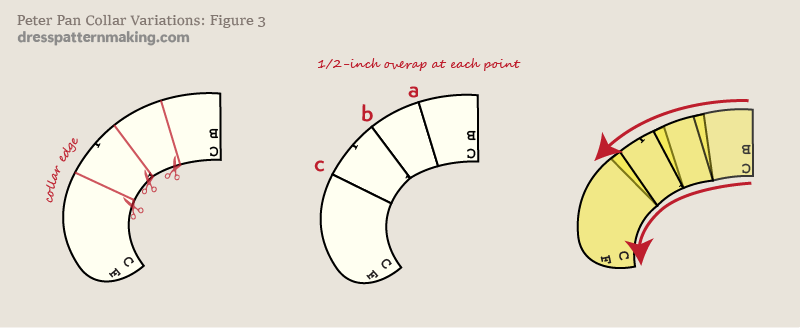
To create the 1-inch stand from the 1/8-inch stand, cut into three and overlap each section at the collar edge by 0.5-inches (1.25cm). You will need smooth out both the neckline edge curve and the collar edge curve after lapping.

You can lap a less amount (.e.g .25-inch) for a medium stand (for example the middle collar in first image on page).

