(Manipulating Darts) Skirt Style 01
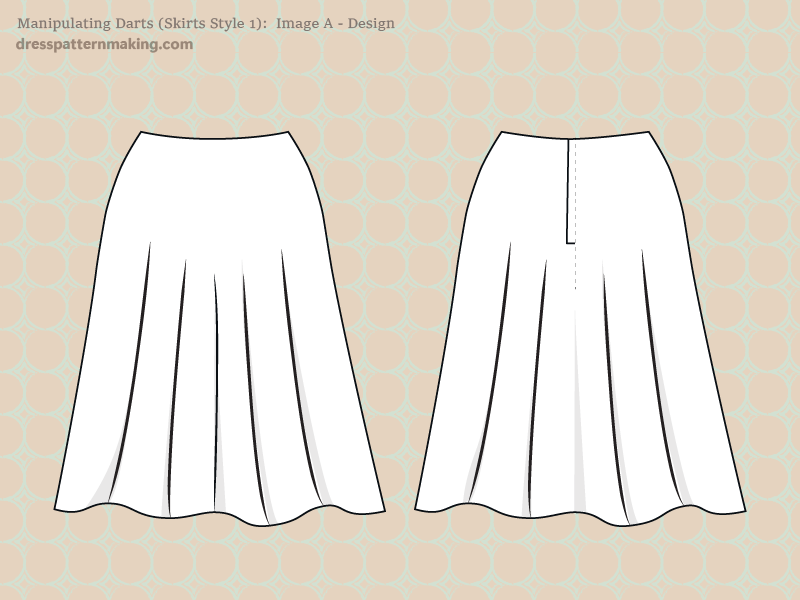
The A-line style of the skirt shown in Figure A has been created by pivoting closed the waist darts and opening up the hem. In this exercise the dart manipulating has been done by pivoting rather than cutting-and-spreading. Both methods are equally as valid.
Example: Outcome
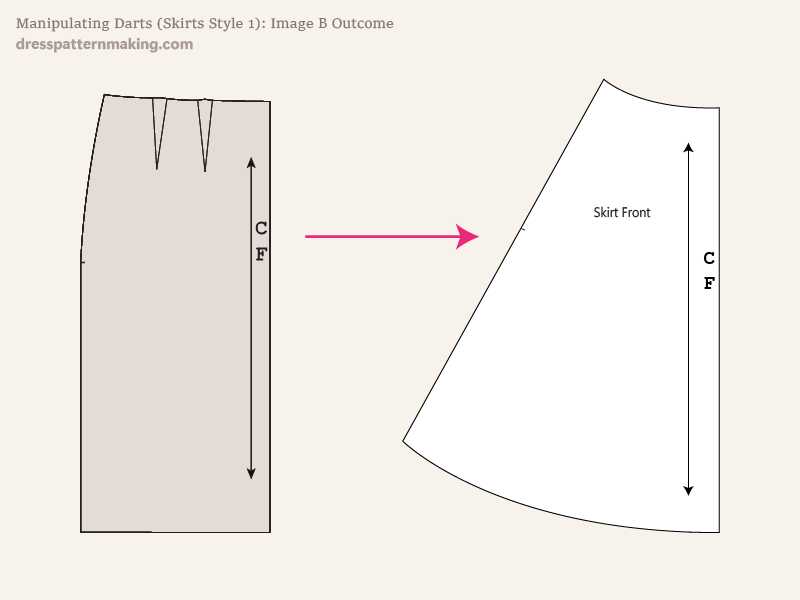
Figure B shows the block being used on the left, and the pattern that will be created (Skirt Style 01) on the right. Only the Skirt Front has been done; the same directions apply to the Skirt Back.
Seam allowance or cutting instructions have not beedn added added, this exercise covers only the theory of manipulating darts, not creating production ready patterns.
Instructions (Skirt Style-01) - Figure 1
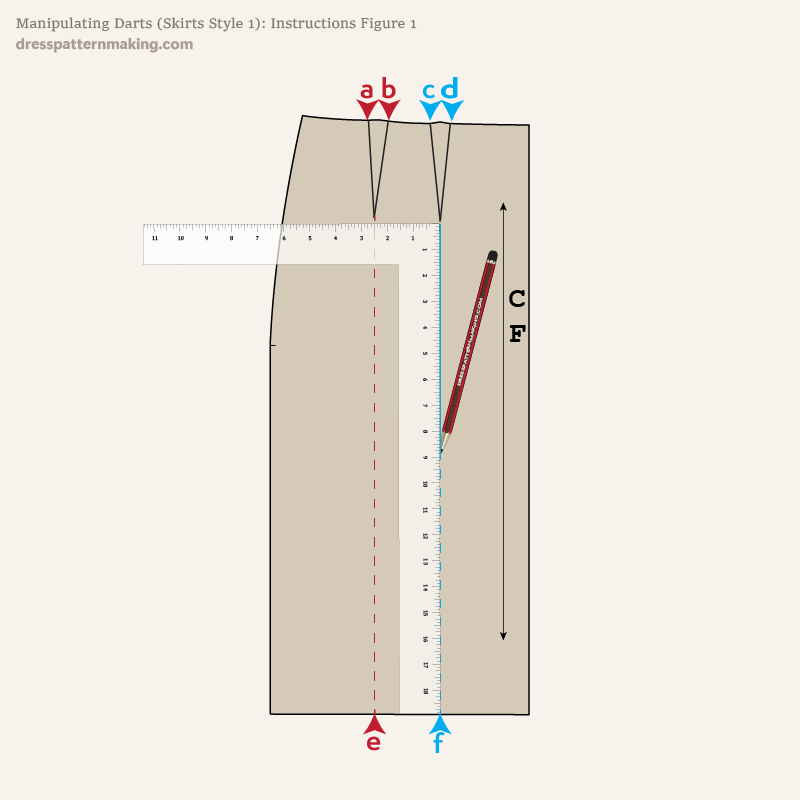
The same method applies to both Front and Back. I will be using the Skirt Front as the example; if you were making this pattern you would need to follow the same steps for the Skirt Back. In the image below have marked the points A to F to assist in the instructions. You do not have to write these on your block. Note that these relate to the points where the dart leg meets the edge of the block, as shown by the arrow tips.
- On your block, draw vertical lines (parallel with CF) from each dart point down to the hem.
Instructions (Skirt Style-01) - Figure 2
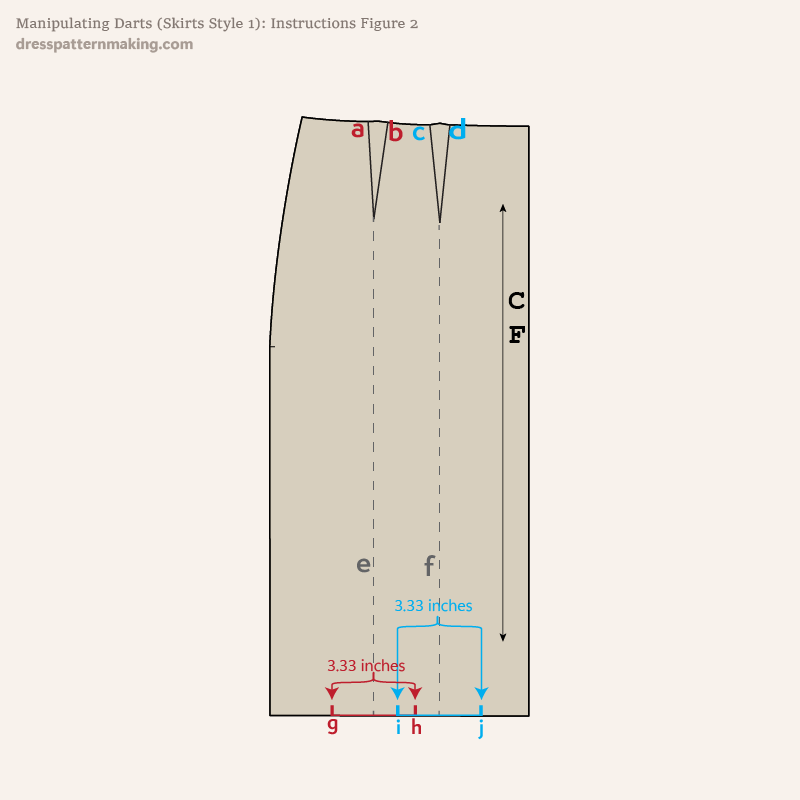
Now the skirt hem area is currently 40 inches total - (Front Block + Back Block) x 2. Depending on how much flare you want, you can add different amounts, but in this case I will double the hem area, and so will add 10 inches to each half-block. I will add some of the flare in the side seam as well, and therefore will distribute the 10-inches equally between the side seam and points E and F. We will add the side seam amount after we trace the block, for the moment we are just marking the following on the block.
- Measure a line 3.33 inches long, with E at the center. Mark the end points G & H.
- Measure a line 3.33 inches long, with F at the center. Mark the end points I & J.
The points I and H will overlap - that's fine.
Instructions (Skirt Style-01) - Figure 3
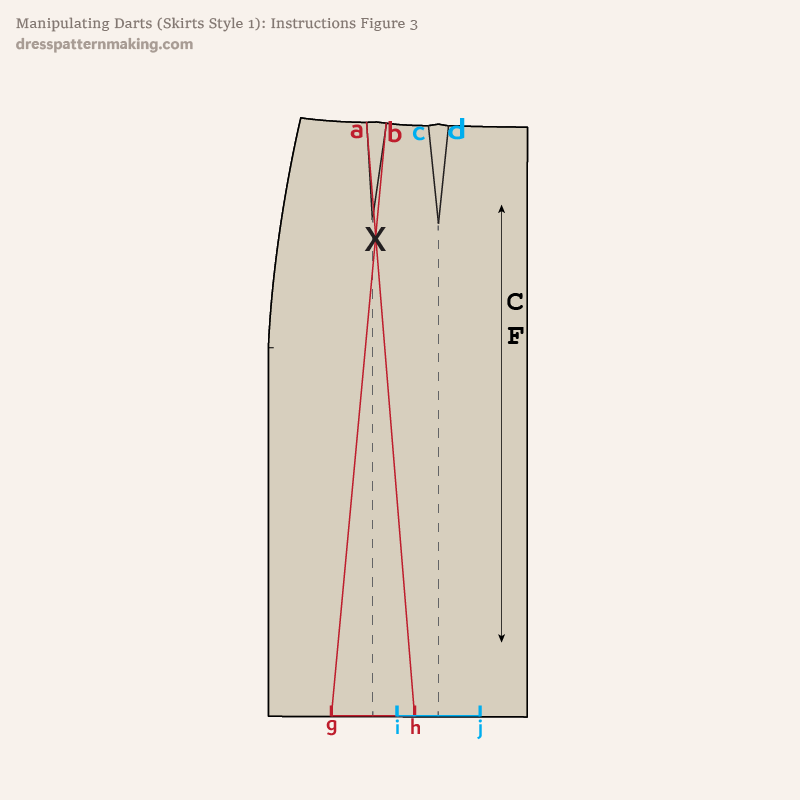
- Draw a line from A to H.
- Draw a line from B to G.
The point where the two lines cross is the pivot point for that dart - indicated by the big black X. Note the following:
- The less the amount added to the the hem, the lower the pivot point will be
- The higher the pivot point, the looser the skirt will be in the hip and above
- The lower the pivot point, the tighter the skirt will be in the hip and above (you may lose some of the existing ease). Because of this, if you only want to add a little bit of flare to the skirt, don't use this method.
Instructions (Skirt Style-01) - Figure 4
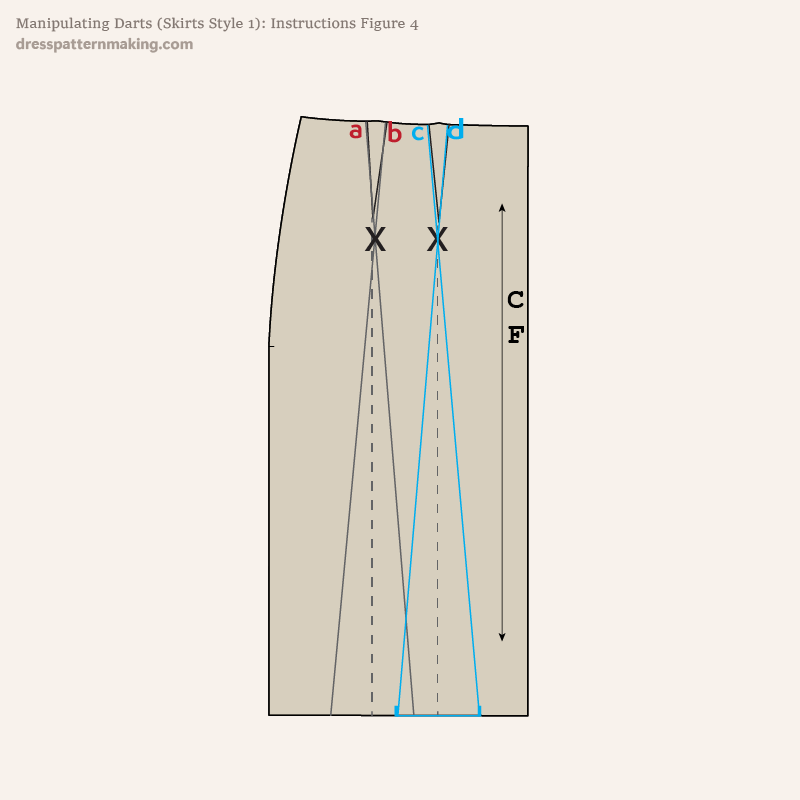
- Draw a line from C to J.
- Draw a line from D to I.
Where the two lines cross is the pivot point for that dart.
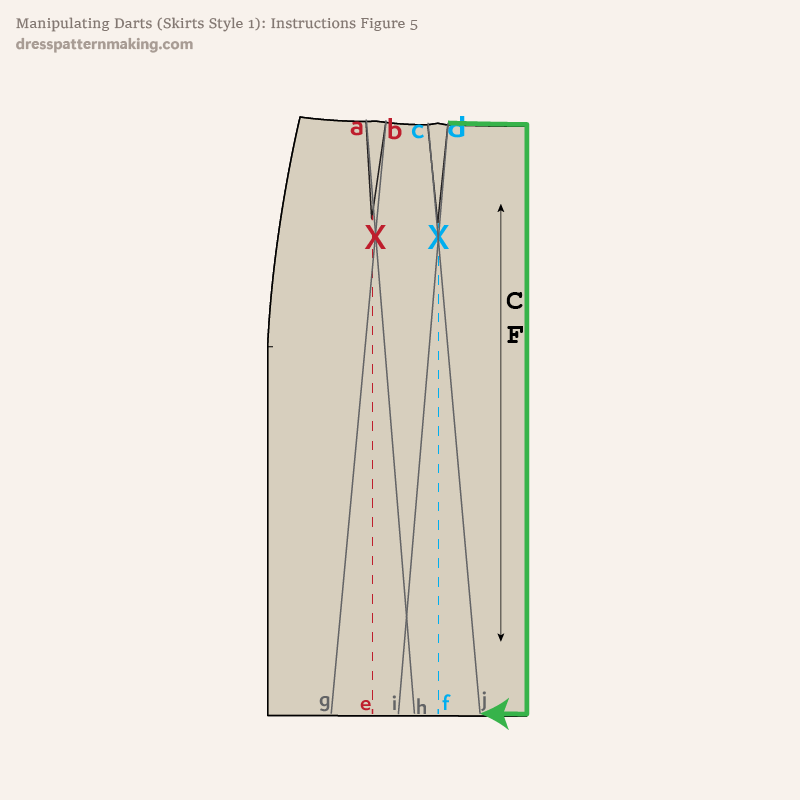
Instructions (Skirt Style-01) - Figure 5
Holding the block firmly so it doesn't move:
- Trace the block from D to J.
- Place a pencil on the pivot point on the C~D dart, for pivoting.
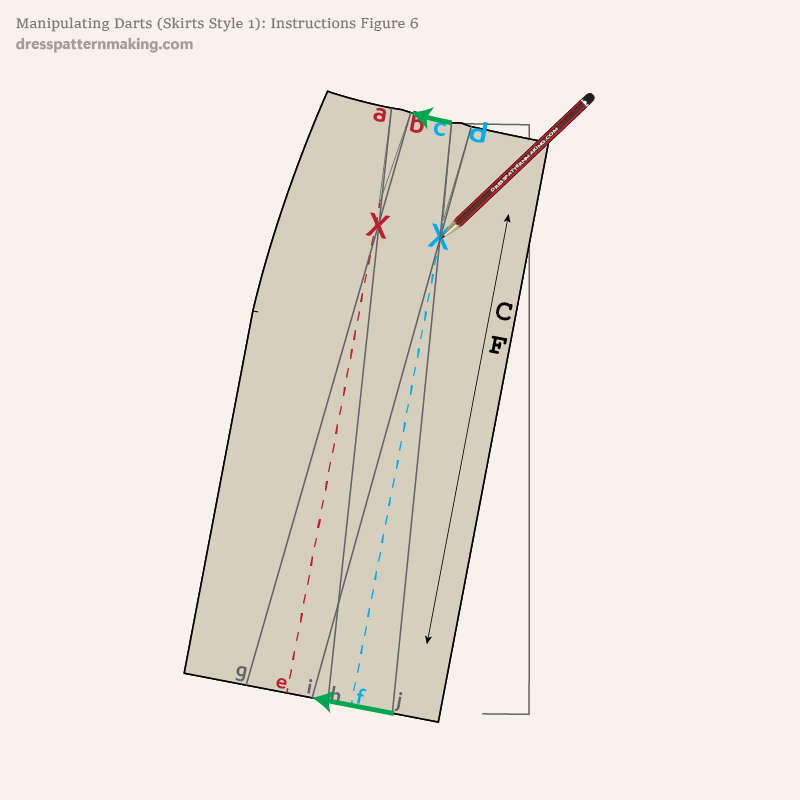
Instructions (Skirt Style-01) - Figure 6
- Pivot the block on the C~D dart pivot point, until the C~D dart is closed.
- Trace from C to B.
- Trace from J to I.
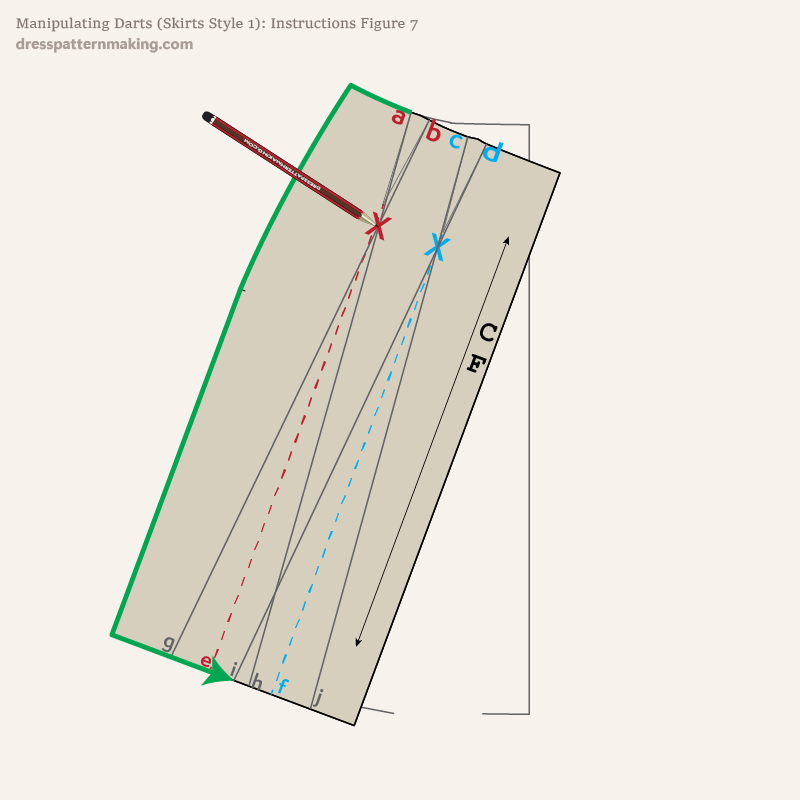
Instructions (Skirt Style-01) - Figure 7
- Hold the block down at the A~B pivot point, and turn the block until the A~B dart is closed.
- Trace the block from A to I.
You can put the block aside now.
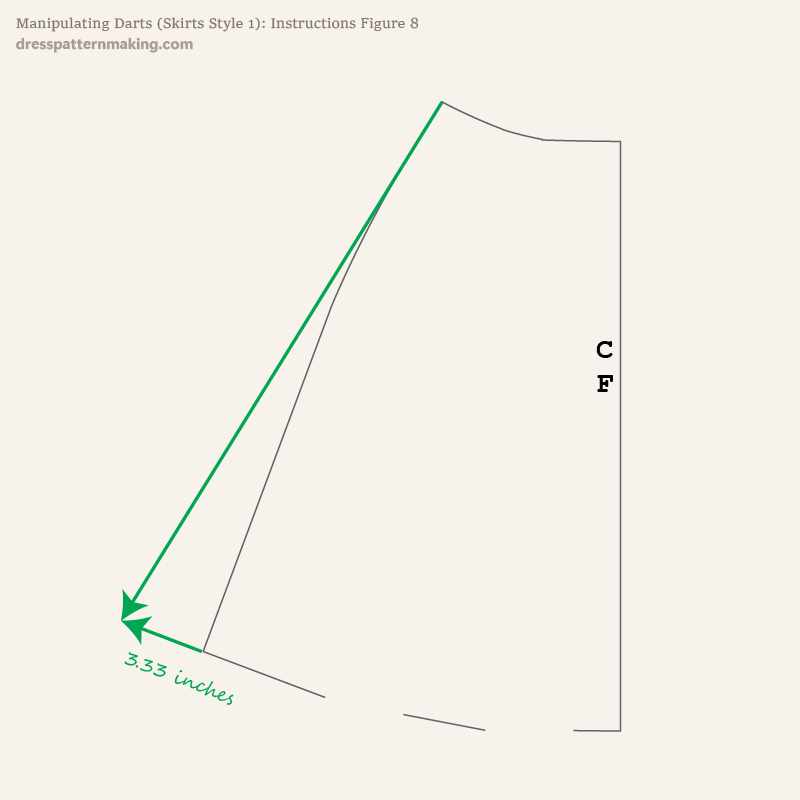
Instructions (Skirt Style-01) - Figure 8
Now we will add the 3.33 inches to the side seam to bring the total hem area of this half-block to 20 inches (and therefore the skirt to 80 inches). See Figure 2 if you've forgotten what this is about.
- Measure out from the side seam hem line for 3.33 inches.
- Draw a line from the waist side seam to the point just made.
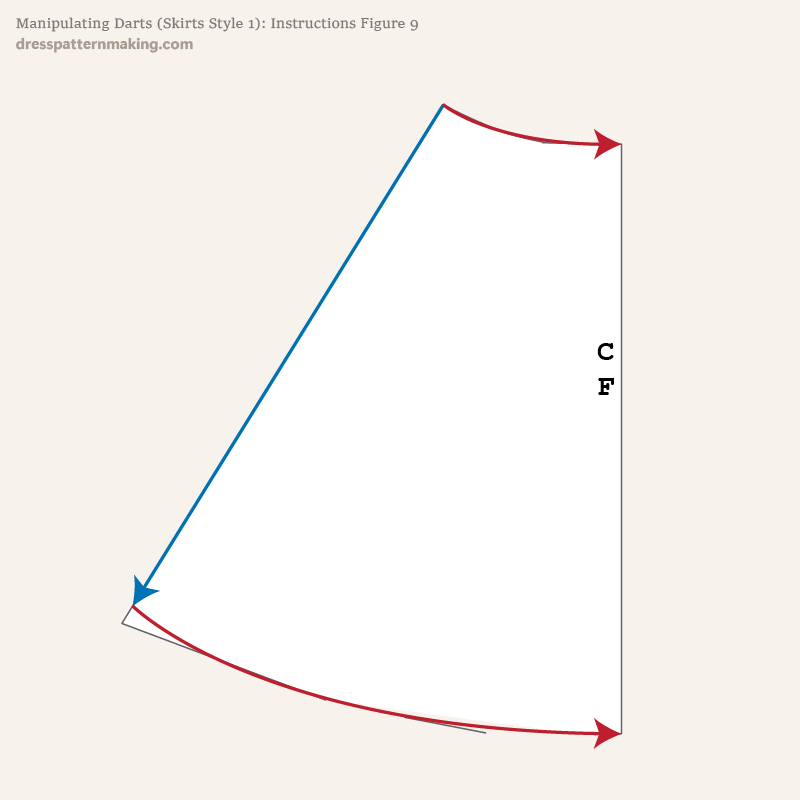
Instructions (Skirt Style-01) - Figure 9
- Smooth the curve of the waist.
- Measure the CF length, and measure down the side seam, to make the side seam the same as the CF.
- Redraw the curve of the hem.
Instructions (Skirt Style-01) - Figure 10
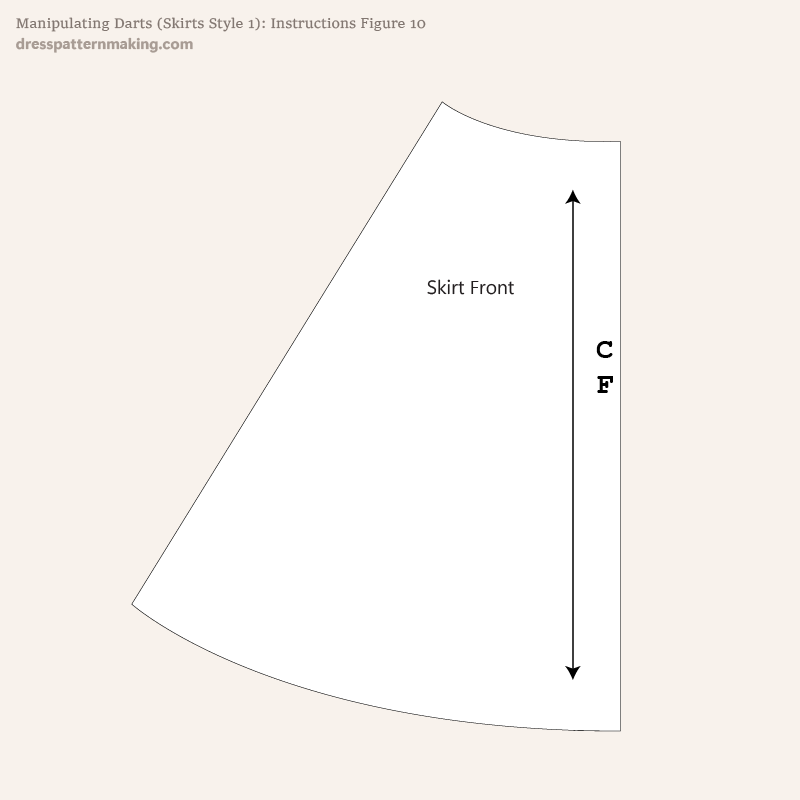
We have finished using pivoting to close the darts in the waist and add volume to the hem. You would need to follow the same steps for the Skirt Back. If this was a pattern, you would need to add seam allowance, mark the grainline, mark the cutting instructions and etc. (Not all shown here).
