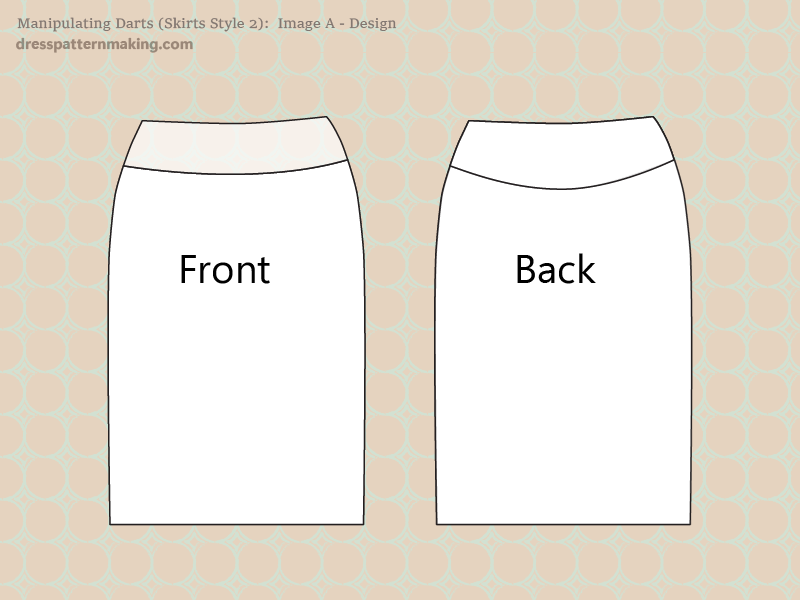
(Manipulating Darts) Skirt Style 02
This style has a lowered waist and a yoke style-line. The darts in the Bodice Front and Bodice Back have been incorporated into the yoke style-line. The reason that the back yoke is deeper is because the back darts are longer.
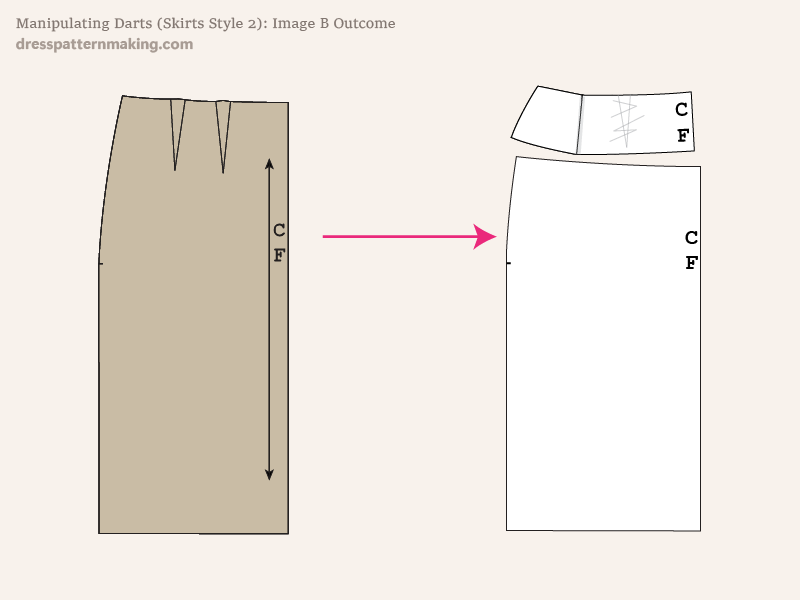
Example: Outcome
Figure B shows the block being used on the left, and the pattern that will be created (Skirt Style 02) on the right. Only the Skirt Front has been done; the same directions apply to the Skirt Back.
No seam allowance or cutting instructions have been added; these exercizes are focused on covering the theory of manipulating darts, not creating production ready patterns.
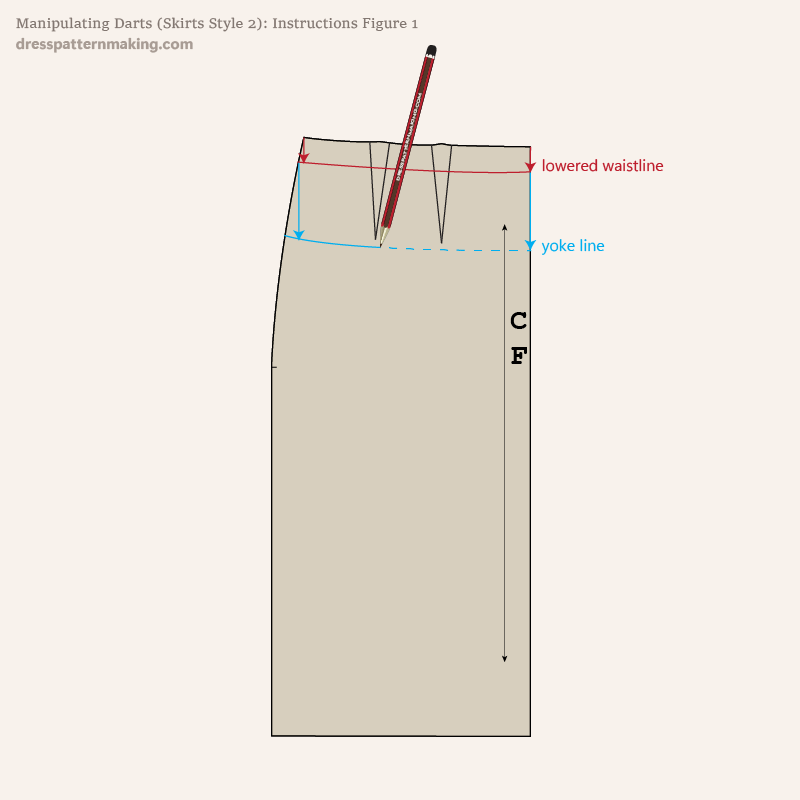
Instructions (Skirt Style-02) - Figure 1
The same method applies to both Front and Back. I will be using the Skirt Front as the example; if you were making this pattern you would need to follow the same steps for the Skirt Back (and add in zip details in the back, etc).
Mark the lowered waist and the Yoke Style-line on the block. The waist is lowered 1-inch, and the Yoke is 3 inches wide.
- Mark down 1-inch from the CF and from the side seam, and draw a curved line for the lowered waistline. (Shown in red)
- Mark down 3 inches from the lowered waist line on the CF and the side seam, and draw a curved line for the Yoke. (Shown in blue)
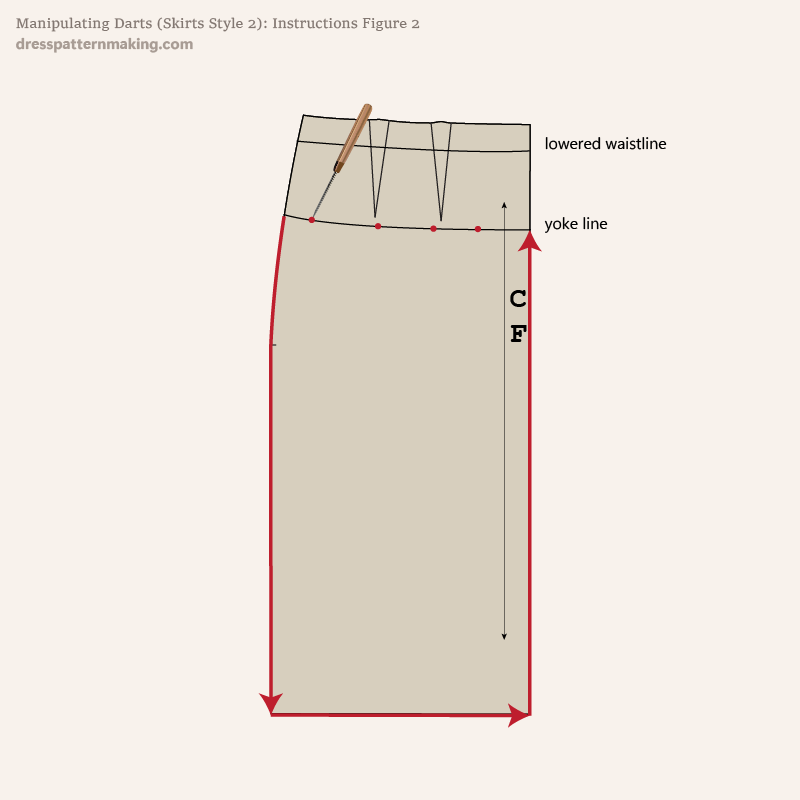
Instructions (Skirt Style-02) - Figure 2
We will now trace the block to create the two pattern pieces; the yoke and the skirt. We will start with the skirt - that is the easiest part.
- Trace around from the bottom part of the block from the yoke-line to the yoke-line.
- With an awl, pierce a number of holes along the yoke-line - shown by the red dots on the yoke line. These holes will appear on the paper and be a guide to draw the curved line. (Using a tracing wheel is a possibility, but it will weaken your block quite quickly).
Instructions (Skirt Style-02) - Figure 3
Lift up your block and put it aside for the moment.
- Draw the the yoke-line for pattern piece #1 (skirt) using a French curve. The holes pierced by the awl will be a guide for drawing the line.
- You will need to add seam allowance before cutting out the pattern piece; I have not added seam allowance in this image.

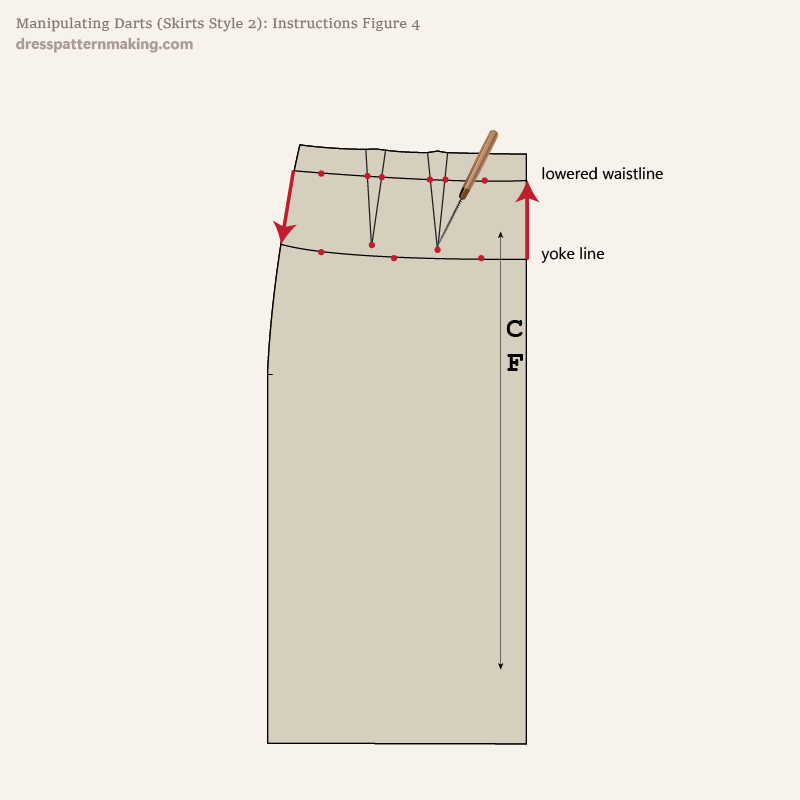
Instructions (Skirt Style-02) - Figure 4
Put the block back on paper to create the second pattern piece - the yoke.
- Trace the sides of the Yoke piece.
- Using an awl, mark the dart legs on the lowered waistline, the dart points, and the yoke line.
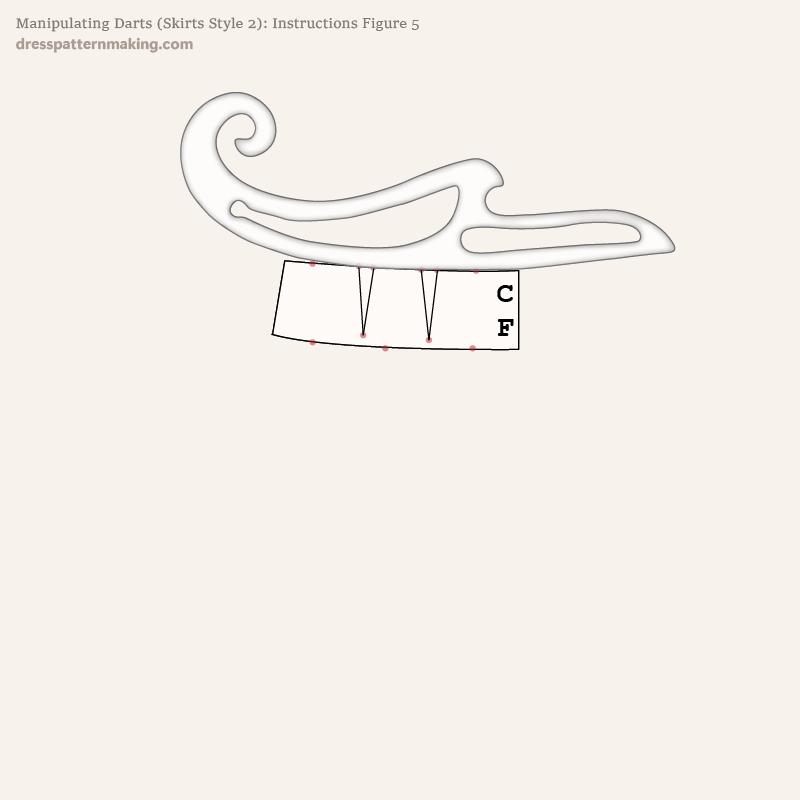
Instructions (Skirt Style-02) - Figure 5
Lift up the block and put it aside.
- Draw the dart legs.
- Draw the curves for the lowered waistline and the yoke line.
- Mark the CF.
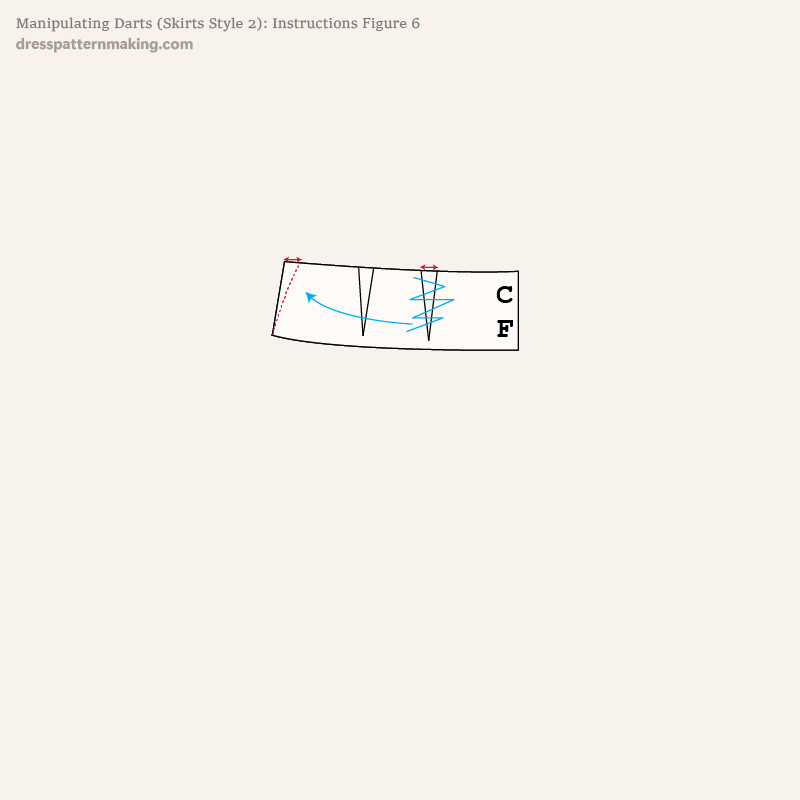
Instructions (Skirt Style-02) - Figure 6
First we will move the value of one of the darts into the side seam. Then in the next image we will close the other dart.
- Measure the width of the dart closest to the CF (red arrow)
- Measure in from the side seam for that same value.
- Redraw the side seam line - shown in the image with a dashed red line. Make sure the line is a little curved, not completely straight.
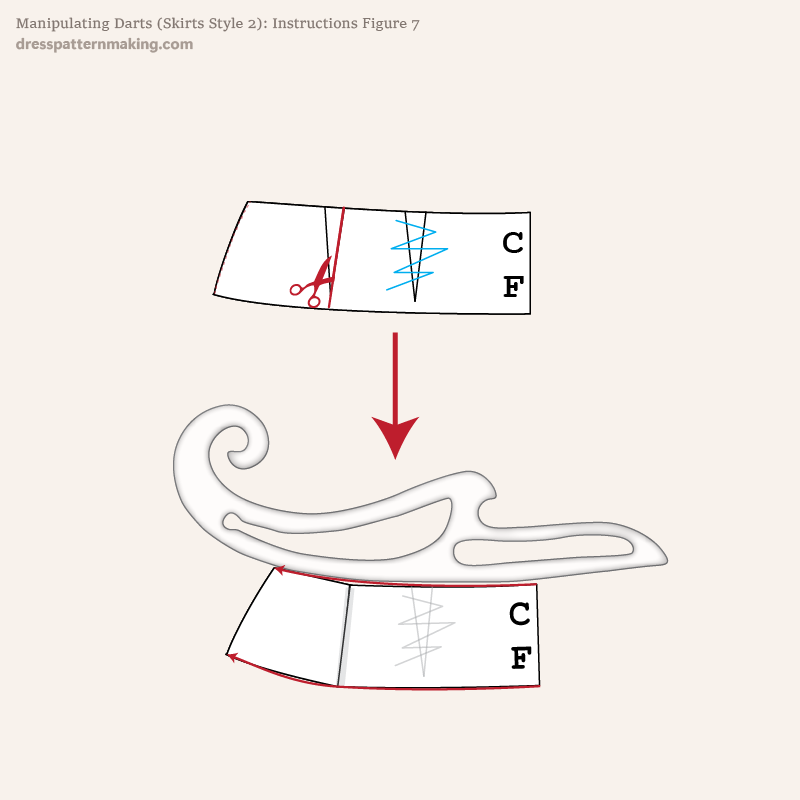
Instructions (Skirt Style-02) - Figure 7
- Cut along one of the dart legs.
- Pivot the dart closed.
- Secure with sticky tape.
- If the the lines are too angular with the darts closed (The larger the darts, the more angular the line will be. The larger the difference between your hips and your waist, the larger the waist darts will be), you will need to stick the pattern piece onto paper again and redraw smooth curve).
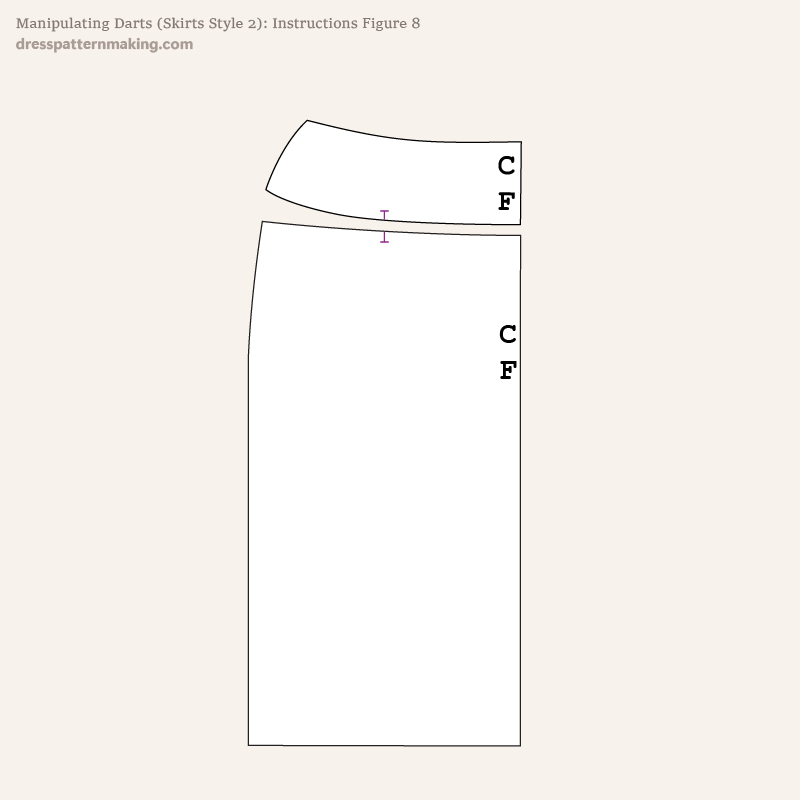
Outcome
And here is the final pattern piece once it is 'cleaned up' but before the back pieces are finished, seam allowance or cutting instructions are added.