Straight Waistband
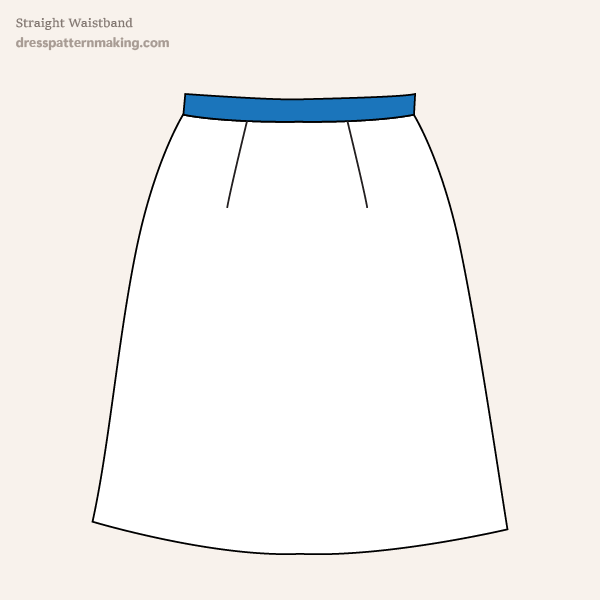
The straight waistband sits on top of the skirt that is drafted; this means that it sits above wherever you took your waist measurement when you made your block. If you make a skirt with a lowered waist you cannot use a straight waistband, you will need to draft a contoured waistband. This waistband is as half the pattern (from CF to side seam), but you draft it so that the CF is on a folded piece of paper. When you cut it and open it out you have the whole pattern piece. Note that this waistband closes at the Center Back. You could draft it to close at the side or front if that suits your design better. To draft the waistband you need the following measurements:
- waist measurement of the skirt that has already been drafted
- the front waist measurement (of the skirt already drafted)
- the back waist measurement (of the skirt already drafted)
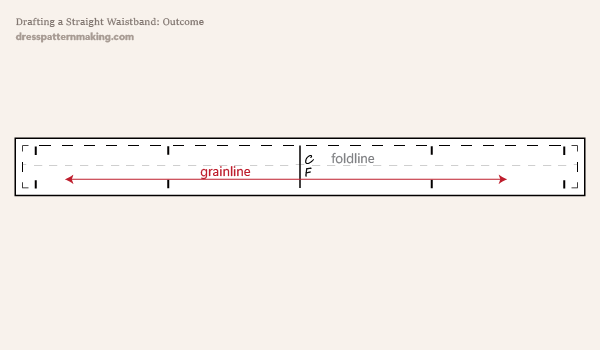
Example: Outcome
Figure A shows the final straight waistband opened out.
Instructions: Drafting the Straight Waistband - Figure 1
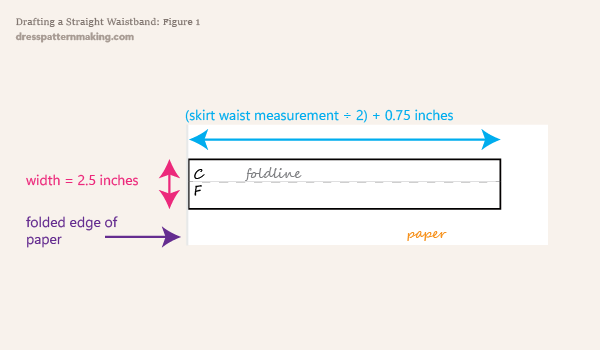
The standard waistband width is 1.25" (finished width), and is drafted double the finished width as it is folded over. As the waistband sits on top of the skirt (above where you measured your waist to make your block), it is not usually much wider than this as it won't fit how the body curves outwards again above the waist. The length of the waistband is the (measurement of the skirt waist ÷ 2), plus 0.75-in for the extensions. There is an extension of 0.75-inch on each end for the button and the buttonhole. These are the standard measurement, you can try making it smaller/bigger but it needs to be big enough for the button and buttonhole, and if it's too big it fill flap around or fold back. Fold a piece of paper and draw a rectangle where:
- The height is 2.5 inches (double the finished width)
- The length is (waist ÷ 2) + 0.75 inches
- Draw the fold-line in the middle, half way down the width
- Mark the CF
Instructions: Drafting the Straight Waistband - Figure 2
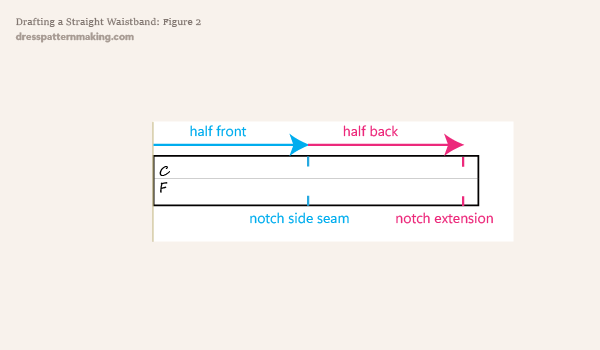
- Measure from the CF for half the front measurement, and mark notch points for the side seam.
- Measure from the side seam for half the measurement of the back, and mark notch points for the extension.
- If you have done your calculations correctly, you will have a 0.75-inch extension.
Instructions: Drafting the Straight Waistband - Figure 3
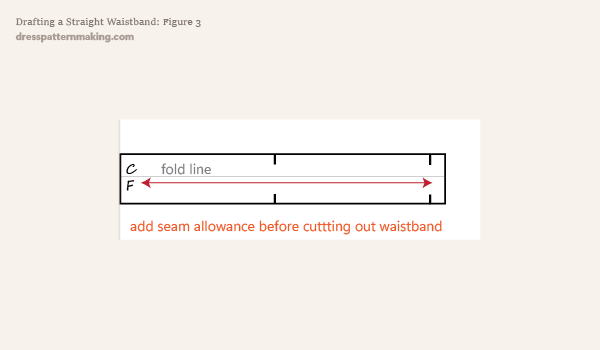
- Mark the grainline
- You would probably want to add the seam allowance before cutting out the pattern piece.
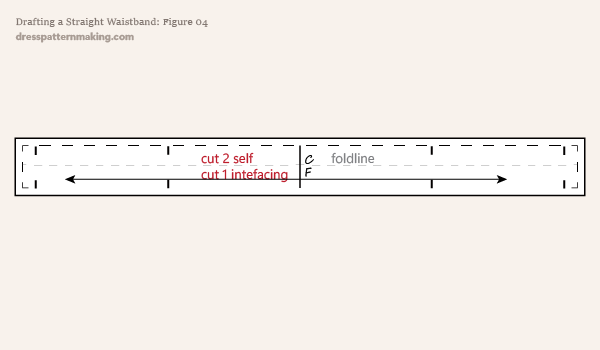
Instructions: Drafting the Straight Waistband - Figure 4
Here is the final pattern piece with cutting instructions.
