Separate Armhole & Neckline Facing
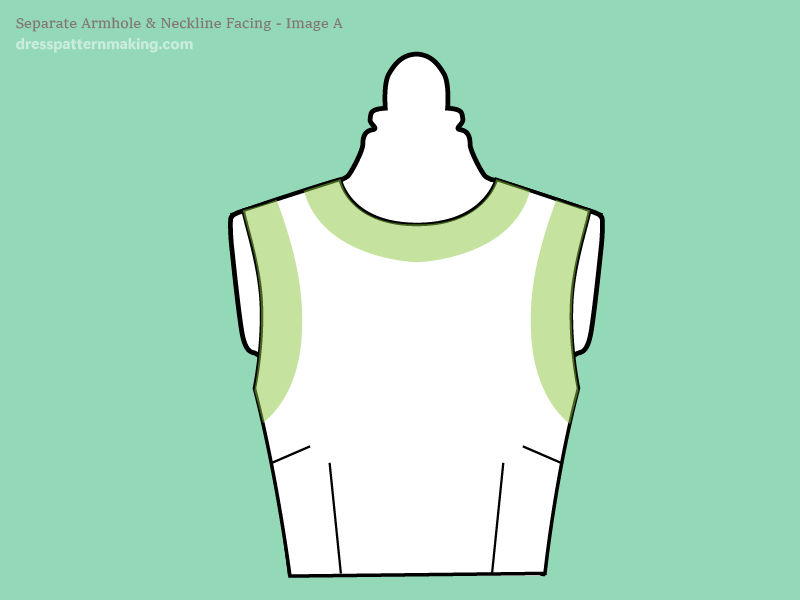
The width of facing at the shoulder and at the underarm is usually between 1.5 and 2-inches. The depth of both the armhole facing and the neckline facing is also 2 inches. For the Bodice Back, the depth can be increased for aesthetic purposes - it just looks a bit better, especially when the front neck is low and you can see the facing when looking at it hanging up. (If you are making your own patterns for yourself, hanger appeal may not matter!) The example below walks you through creating the facings for the front. The same process applies to the back.
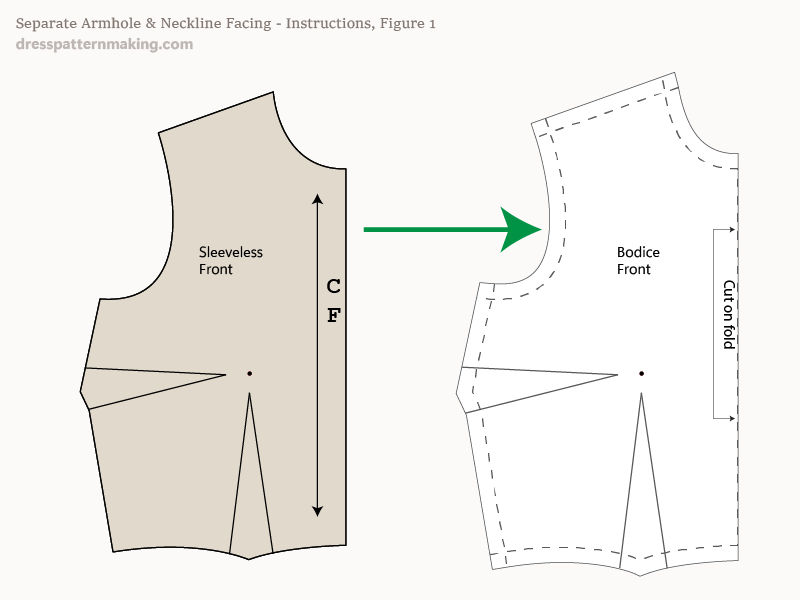
Instructions (Armhole & Neckline Facing) - Figure 1
I am using the Sleeveless Block so there are no modifications I have to make any changes to the block; just trace it. (i.e. The fact that there is facing on the armhole means it is a sleeveless garment. I just want to be clear that if you were using your standard block that is designed for sleeves, you will need to make the necessary 'contouring' adjustments and finalize your pattern before creating the facing. I am drafting the facing as if my garment is the shape of my basic Sleeveless Block). I have traced the block and added seam allowance (no seam allowance on the CF as it will be cut on the fold).
Instructions (Armhole & Neckline Facing) - Figure 2
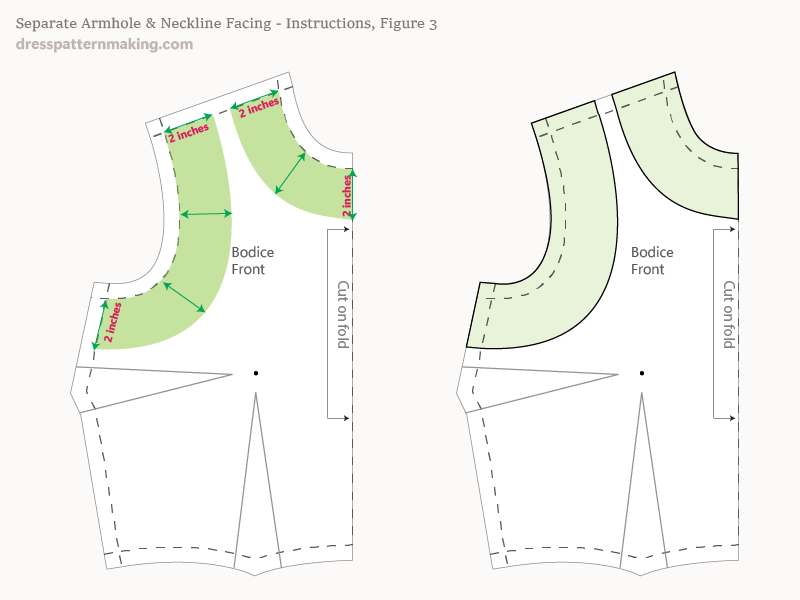
For the Bodice Front the width of the facings is 2-inches at the shoulder, the armhole and at the CF; at the seam lines, not the cutting lines. (The Bodice Back facing is 4-inches at the CB; see Figure 5). On the left the facing measurements are shown in green shading; this is how much facing there will be on the garment. The facing does have to extend through the seam allowance; on the right the green shading with the black outline shows the shapes of the two Front Facing pattern pieces. On your paper you will of course just have lines, not shading.
Instructions (Armhole & Neckline Facing) - Figure 3
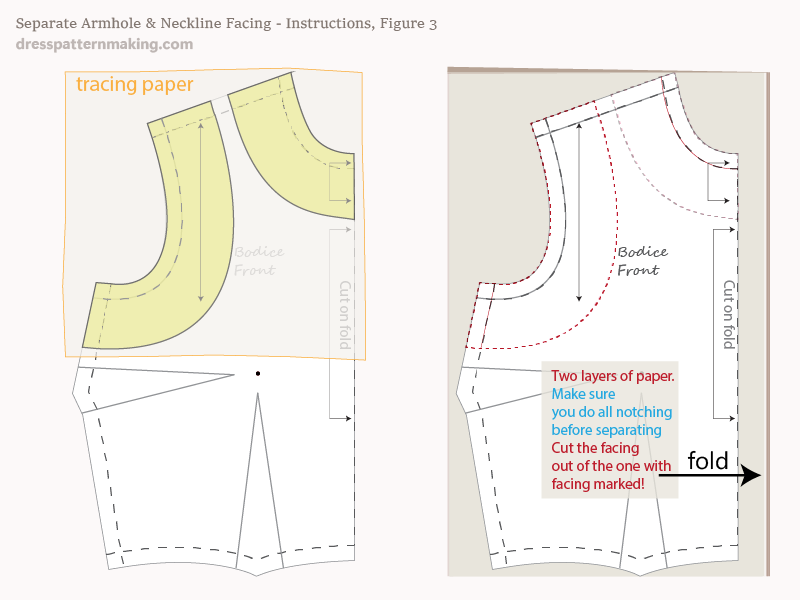
The facing lines are drawn on your original pattern piece, and you don't want to cut that up. (Some of) your choices are:
- Put tracing paper on top, trace the facing (don't forget to mark the grainline while you're there!), then cut them out.
- Start with doubled up paper when you create the pattern. (You could just put another piece of paper underneath when finished, but it is less secure, could move, and end up being just a little wrong). You can then cut out and notch both pieces together. The top one, with the facings marked, can be cut up for the facing pattern pieces.
- Put some paper underneath and use a tracing wheel to draw the facing pieces. You will end up with fine holes in the bottom paper; draw over those lines with pencil to outline the shape.
Instructions (Armhole & Neckline Facing) - Figure 4
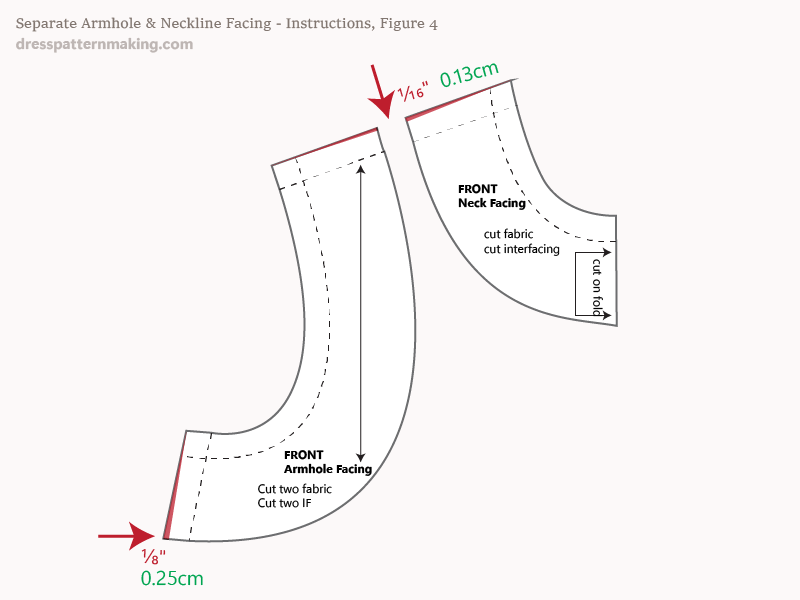
An option you have is to trim a slight amount of the facing, as shown on the image below, to make the facing slightly smaller and improve the fit. I have checked some commercial patterns and they don't seem to do this, however it does help to make sure that the facing doesn't 'peek out'. If you trim this extra bit off and make sure you under-stitch all the seam allowances to the facing, then this ensures the facing stays underneath and is not visible from the outside. The tiny bit that is trimmed is 1/16 at the shoulder down to zero at the shoulder tip and neck point, and 1/8 at the the side down to zero at the underarm. The amount that is shaved off is shown in red shading.
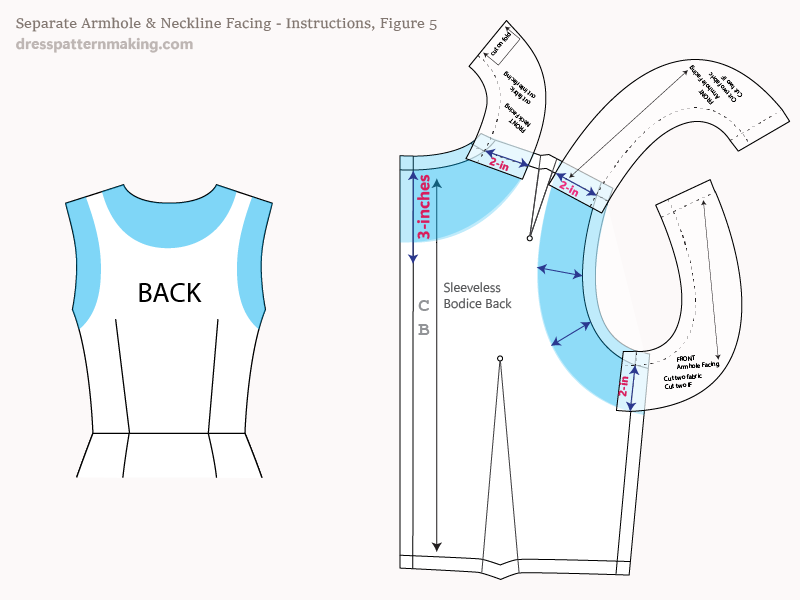
Instructions (Armhole & Neckline Facing) - Figure 5
The Bodice Back is done the same way as the front. The width at the shoulders and underarm should match the front. The depth of the neckline at the CB is usually more than the front; in this case 4-inches at the back, compared to 2-inches at the front. Also remember to check the front and back pieces against each other at the end. You should check the seam lines, not the cut edges. It's better to do it before you cut out the Back Pattern pieces, in case you need to make any small adjustments.
