Slinky Skirt (Clinging Hip-line)
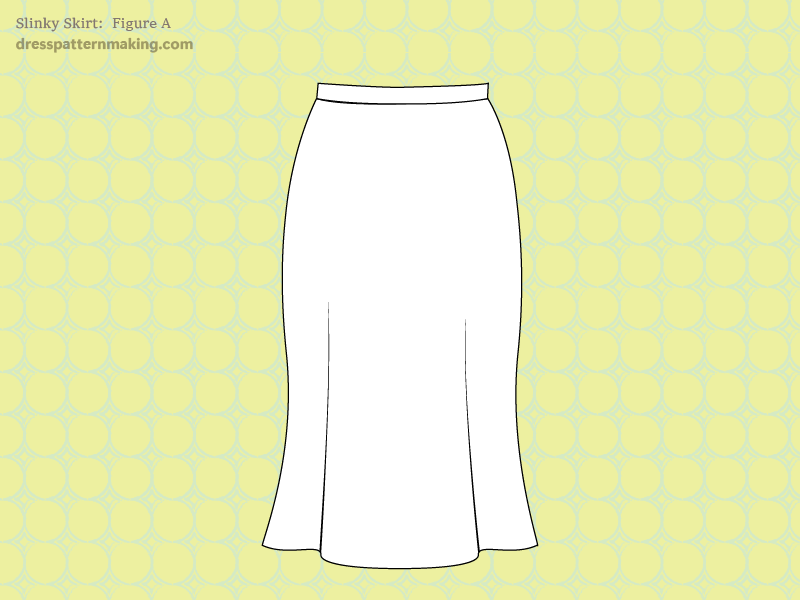
The slinky skirt is created with the 1-Dart Skirt Block. When the closing the waist dart and moving that value into the hem, you use one of the lower pivot points. This means there is no ease (or negative ease) in the hip. When this is cut on the bias it produces a skirt that hugs the hips and the flare below the hips drapes nicely.
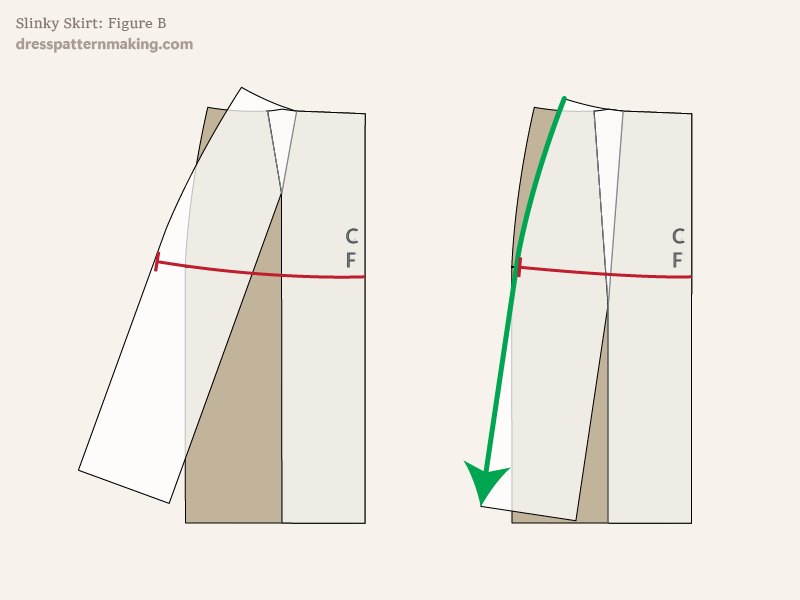
Example: Pivot Points - Figure B
So that you can understand the concept before starting to draft, below is an image that shows you the difference in the silhouette when you use a lower pivot point to draft the slinky skirt (on the right) and using the normal dart point to draft a standard flared skirt (on the left). Note how the slinky skirt on the right has a bit of the hip value removed, compared to the flared skirt on the left which has a substantial amount of ease in the hip. Notice also that the flare added in the slinky skirt is quite small compared to the flared skirt. This is due to the pivot point of the dart being lower on the slinky skirt.
When creating the slinky skirt, the lower the pivot point you use, the less ease there will be in the hip and the smaller the amount of flare that will be gained. Additional flare can be added at the seams if desired.
Figure B shows the final slinky skirt overlaid on the original 1-Dart block.
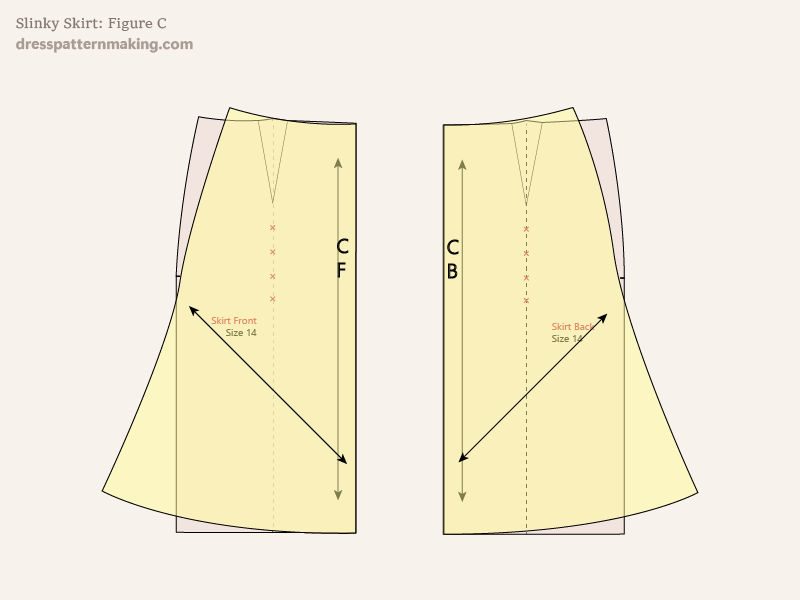
Example: Outcome - Figure C
Figure Cshows the final slinky skirts overlaid on the original 1-Dart Skirt Block.
Instructions: Drafting the Slinky Skirt - Figure 1
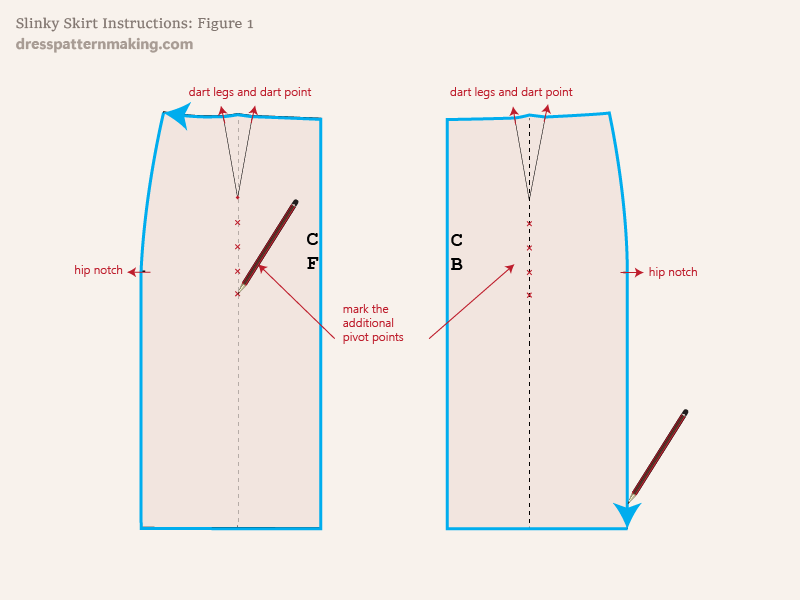
If you have drafted the 1-Dart Skirt Block using the instructions on this website, you will have some pivot points marked further down from the dart point.
- Trace the 1-Dart block onto paper.
- Make sure you mark the dart legs, the hip notches and the additional pivot points that will be used to create the slinky skirt. (You don't need the dart points as you will be using one of the pivot points).
Important Note: I am showing you the drafting of the Front and Back at the same time, but you would normally first draft the Front, then when finished that, draft the Back.
Instructions: Drafting the Slinky Skirt - Figure 2
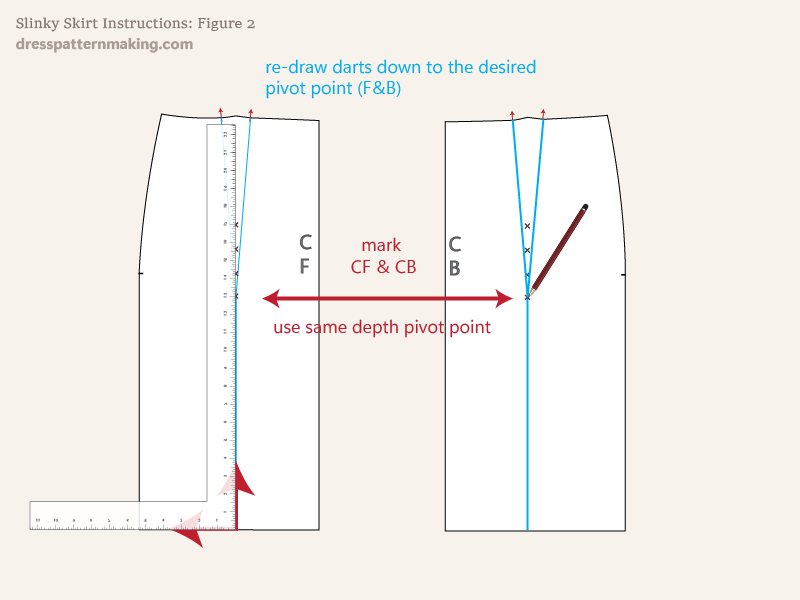
Remove your block after you have finished tracing and marking points, then:
- Mark the CF and CB on the working pattern pieces.
- Square a line up from the hem to meet the pivot point you will be using, using the same pivot point depth on the front and the back. The lower the pivot point, the tighter in the hip and the less flare you will get (but you can add more at the side blending to the lower pivot point).
- Redraw the darts to the lowered pivot point.
Instructions: Drafting the Slinky Skirt - Figure 3
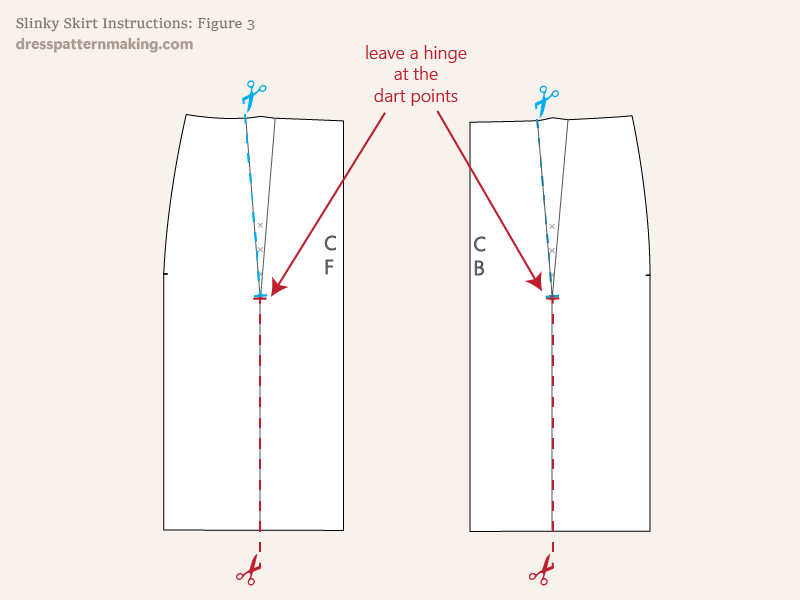
- Cut up from the hem to the dart point
- Cut along one dart leg down to the dart point, leaving a hinge
Instructions: Drafting the Slinky Skirt - Figure 4
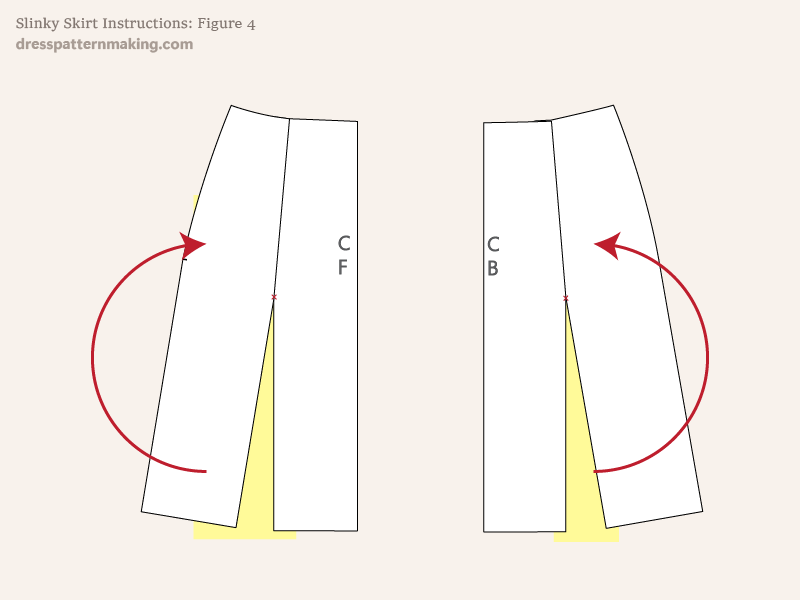
- Pivot the side piece on the hinge to close the dart.
- Put paper underneath to fill in the open section.
- You would normally tape the pieces together, but if you want to add more flare, don't do so yet.
In this image the paper is shown in yellow.
Instructions: Drafting the Slinky Skirt - Figure 5
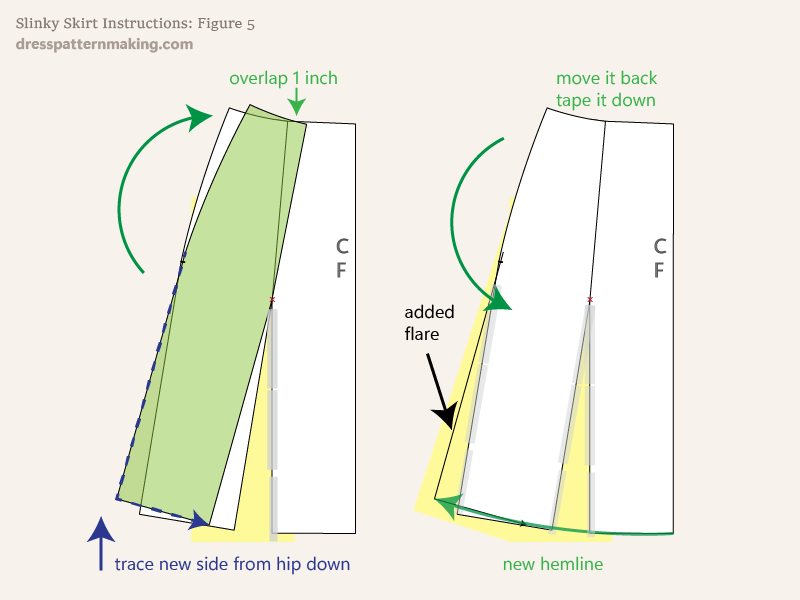
There are two ways to add more flare to the skirt, You can use just one, or use both for additional flare. I will show this with the Front only. You would repeat for the Back.
- You can tape down the CF Front piece onto the paper to secure it.
- Pivot the side piece to overlap at the waist, it will give more flare at the bottom.
- Trace the side flare piece (shown with a dashed navy blue line).
- Pivot the side piece back so that the dart is closed but not overlapped
- Place paper underneath the side piece.
- Tape the side piece down.
A little more flare is added in Figure 6.
Instructions: Drafting the Slinky Skirt - Figure 6
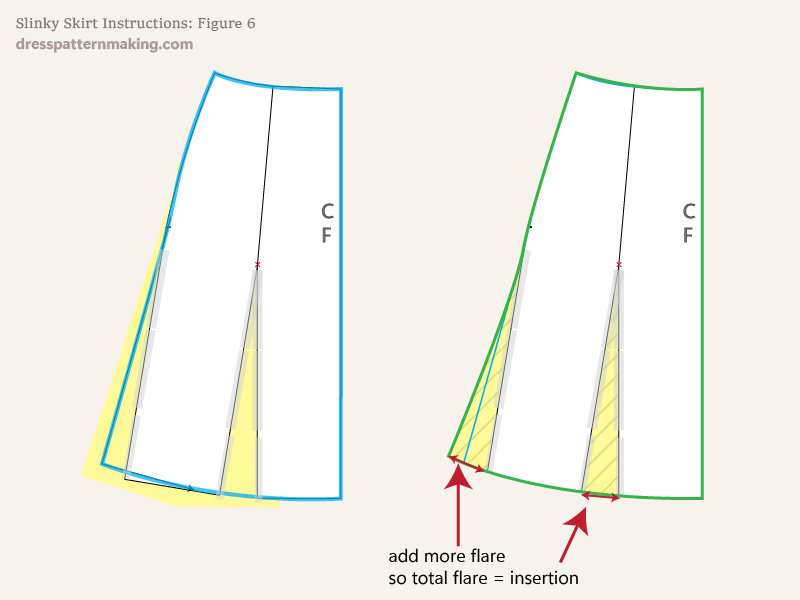
In this image, the figure on the left outlined in blue is what we finished with in Figure 5; this has not yet been cut out as we want to add a bit more flare to the side seam.
- Measure the insertion that was created by closing the dart.
- Add to the side so that the total flare measurement equals the total insertion measurement.
- Cut out the working pattern (this has no seam allowance). The final shape is shown outlined in green.
Instructions: Drafting the Slinky Skirt - Figure 7
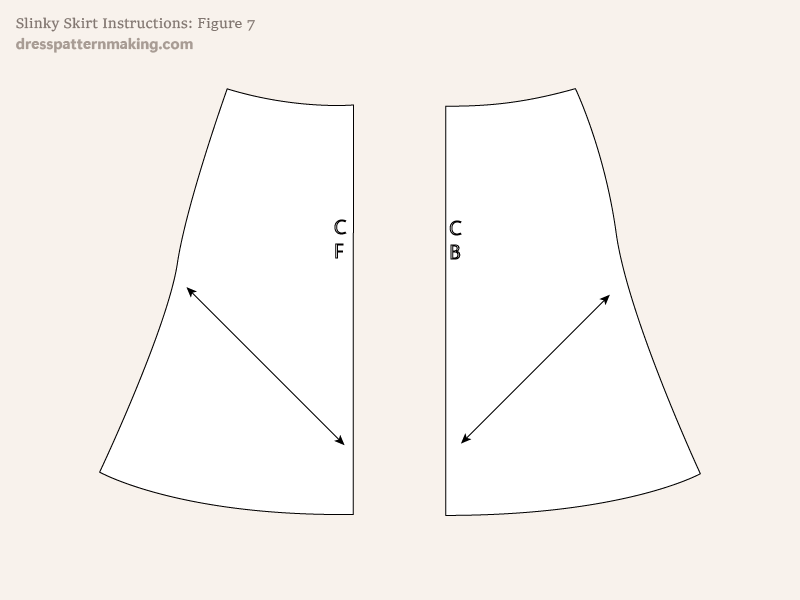
Here are the CB and CF finished.
- Add the bias grainline; I have put the arrow on both sides. If your fabric is directional, make the necessary change.
Final Note
This is not the final pattern piece for cutting. You would trace this off onto fresh paper and add seam allowance, cutting instructions etc. You would also need to draft a waistband*, or continue working on this pattern and draft the yoke, etc.

