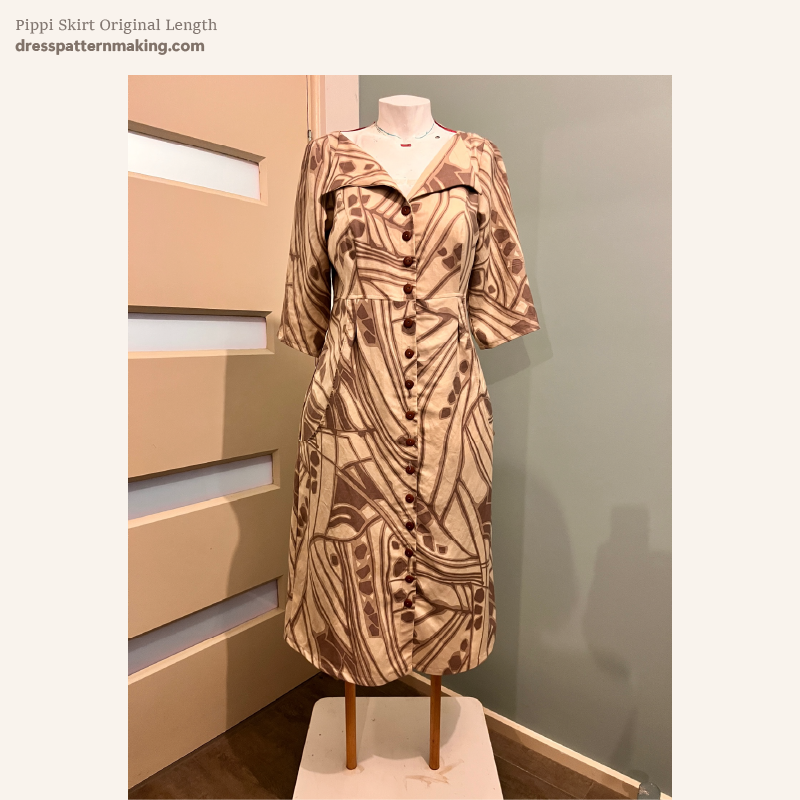
My Pippi Dress Pattern
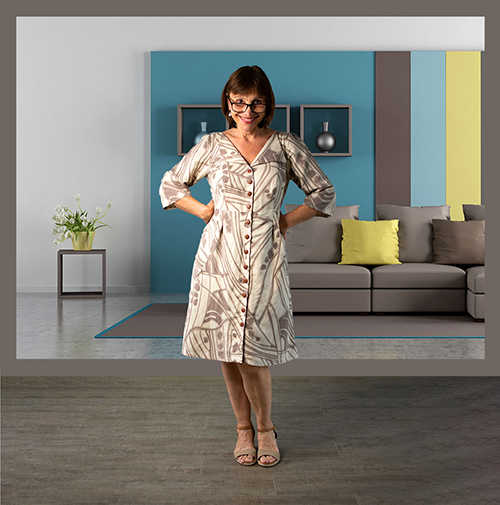
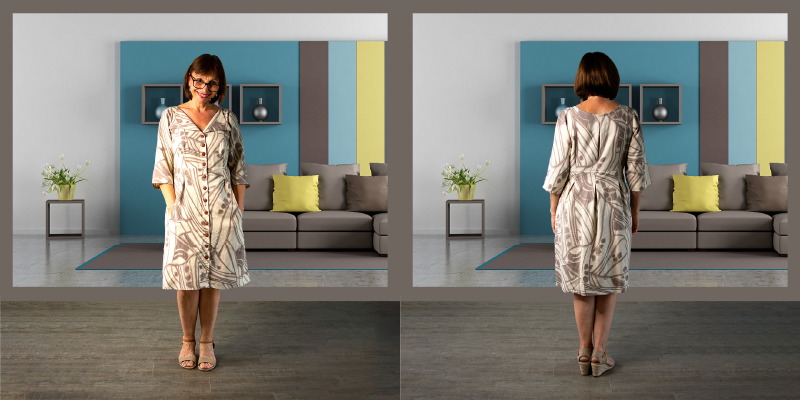
The fabric used for my Pippi dress is a lovely Viscose/Linen blend that is quite heavy (I think about 140gsm) and have a lovely drape.
Pippi Dress - Linen/Viscose Blend Fabric
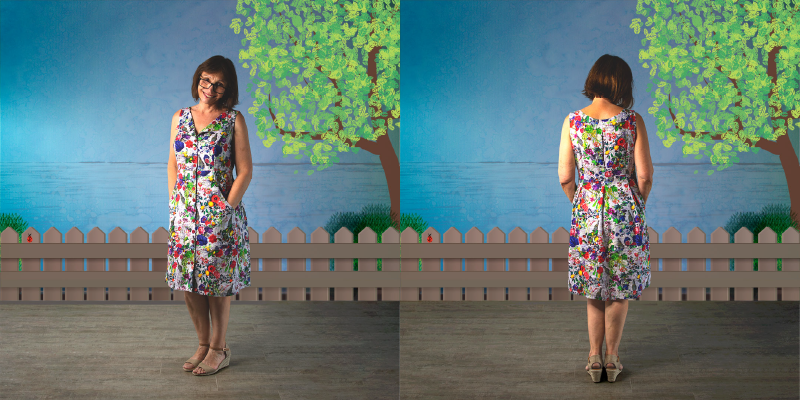
This is a slightly different version of the Pippi Dress; it is sleeveless and I made some changes to the pockets and the pleats in the skirt. The fabric is 100% linen.
Fashion Flat
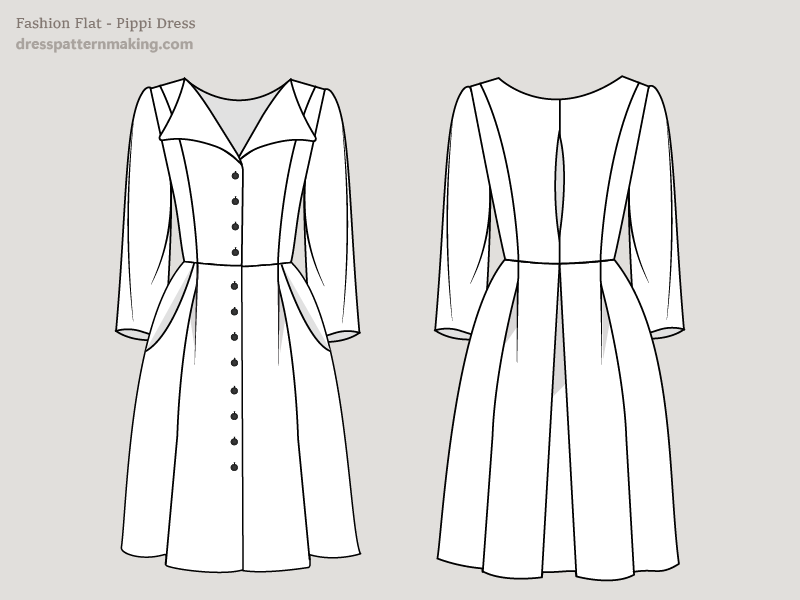
Pattern Pieces (looking at the Fashion Flat)
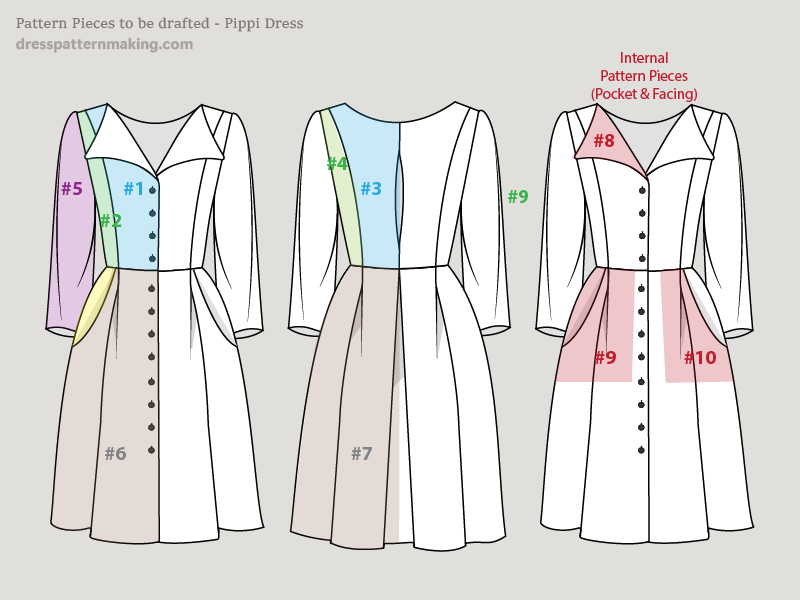
The pattern pieces to be drafted are:
- Bodice Center Front
- Bodice Side Front
- Bodice Center Back
- Bodice Side Back
- Sleeve
- Skirt Front
- Skirt Back
- Bodice Front Facing
- Skirt Pocket Back
- Skirt Pocket Front
Components of the Pippi Dress
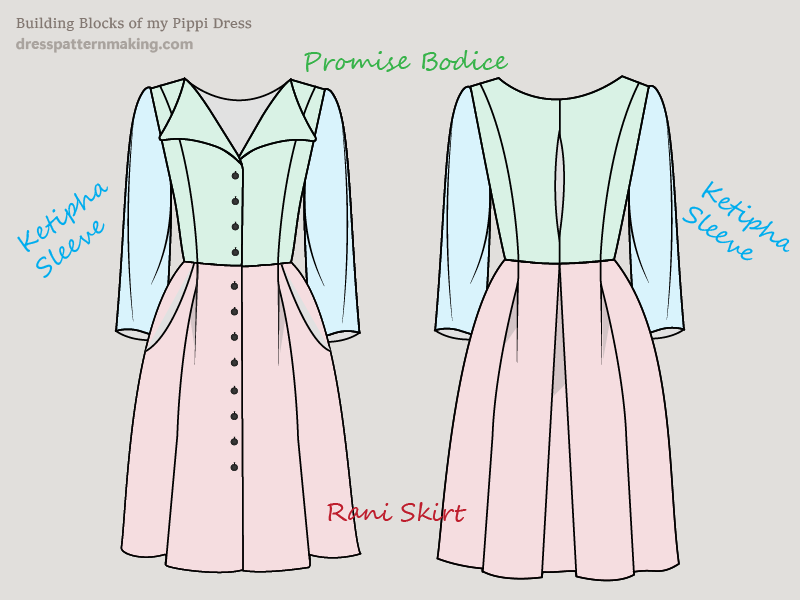
WIth all my dresses, they are made up from different elements; this dress consists of my Promise Bodice, my Rani Skirt and my Ketipha Sleeve.
I often (but not always) reuse the same bodice, skirt or sleeve in different dresses (i.e. mixing and matching). Also, rather than draft everything from scratch, I often start with one of my elements/components and make changes to create a slightly different style.
The Promise Bodice in this dresses is basically the Serenity Bodice (from the Jasnah Dress) but with a different neckline; rather than the rounded V-Neck of the Serenity, I changed the neckline to have a fold-back lapel. To create the Rani Skirt from this dress, I started with the Xera Skirt (used in the Jasnah Dress) and shortened it and added pockets. Because the pockets mean the skirt needs different pattern pieces, it gets a new name.
This is my system and it works for me; I don't have the time (or inclination) to change this system when writing instructions or showing people what I do.
Block/s Used
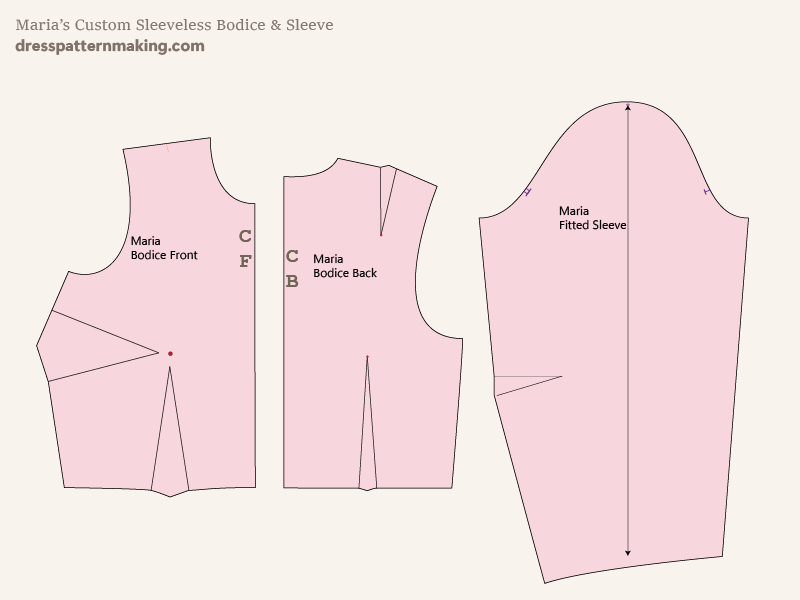
I always use my Sleeveless Bodice Block, despite the fact that this dress has sleeves. The ease added in the CB in the form of a pleat and the ease added to the Sleeve bicep compensates for the reduced ease in the Sleeveless Block. I don't use a Skirt Block to draft the skirt. Since the skirt falls from the Empire waistline, I find it easier to draft it from scratch.
Promise Bodice Pattern Pieces
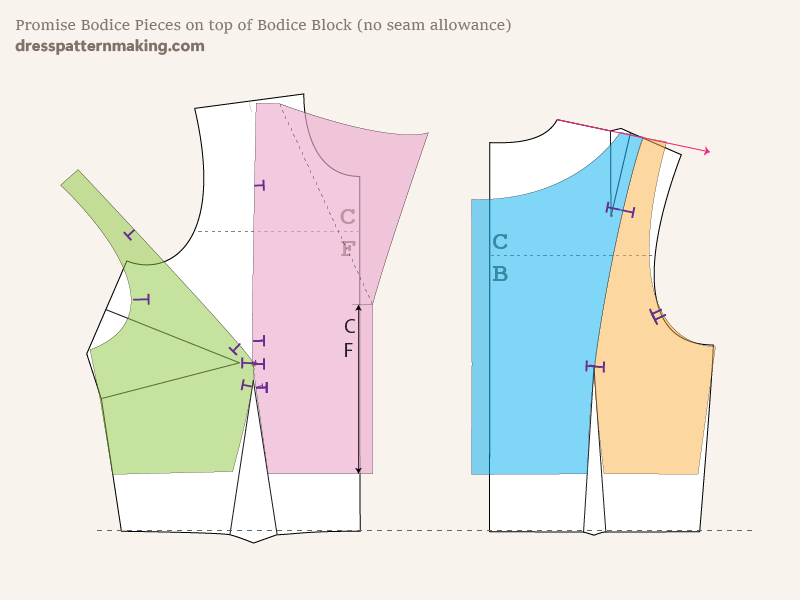
The bodice pattern pieces are placed on top of the Bodice for comparison. The CF has a fold back lapel and it extends beyond the CF of the block because it has a button extension. The CB extend beyond the CB of the block as due to the CB pleat. The reason the CF piece may seem strange (leaning towards the front so the shoulder/strap placement seems so different to the back pieces) is due to the Contouring that has been done. If this pattern was created for a Standard Figure this would not be so significant. (i.e. The standard contouring amount for a gape dart in the CF at this depth is about .75cm, mine is 2.5cm).
Of course all the bodice darts have been manipulated into the Shoulder Princess Line.
For the Bodice Back, the shoulder dart has been (in effect) transferred to the armhole.
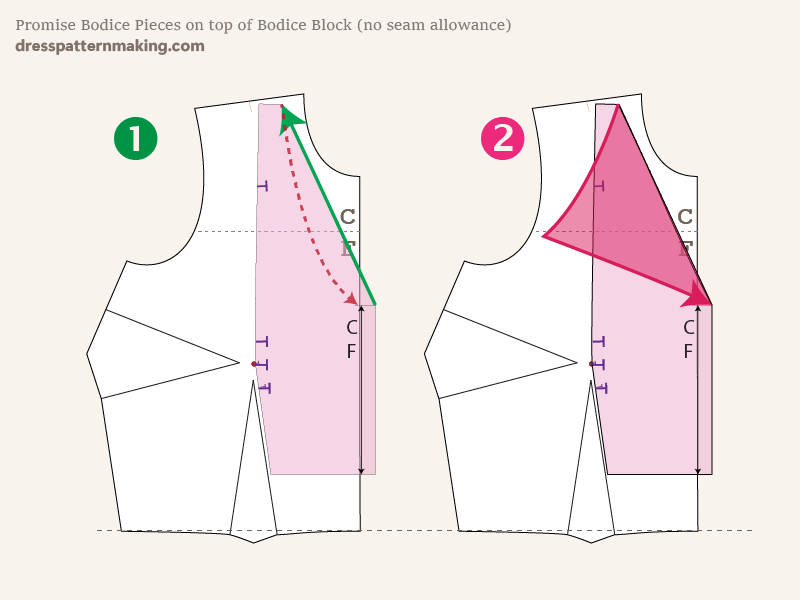
In the image below (#1) the red dashed line is the curved V neckline of the Serenity Bodice. The straight green arrow is the neckline of the Promise Bodice. A fold-back lapel requires a straight line to fold back on.
When drafting a fold-back lapel, you first draw the shape you want (#2). As you can see, my corner of my lapel collar almost reaches my armhole. However, if you look at the photos, in real life it extends past the armhole. You have to remember that these flat drawings don't show exactly what will happen on the 3D body. My point being that you may want to test the shape on your body with a scrap of fabric if you do want something to be very particular.
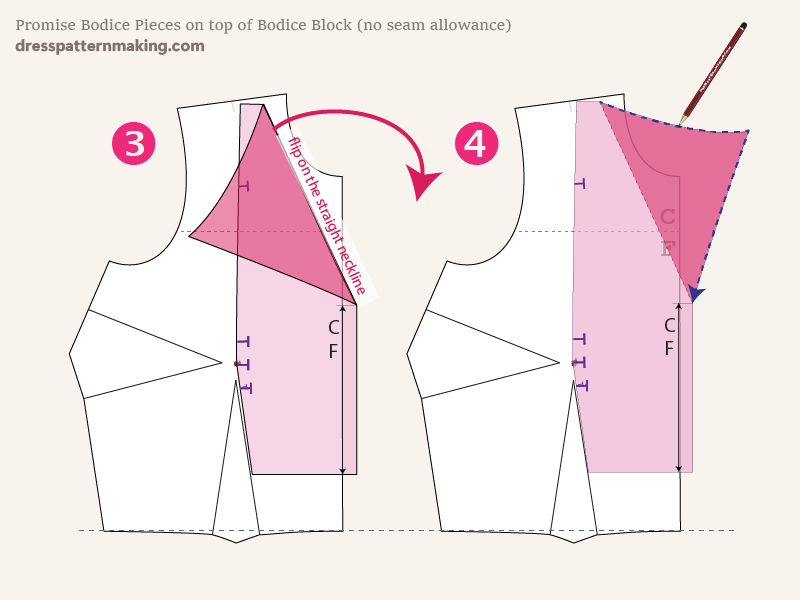
Once you have the shape you want you will need to trace that section off (the dark pink shaded shape), flip that over on the straight neckline and trace it off to create the pattern shape.
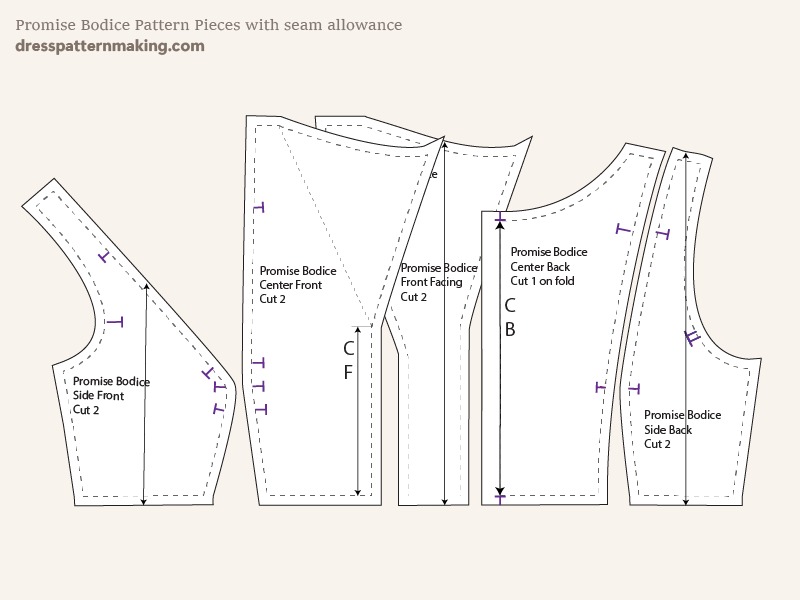
Final Promise Bodice Pattern Pieces with seam allowance
Here are the (not quite final) pattern pieces of the Promise Bodice. I have traced off a section of the Bodice Front to create the Facing, but I do end up joining the Bodice Facing and the Skirt Facing pieces into one long piece, which is why I say it's 'not quite the final' pattern pieces.
Sleeve Pattern Pieces
On the left is my Fittted Sleeve Block. My Ketipha Sleeve has extra ease added throughout the length; so I have cut and spread the sleeve block shape to add that ease, and then lowered the cap height.
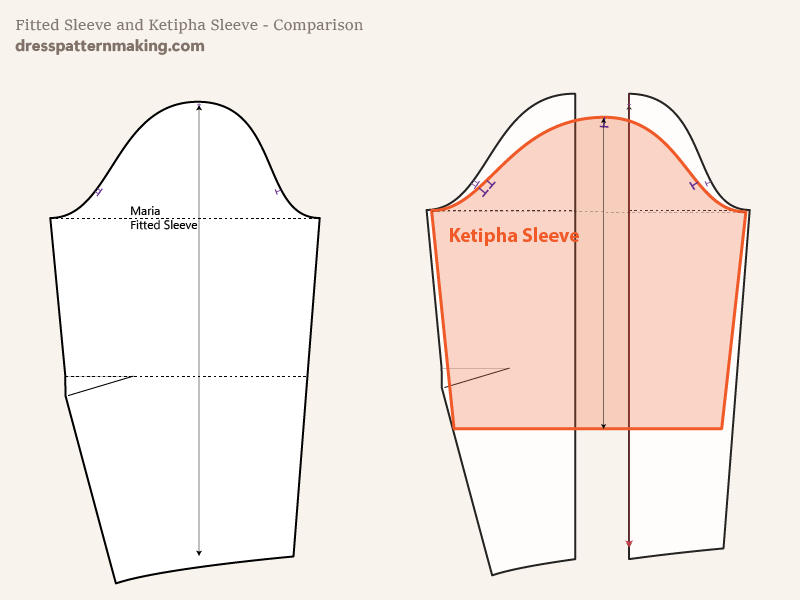
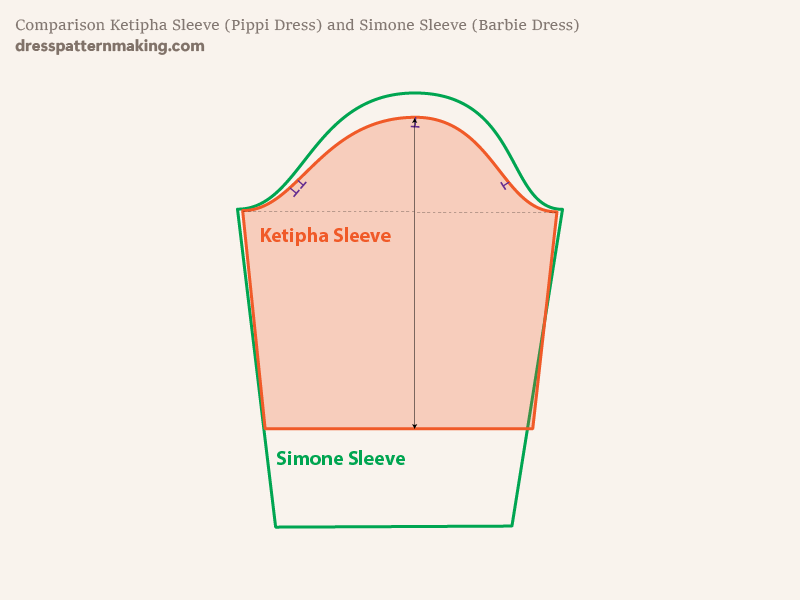
If you have looked at my Barbie Dress infomation you may think this is the same as my Simone Sleeve, but it is not - look at the next image to see the difference. The Ketipha Sleeve has a lower cap height. In terms of how these 2 sleeves will differ on the garment is that the Simone Sleeve would have more ease (in the form of gathers) in the sleevehead than the Ketipha Sleeve. The Ketipha Sleeve has very minimal gathers, the sleeve on my Barbie dress has significantly more gathers.
The other difference of course is the length of the sleeve; the Ketipha shorter at just past elbow length (3/4 length?).
Sleeve Patterm Pieces
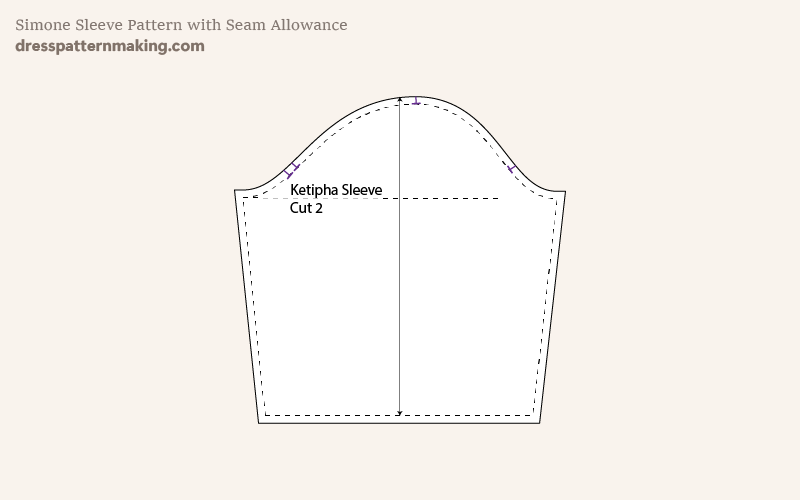
Here is the final sleeve pattern.
The Rani Skirt
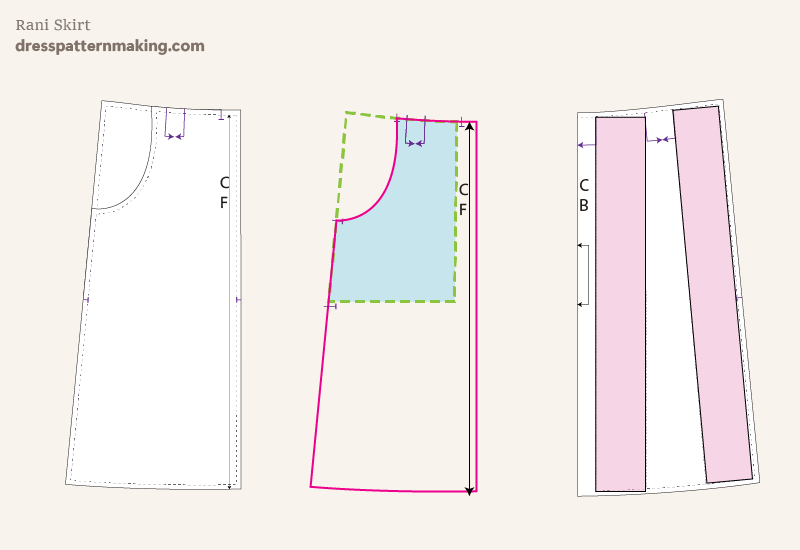
The base of the Rani Skirt is the Xera Skirt that I used in the Jasnah Dress. The original skirt was ankle length, and I have shortened it to just below the knee. The other difference is adding pockets; this creates significantly different pattern pieces for the skirt front (3 pattern pieces instead of 1).
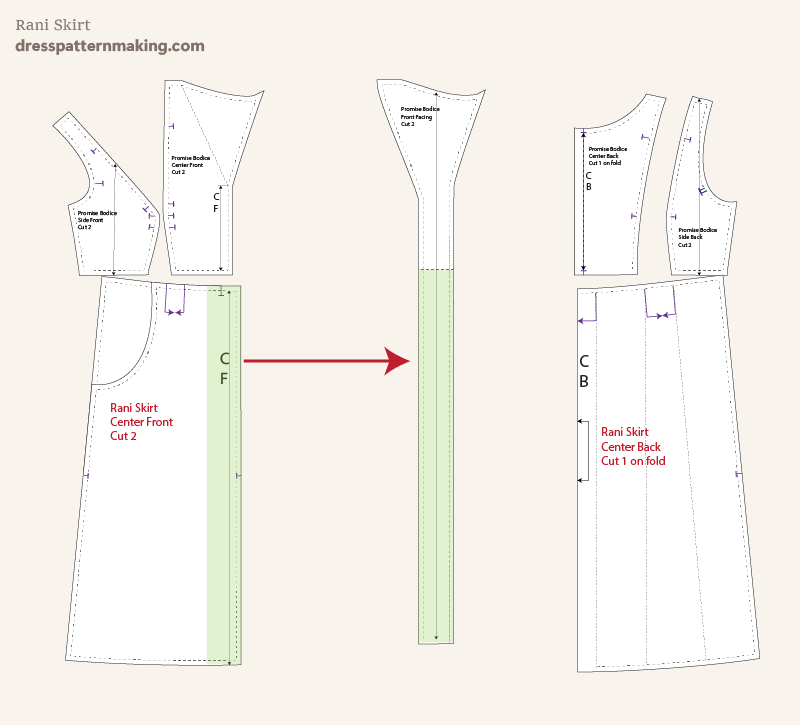
Another difference is that the Xera Skirt Front was cut on the fold (no buttons down the front) and the Rani Skirt has buttons. That means that a button extension needed to be added, and a facing created. The facing is the same width as the bodice facing. Rather than have 2 pattern pieces (the Facing for the Bodice and the Facing for the Skirt) I created one long whole facing piece. This does make it more difficult for the fabric layout and may actually require more fabric to accomodate it, but given the fabric I was using was quite heavy, I didn't want the extra bulk of a seam in the facing.
In this image the 3 pattern pieces of the skirt front are indicated, to show you how the skirt is drafted. The pink outline is the Skirt Front, the green dashed line is skirt back and the blue shaded section is the pocket bag. The pocket bag does not need to be the same fabric as the skirt , particularly if you do have a heavier fabric, but I did use the fashion fabric.
On the right hand side is the Skirt Back pattern piece. This is just to give you an indication of how I drafted the Xera Skirt - I started a rectangle that was the width of the Empire Line Waist and the height of the skirt. I then cut and spread the rectangle to add in pleats, and then I added some extra fullness in the hem. Detailed step-by-step instructions on how i drafted this skirt can be found in my Jasnah Dress Video.
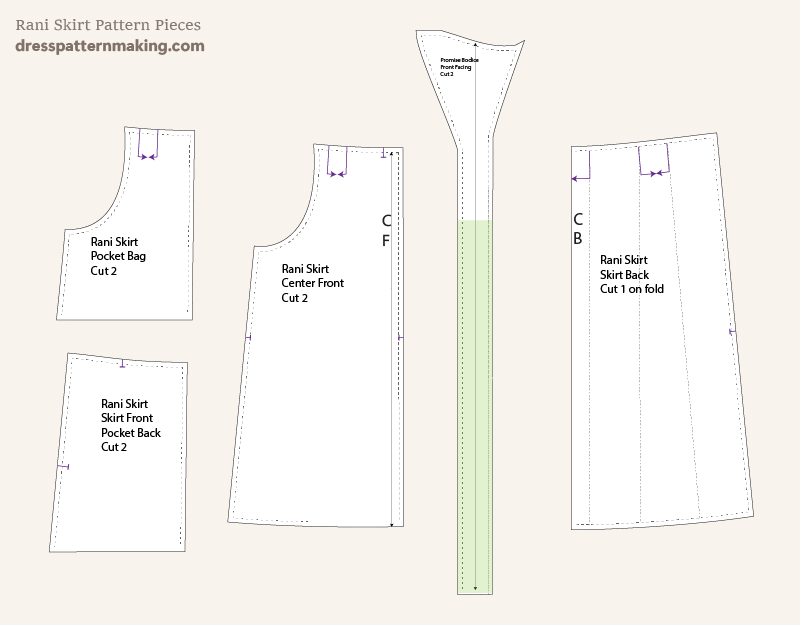
The Final Rani Skirt Pattern Pieces
Here are the final Rani Skirt pattern pieces with seam alloance. I have included the full facing piece which include the Bodice Facing.
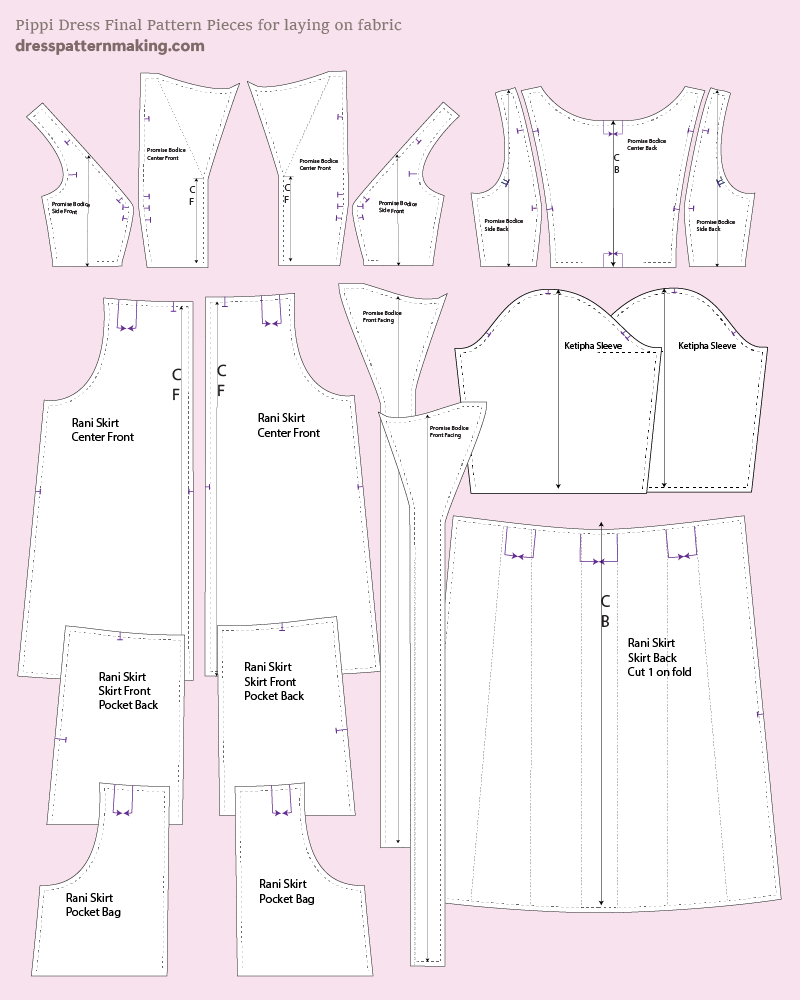
All pattern pieces for the Pippi Dress (for laying on the fabric)
And here are all the pattern pieces making up the Pippi Dress. As I always cut on one layer (never on the fold) I have created full pieces and all pieces to lay out on my fabric.
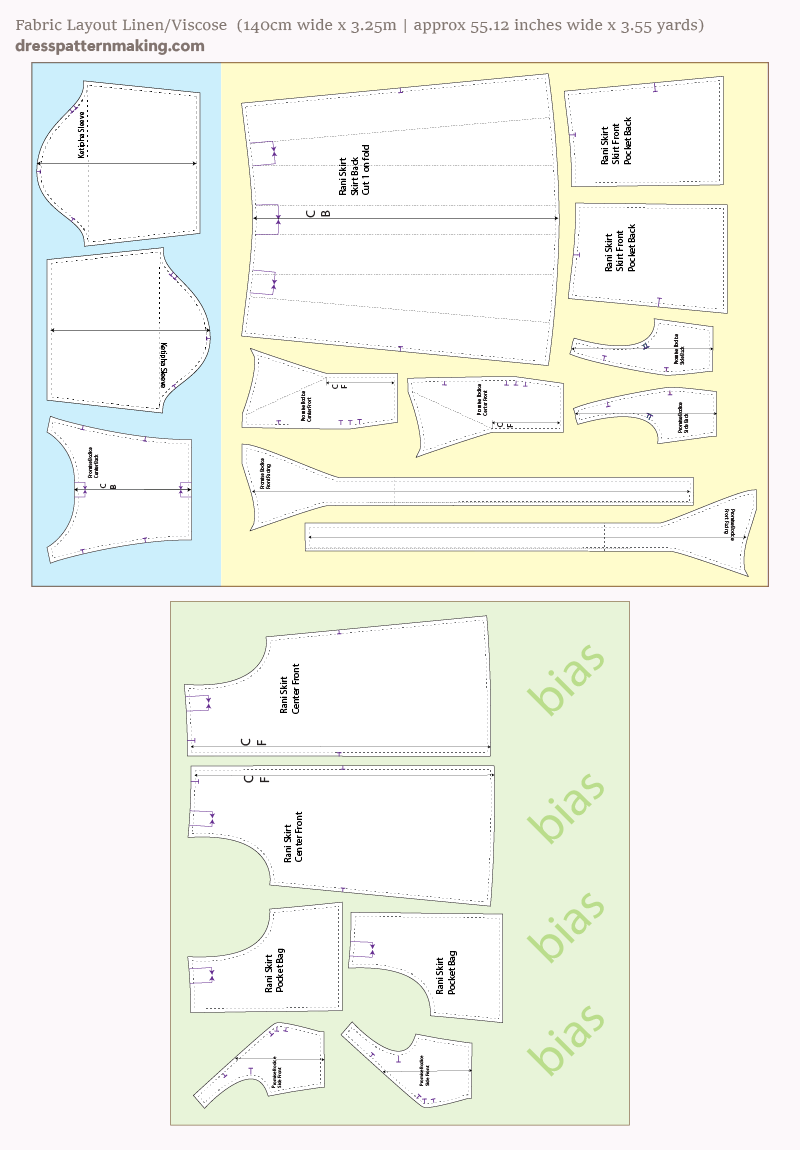
Cutting Layout & Meterage
Here are the pattern pieces as they were laid out on the fabric for cutting. I tend to do my layouts in sections so I can cut my fabric out into those smaller sections for cutting. I don't like wrangling long lengths of fabric that don't fit on my cutting table. If you do this you must make sure your fabric is cut at right angles or you may end up in trouble.
The fabric was 140cm | 55.12 inches wide and I needed about 3.25 metres | 3.55 years of fabric for this dress.
Cutting the fabric into sections like I do does mean that I use more fabric (and there is some fabric wastage), but I do save some fabric by cutting on one layer. Cutting this way is so much easier, both physically and mentally, that I there is no way I would ever go back to trying to layout and cut on the whole length of fabric.
Cost/Price and General Notes
I bought this fabric on sale for $10 a metre, so the total fabric price would be about $32.50.. However, I actually bought 3.75metres and the dress was intially longer (almost to the ankle). I didn't like it that length and shortened it.
This dress has buttons all down the front and I have, in this case, used very cheap buttons. Nice buttons at $2.00 each would have cost $24.00 (or $30 at the original length).
As is often the case, I actually only bought this fabric because it was (a) a fabric type I LOVE (Linen/Viscose Blend) and on sale very cheaply. I would generally not buy this color, but in the end I do love the fabric and the dress.
The original Length
