Skirt with Inverted Box Pleat
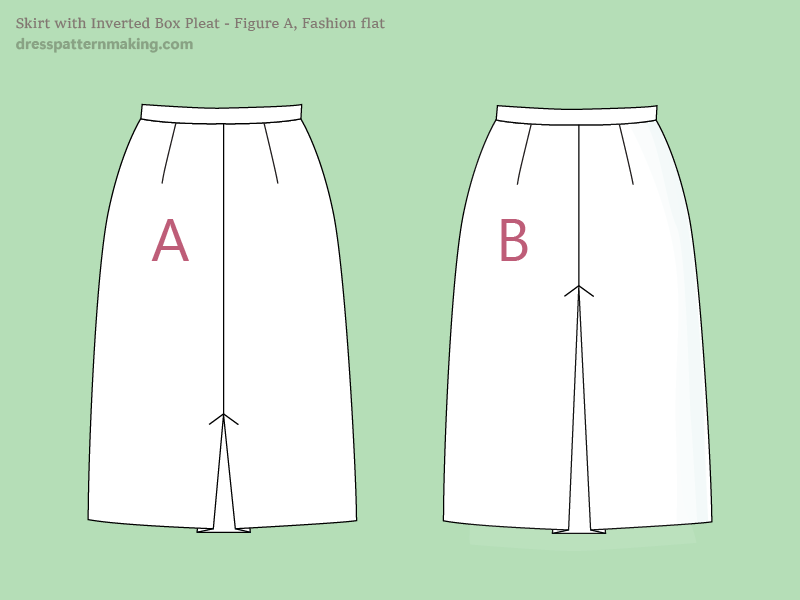
This is a fairly straight skirt with a inverted box (kick) pleat that allows a little more 'stride room' when walking. The kick pleat can be put in the front or the back, in this case I am putting it in the front. In these instructions I will also add a little flare to the side seam as well. If you wanted to make this a pencil skirt you could add more stride room by adding a slit up the back or slits at the side seams.
In the future will be adding instructions for a skirt with Inverted Box Pleats in the body of the skirt, so the pleats fall from the end of the dart down to the hem.
Examples: Outcomes
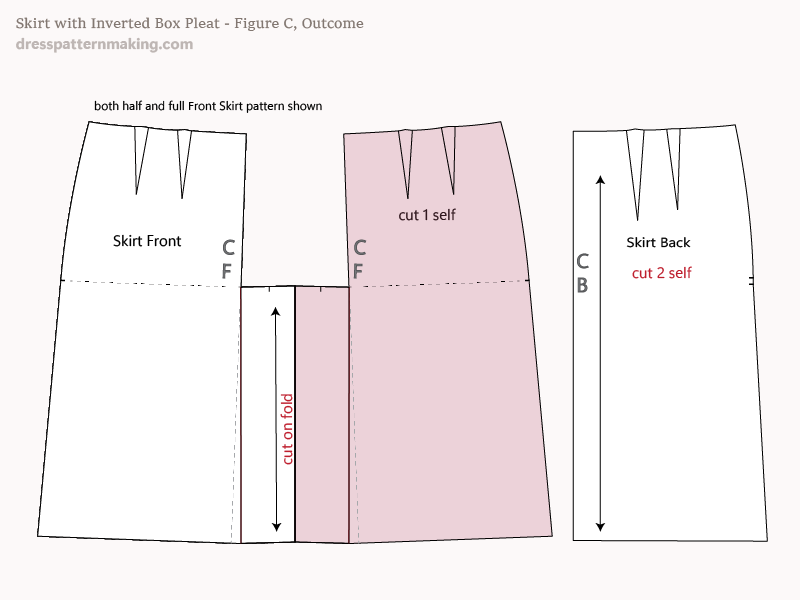
There are two different outcomes below. Figure B shows a standard pleat, Figure C shows a second method of constructing the pleat that helps keep the pleat closed when the wearer is standing (if that is your preference). In order to eliminate a seam-line in middle of the pleat, the cutting instructions must have the pleat cut on the fold, or a full pattern piece with a rectangular cut out. This may result in fabric wastage - of course whether there is fabric wastage will depend on the rest of the design of the skirt and therefore whether or not that portion of fabric can be utilized. If fabric wastage is an issue, a separate Pleat Backing pattern piece can be drafted to eliminate the seam-line. However I will not be showing the drafting of the separate backing piece in this article.
Figure B shows the final Skirt Pattern Pieces. For the front you could choose to create a half-pattern piece and cut on fold, or a full pattern piece and cut 1 self.
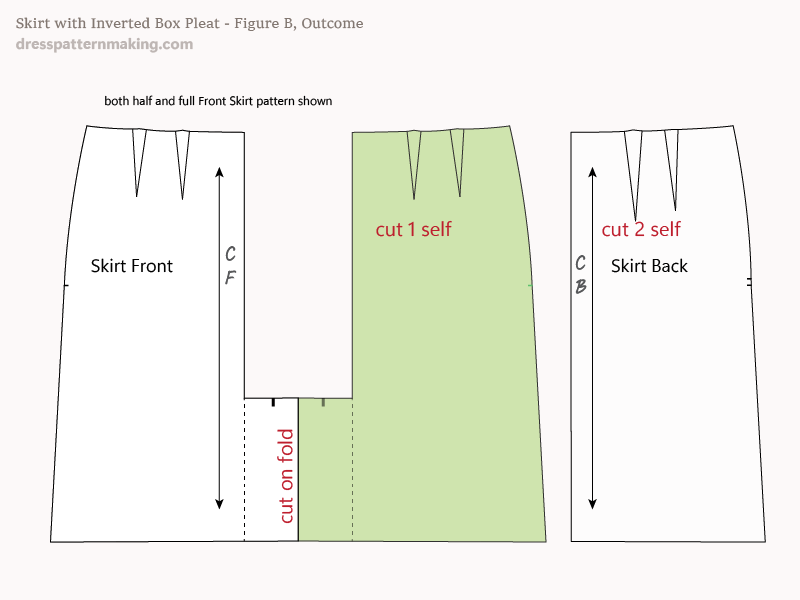
Figure C This shows the outcome of a different method of creating the pleat which helps the pleat to stay closed when the wearer is standing.
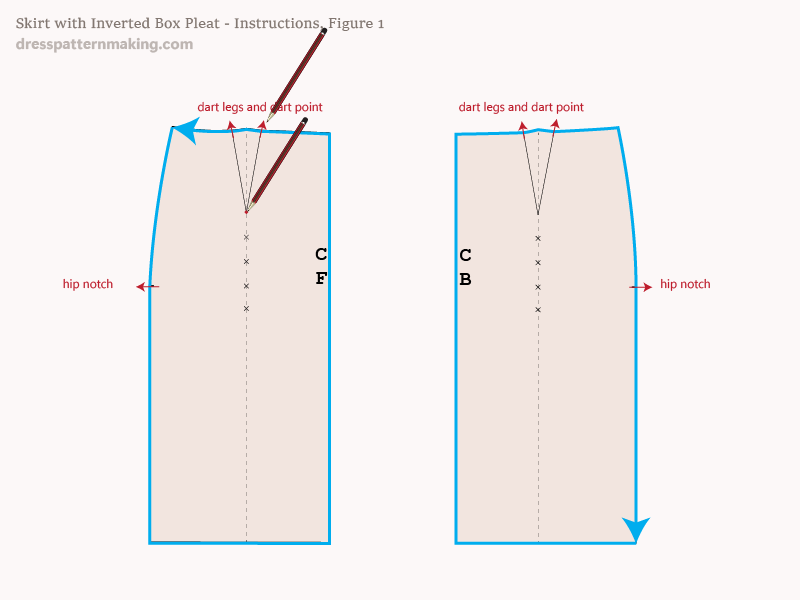
Instructions: Drafting the Inverted Box Pleat Skirt - Figure 1
- Trace your skirt blocks onto paper.
- Make sure you mark the dart legs, the dart points and the hip notches.
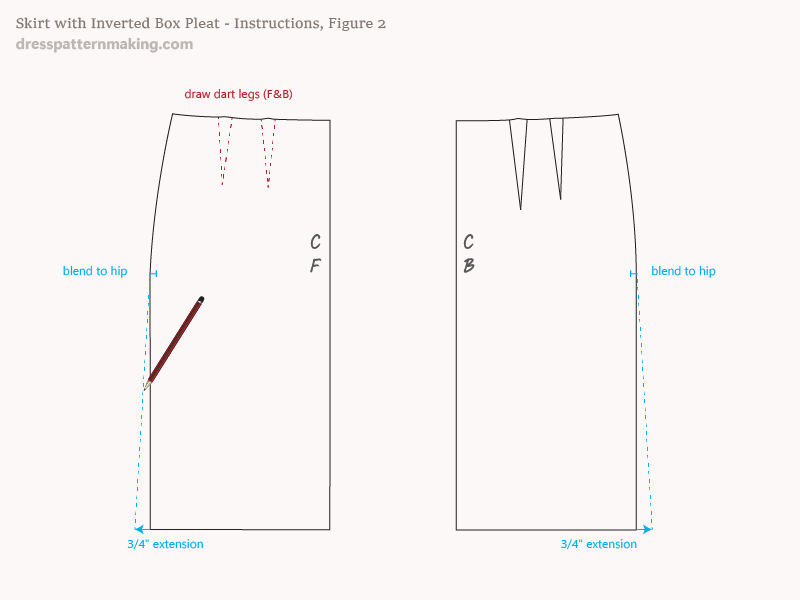
Instructions: Drafting the Inverted Box Pleat Skirt - Figure 2
Remove your block after you have finished tracing and marking points, then:
- Draw in the darts.
- Mark the CF and CB.
We'll add an extension to the side side; adding a slight flare will help the pleat close.
- Square out 0.75-inch from the side seam at the hem.
- Blend from that point up to the hip.
- Do this for both the front and the back
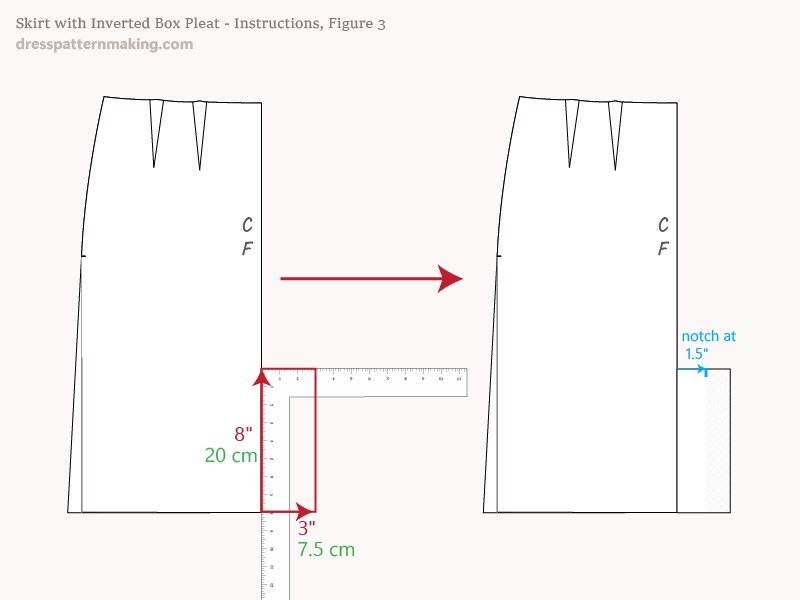
Instructions: Drafting the Inverted Box Pleat Skirt - Figure 3
The back skirt is finished (except for seam allowance, cutting instructions, grainline, etc), so it will not be shown from Figure 3.
In Figure 3a to 3b, we will construct the skirt shown in Outcome A.
- On the CF line, measure up 8-inches from the hem.
- Measure out 3 inches from the hem.
- Square off to finish the pleat rectangle.
- Notch at 1.5-inches (halfway) to show the fold.
The slightly shaded area of the pleat is the portion of the pleat that will show.
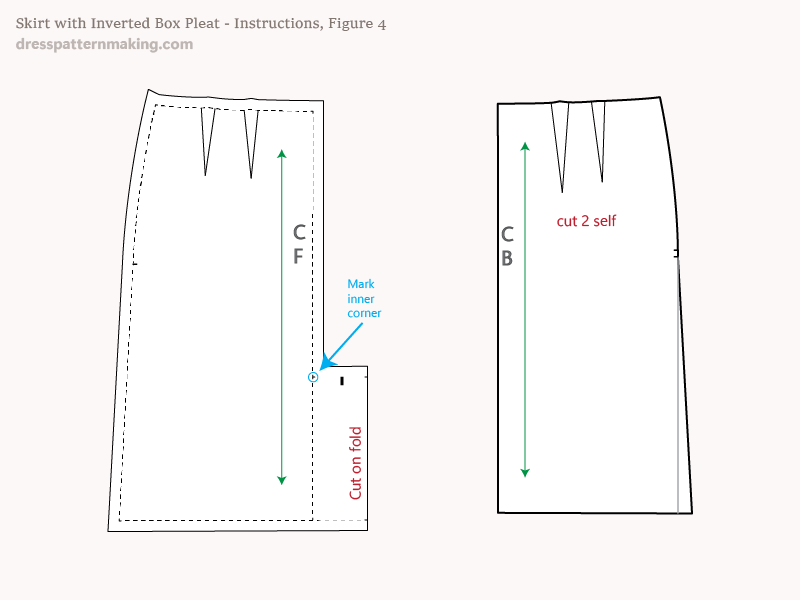
Instructions: Drafting the Inverted Box Pleat Skirt - Figure 4
This image shows the front and the back pattern pieces.
- Seam allowance needs to be added - shown for the front, not the back.
- Mark the inner corner of the pleat with a circle or something to remind you to mark this point on the fabric - shown in blue in the image.
- Add the grainline, parallel to CF and CB.
- Add cutting instructions; in this case I have marked the front Cut on Fold. If you don't mind having a seam-line down the middle of your pleat, you could choose to Cut 2 Self.
Instructions: Drafting the Inverted Box Pleat Skirt - Figure 5
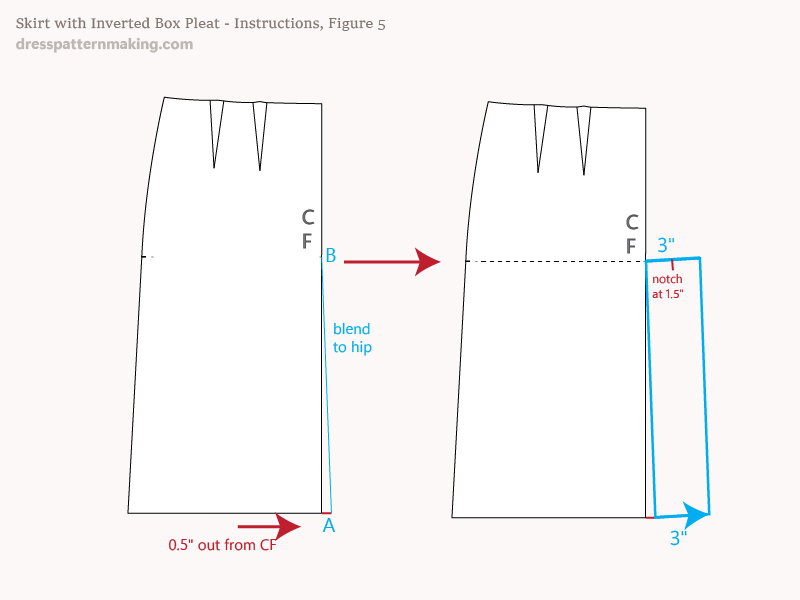
Here we will draft the pleat in Outcome B; this to drafted to help the pleat stay closed when the wearer is standing. This continues from Figure 2, after the flare extension was added to the side seam.
- Measure out from the CF hem for 0.5-inch to point A.
- Draw a line from Point A to blend at the hip level, point B.
- Draw the rectangle on the pleat squared from the A~B line, with a width of 3 inches.
The first option above (Figure 3a and 3b) can be used in both the Skirt Front or Skirt Back. In this second option, you would use it only in the Skirt Front as the pleat is raised up to the low hip. This pleat may get too crushed in the back.
Instructions: Drafting the Inverted Box Pleat Skirt - Figure 6
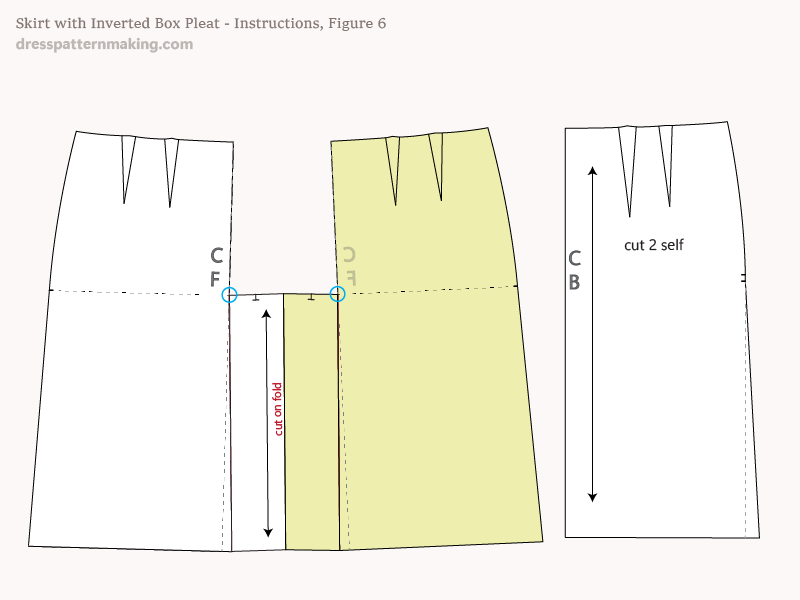
- This shows the final draft, without the seam allowance.
- When adding seam allowance, don't forget to mark the inner corner points.
- Add the grainline. In the front the grainline is parallel to the pleat edge as it is cut on fold.
Final Note
You would trace this off onto fresh paper and add seam allowance and make sure all notches, darts and inner corner points are marked. You would also need to draft a waistband*, or continue working on this pattern and draft the yoke, etc.
** In these Elements pages I am not giving instructions to create a final production ready pattern; you can find those in the Pattern Menu. In these pages I am covering the theory for key parts of drafting patterns. In the menu there will be further information on Skirt Finishes such as waistbands, yokes, etc. You will need to use this in conjunction with other elements to create a finished pattern.

