Grown on Facing (Button Stand)
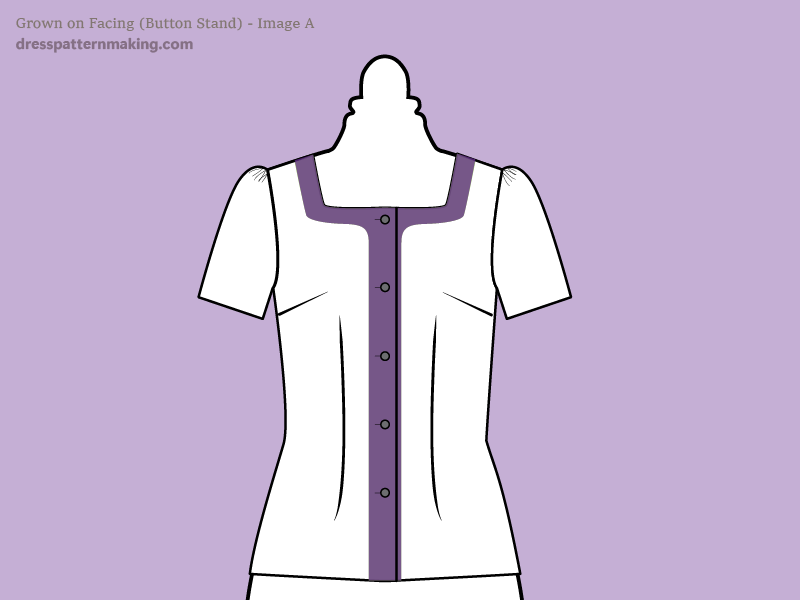
When adding facing to a button stand, you can choose to have the facing as either:
- a separate pattern piece, or
- as an extension to the bodice pattern piece, also termed grown-on.
This page covers the drafting the facing as a grown-on piece- the extension to the Bodice Front. See the menu for creating it as a separate pattern piece. When the garment is complete, these two facings (Separate and grown-on) would look identical; the difference is the number of layers of fabric at the CF edge. Of course the Bodice Back won't need the button stand, so the back facing is just the basic neckline facing. (Width at shoulder 2-inches, depth at CB 3 to 4 inches). The example below walks you through the steps of creating the front facing.
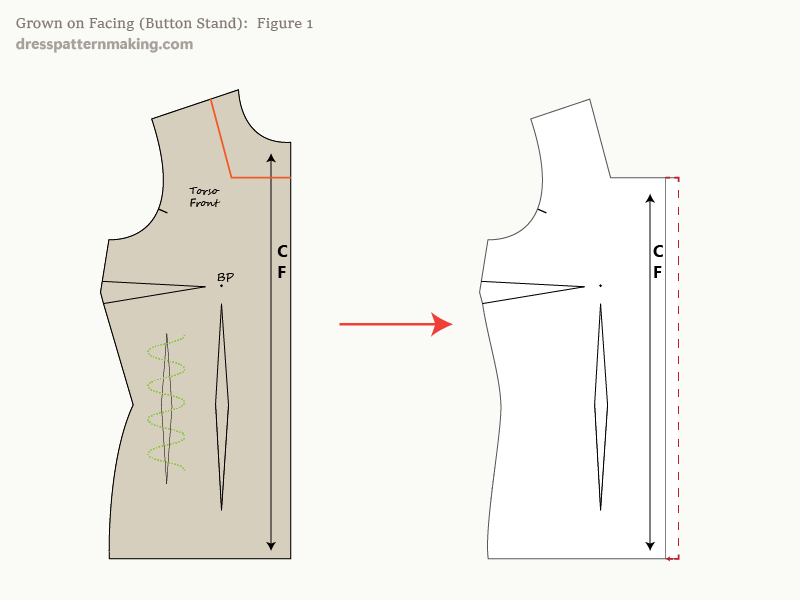
Instructions (Grown-on Facing with Button Stand) - Figure 1
The first few steps for the grown-on facing are the same as the separate pattern piece:
- Draw the neckline on the Bodice Block.
- Trace the block and transfer the design line.
- Add the button extension width* to the CF - shown in the image by the dashed red line.
* This will depend on the width of your button. I am making the extension 0.5 inches | 1.25cm, as that is the diameter of the button.
Important! This design may need some contouring at the neckline, but as these instructions are focusing on the facing only the contouring is not being taken into consideration.
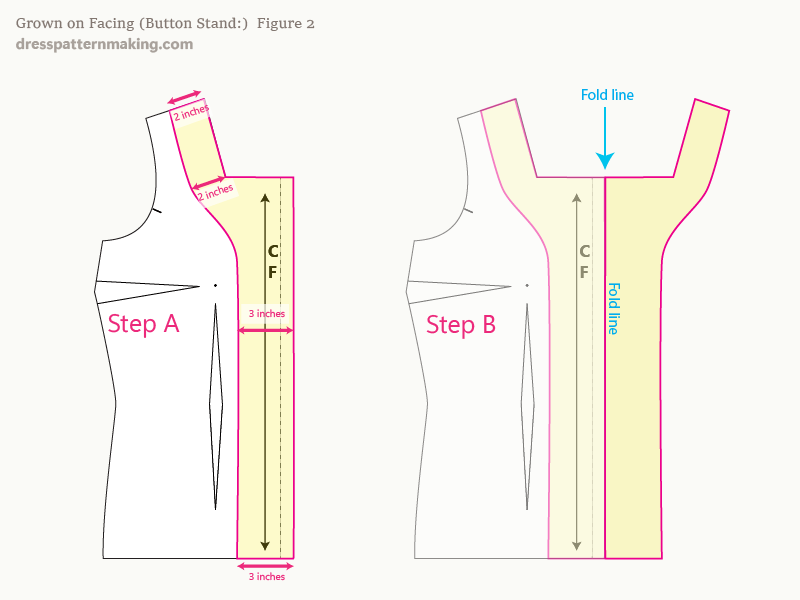
Instructions (Grown-on Facing with Button Stand) - Figure 2
- Step A: Draw the facing; the width is 2-inches at the shoulder and 3-inches at the CF. These widths are measured at the seam line.
- Step B; Trace the facing from Step A, flip it over and add the facing shape to the Bodice Front.
The shape shown in Step B is the Bodice Front, we just need to add seam allowance, shown in the next step.
Instructions (Grown-on Facing with Button Stand) - Figure 3
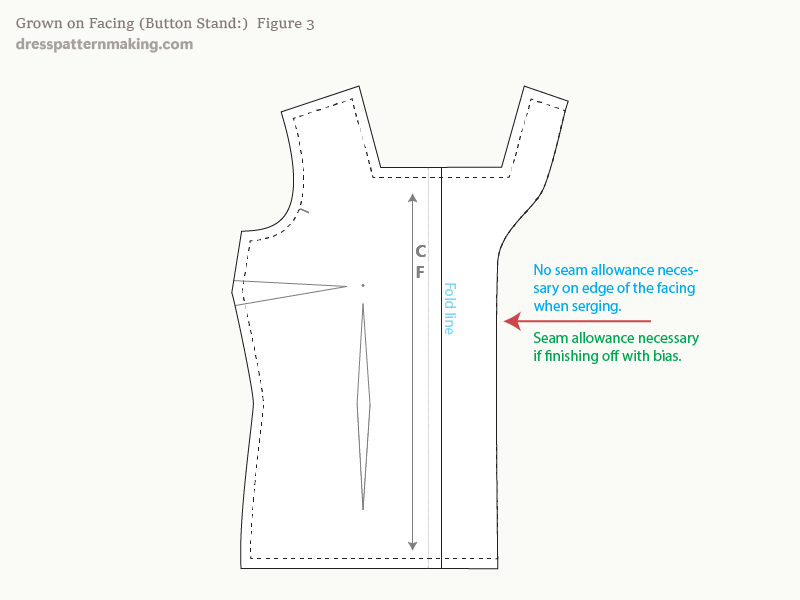
- Add seam allowance to your Bodice Front, and you have a Bodice/Facing piece all in one.
- No seam allowance is necessary on the facing edge from the shoulder down to the hem if you are serging that edge. If you want to clean-finish the edge with bias strips you will need to add seam allowance.
Final Note
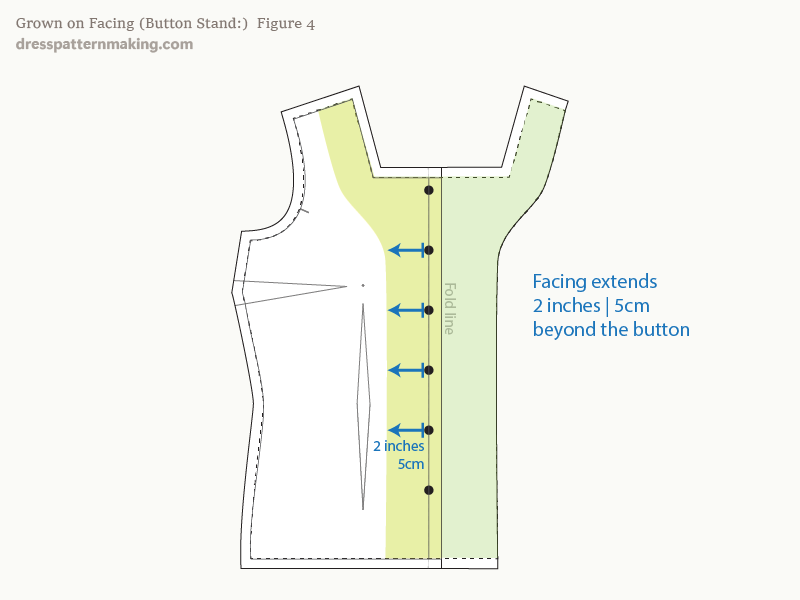
This image shows why the facing was drafted at only 2 inches at the shoulder and 3 inches down the front. You can draft the facing narrower than 3 inches, but note that when the buttons are sewn on the CF line, the facing actually extends 2 inches beyond the inner edge of the button.
Having said that, you can make the facing narrower if you wish, when you are drafting your own patterns you can make those choices for yourself.
