Contoured Waistband
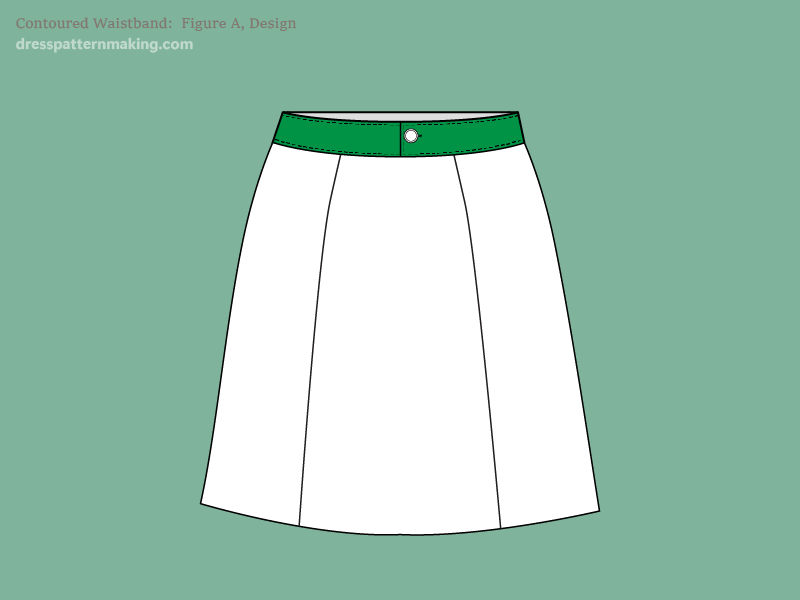
While the straight waistband is a rectangle and sits above the skirt block shape, the contoured waistband is part of the skirt. If you make a skirt with a lowered waist, you must use a contoured waistband as a rectangular one will not fit the body. Note that a yoke on a skirt is in effect the same as a contoured waistband, except it is deeper. If you make a yoke at the right depth you can incorporate the waist darts into the yoke, negating the need for darts or dart equivalents. Which Skirt Block you use depends on the design of the rest of the skirt. If we were making the skirt in the introductory image we would use the 1-Dart Skirt Block, so that is what I'll use in this example.
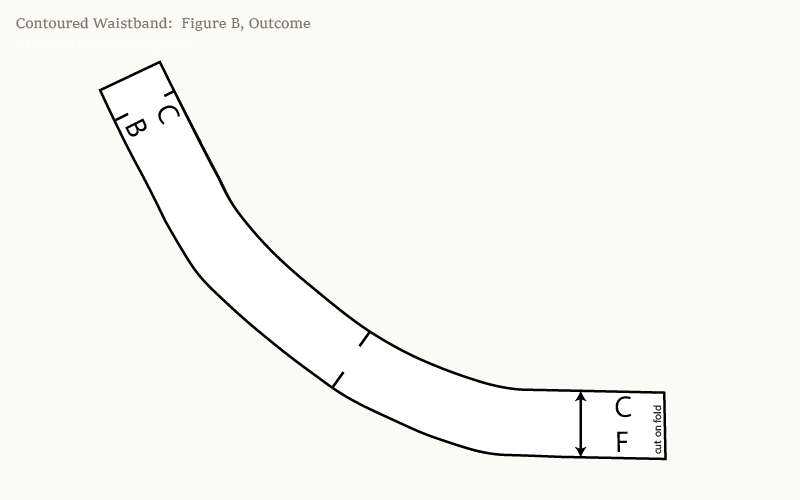
Example: Outcome
Figure B shows the final contoured waistband.
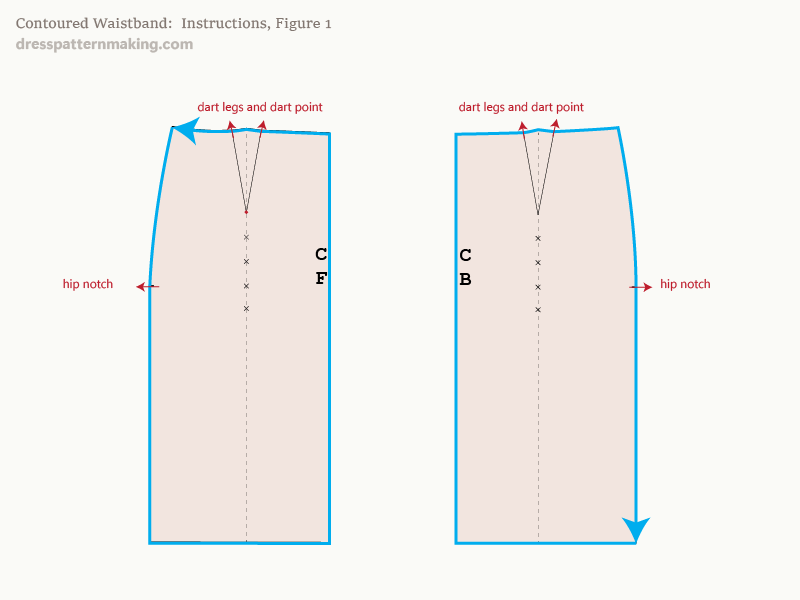
Instructions: Drafting the Contoured Waistband - Figure 1
- Trace your block onto paper.
- Make sure you mark the dart legs, the dart points and the hip notches.
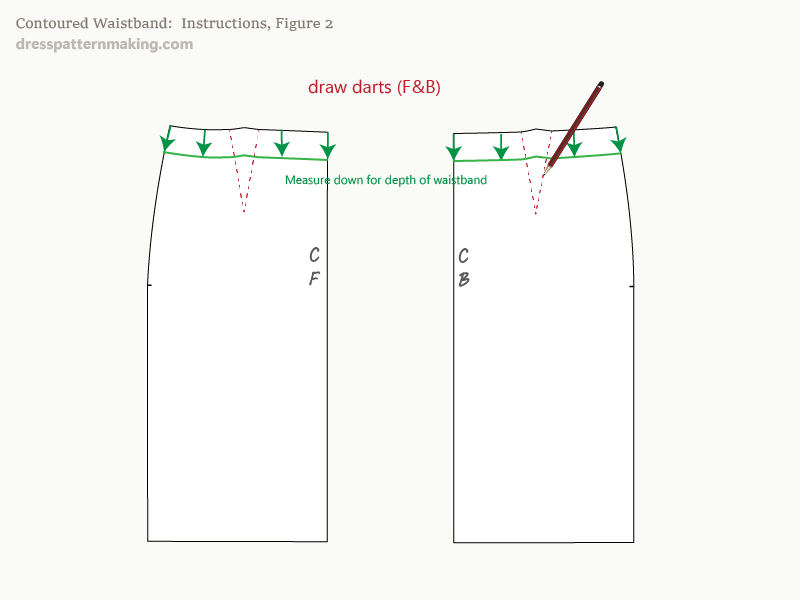
Instructions: Drafting the Contoured Waistband - Figure 2
Remove your block after you have finished tracing and marking points, then:
- Draw in the darts.
- Mark the CF and CB on the working pattern pieces.
- Measure down from the waist for the depth of the waistband - I am making the waistband 1.5 inches wide. The waist is curved so make sure you follow the curve, measuring down 1.5 inches from various points on the waistline. The final shape of the line drawn 1.5 inches down from the waist should be the same curve as the waist.
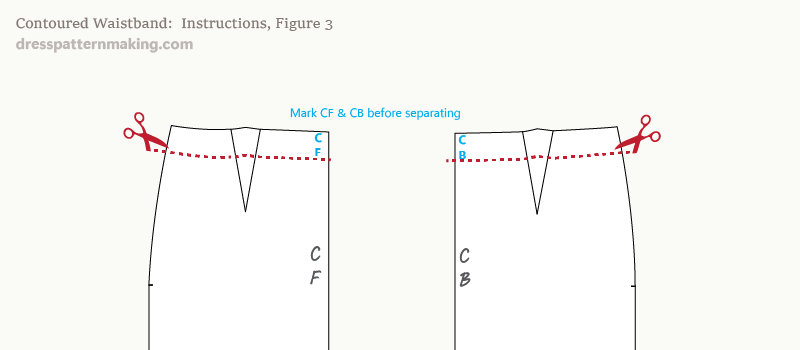
Instructions: Drafting the Contoured Waistband - Figure 3
- Cut along the design line to separate the waistband from the skirt.
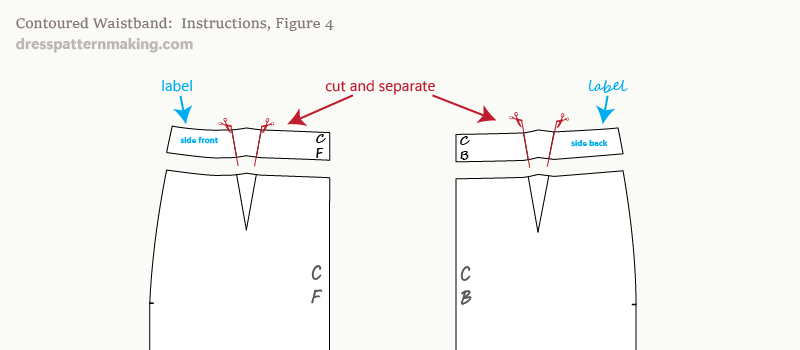
Instructions: Drafting the Contoured Waistband - Figure 4
- Label the side front and the side back pieces.
- Cut along the dart lines; separating each piece into three.
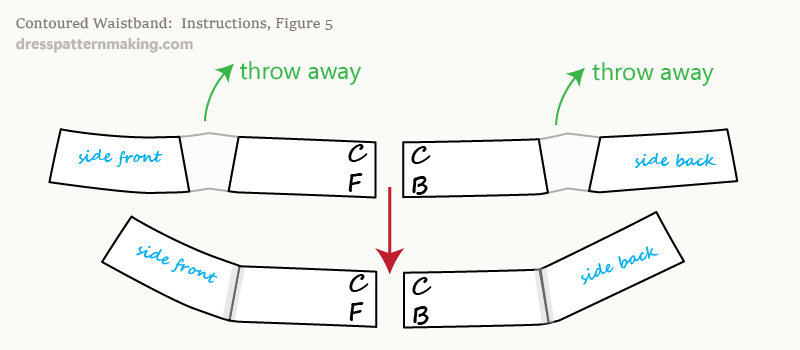
Instructions: Drafting the Contoured Waistband - Figure 5
- Throw away the dart pieces
- Use sticky tape to tape the front pieces and the back pieces together.
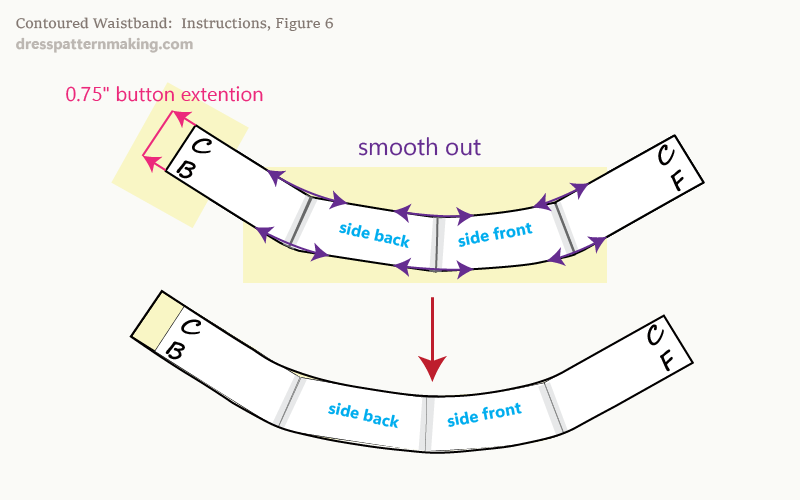
Instructions: Drafting the Contoured Waistband - Figure 6
- Put paper underneath to add a 0.75-inch (button) extension to the CB.
- Put paper underneath to smooth out the curves.
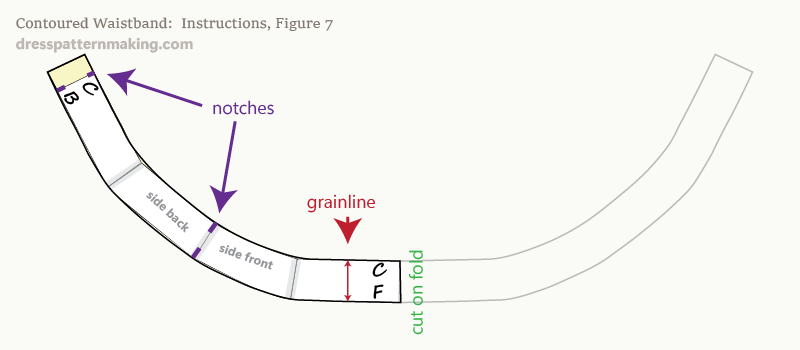
Instructions: Drafting the Contoured Waistband - Figure 7
This is a working pattern piece with many pieces of paper stuck together and would be hard to pin to fabric. You would want to trace this onto a clean piece of paper (or vilene) for the final pattern piece.
- Draw the grainline; the CF is cut on fold
- Add notches at the side seams and the CB
- Seam allowance still needs to be added and cutting instructions (not shown here)*
Note that you would cut two, the same as a waistband.
