Pivoting Darts
Pivoting is one of the methods of moving (or manipulating) darts that is used with the Bodice Bock. The standard Bodice Block usually has two darts in either (i) the side seam and waist, or (ii) shoulder seam and waist. These darts can be moved to anywhere on the edges of that block; e.g. armhole, neck, center front. The pivoting method involves tracing around part of the block, holding the block down at the Bust Point, pivoting the block, then tracing the remainder of the block.
Examples
1. One Dart & Two Dart Blocks
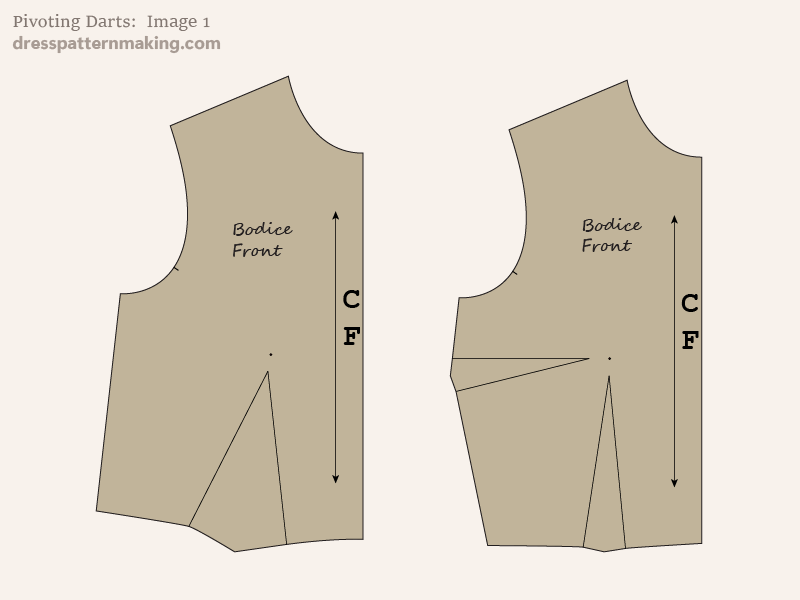
Image 1: On the right is the original Size 12 Bodice Block, created with just one dart in the waist. The one dart-block on the left was created from the two-dart block, one way this can be done is by pivoting the side seam dart value into the waist. (See Cutting & Spreading for the other way to move a dart or part of the dart value.)
2. Two Dart Block: Pivoting the side seam dart into the shoulder
Image 2a: This is the bodice block with two darts; one in the side seam, one in the waist. The green line is the new design line; the side seam dart will be moved to the shoulder by pivoting, creating a new block with a waist dart and a shoulder dart.
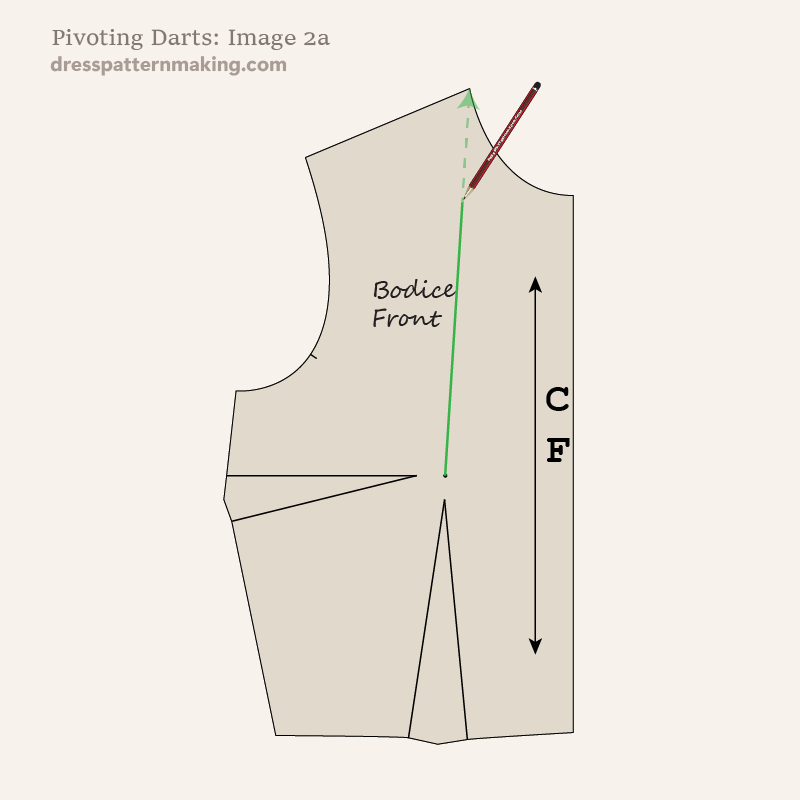
Image 2b: First an explanation of what we are trying to do; we want to close the side seam dart (indicated by the red arrow), and to open up the block at the shoulder where the green line is (as indicated by the green arrow). (If you are new to this, I would recommend that you first look at the Cutting & Spreading method; this Pivoting method achieves the same thing but achieves it differently).
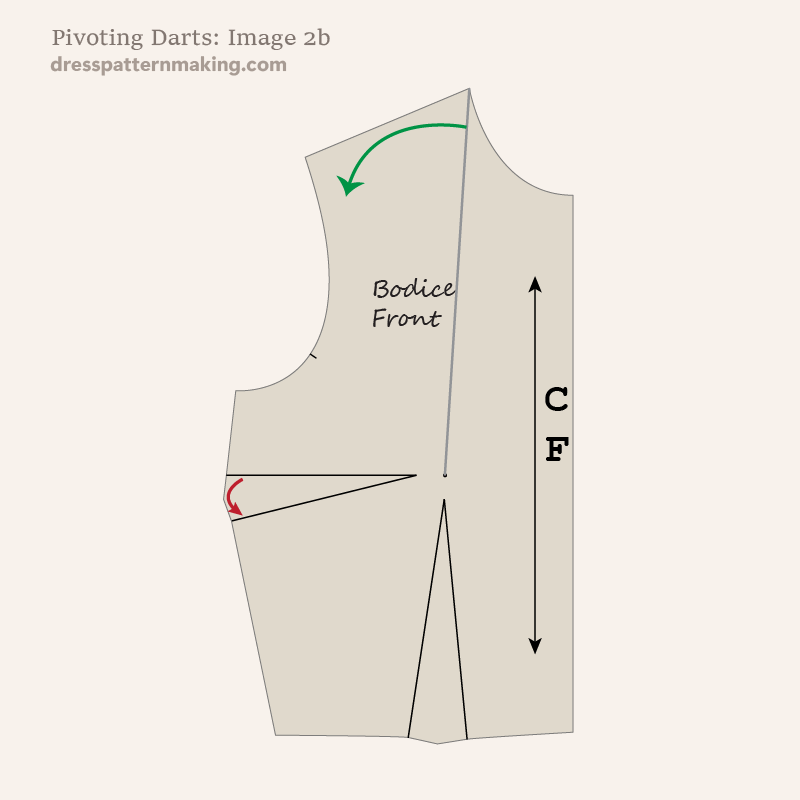
Image 2c: With a pencil, and with the block on top of a piece of paper, trace around it from A to B, indicated by the red line.
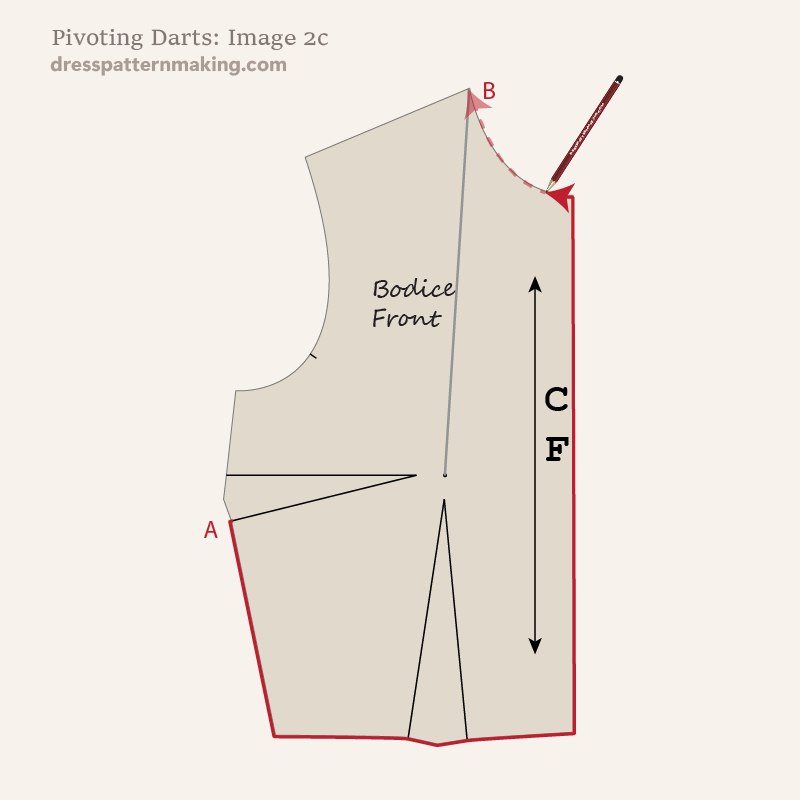
Image 2d: Before we do the pivoting, make sure you mark the waist dart legs on the paper - indicated in blue on the image, and punch a hole through both the bust point and the dart point with an awl. (You may already have holes punched in your block at the bust and dart points, in which case just mark those points with a pencil).
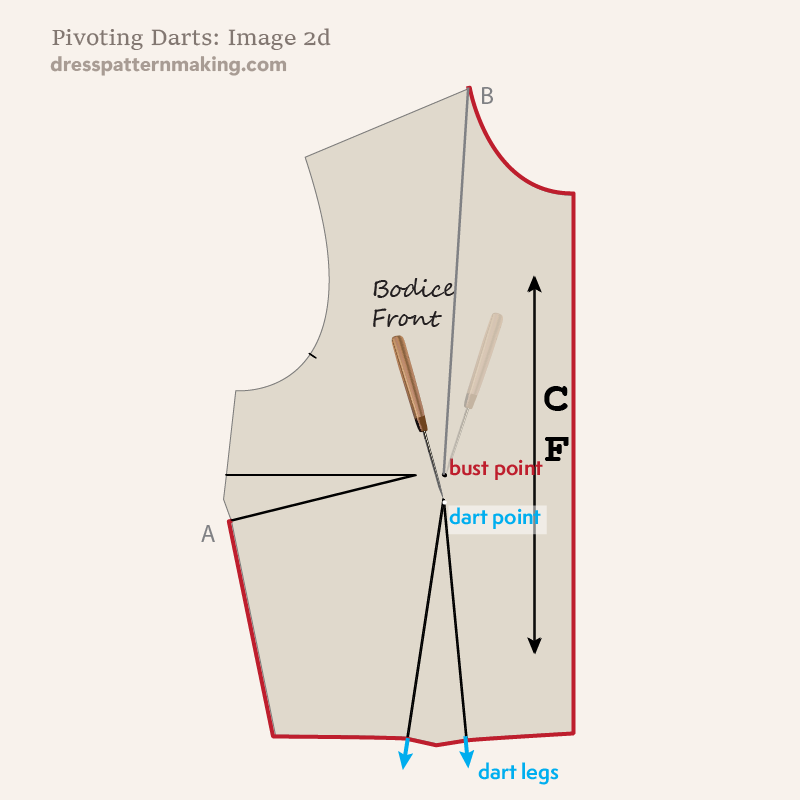
Image 2e: Now move the awl up and hold the block down at the Bust Point (NOT the Dart Point), and turn it around to the left until the side seam dart is closed. Finishing tracing the block from C back to A.
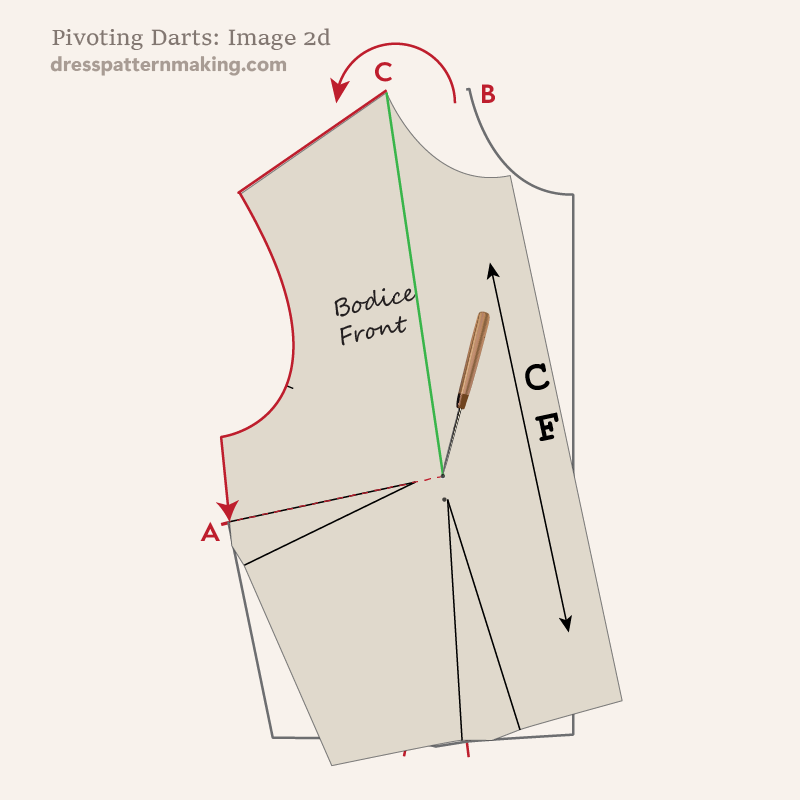
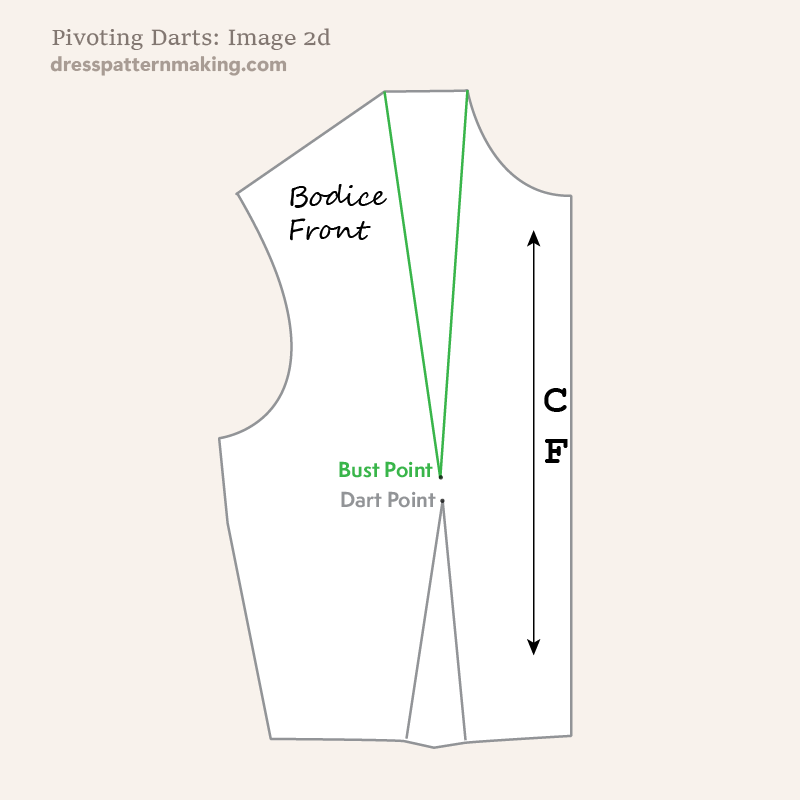
Image 2f: When you lift up the block, you have a shoulder dart rather than a side seam dart. The shoulder dart lines need to be drawn from B to the Bust Point and from C to the Bust Point. The waist dart lines also need to be drawn in from the marks you made in Step 2D.
A number of examples of Pivoting Darts can be found in the Principles section of this website in the Principles Menu,Manipulating Darts pages. You can follow along with the exercises by downloading the Third Scale Block set (you will to cardboard and sticky-tape) to practice the exercises. Using third-scale blocks saves paper and desk space.
