Full Circle Skirt
No Blocks are needed to draft the circle skirts, you only need your waist measurement, including ease.
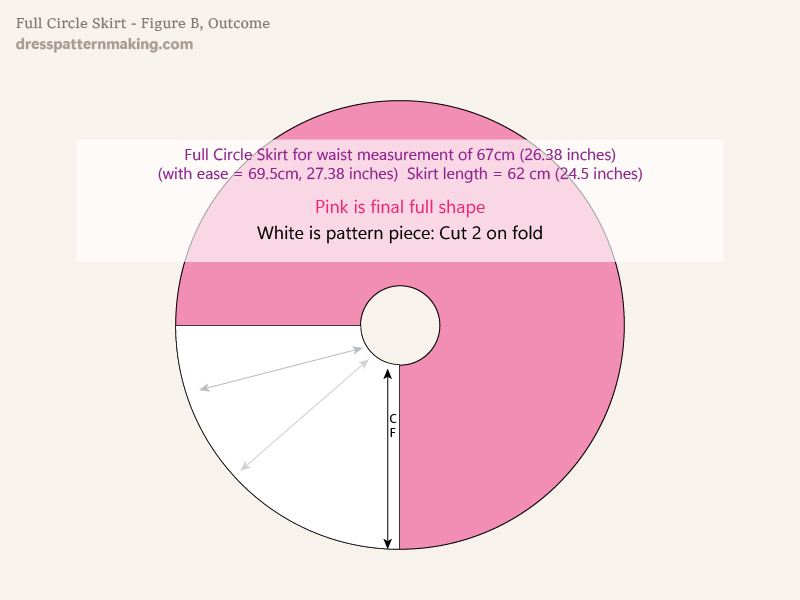
Example: Outcome
Figure B shows the end shape of garment in pink (like a donut), with the white showing the actual pattern piece. The circle skirt is a full circle with the inner circle corresponding to your waist (with wearing ease included) and the outer circle is the hem. The distance between the inner circle and the outer circle is the length of the skirt. The pattern for the circle skirt is 1/4 the full circle.
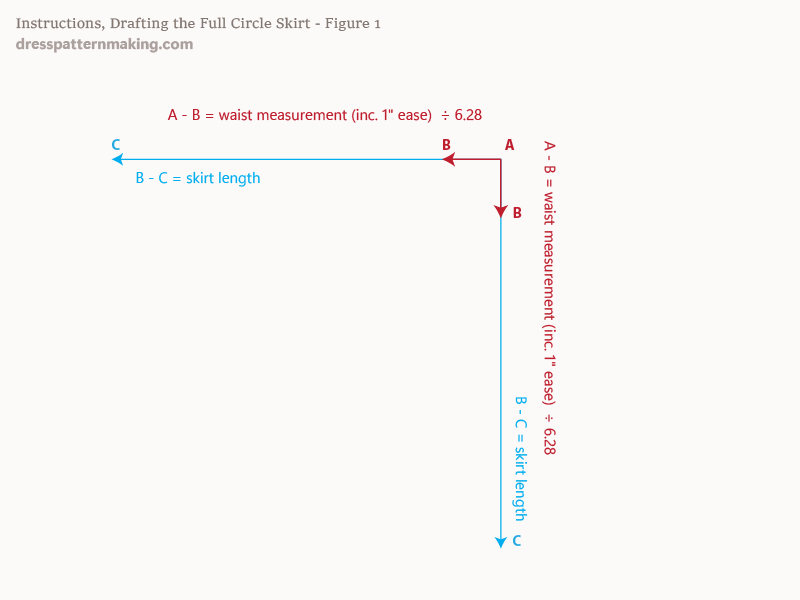
Instructions: Drafting Full Circle Skirt - Figure 1
- Draw a horizontal line from A to B: the length of this line is your waist measurement (including 1 inch ease), divided by 6.28*
- Measure from B to C, your desired skirt length
- Measure the same distances vertically down from A, making sure that you have a right angle
- The actual equation is (waist÷4) x (7÷11). You will end up with the same amount using my numbers. See the parent article: Circle Skirts.
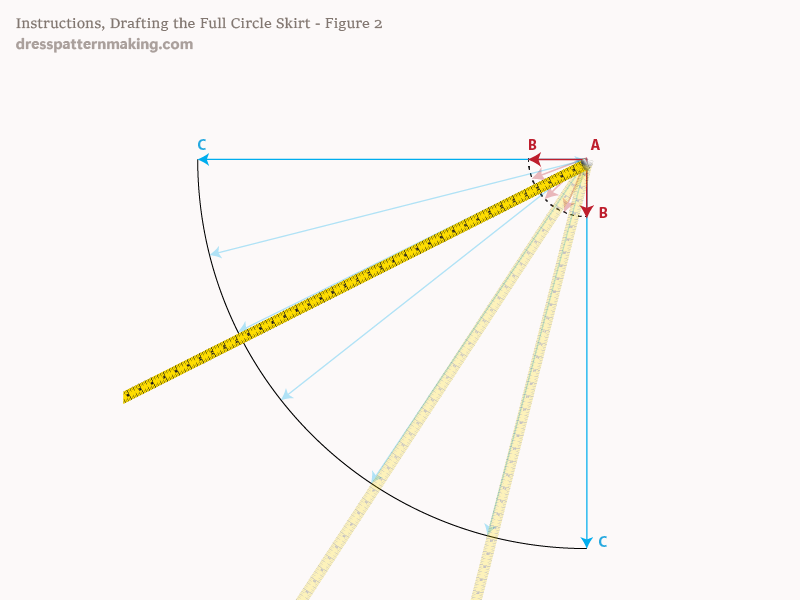
Instructions: Drafting Full Circle Skirt - Figure 2
- Draw a semi-circle shape from B to B
- Draw a semi-circle shape from C to C
The way to do this successfully is:
- Measure the A to C distance with a tape measure, then swing the tape measure around (pinned at A) and mark that measurement at various points. Blend with a curved ruler.
- Repeat for A to B distance.
You can use a piece of string cut to the necessary length if you prefer.
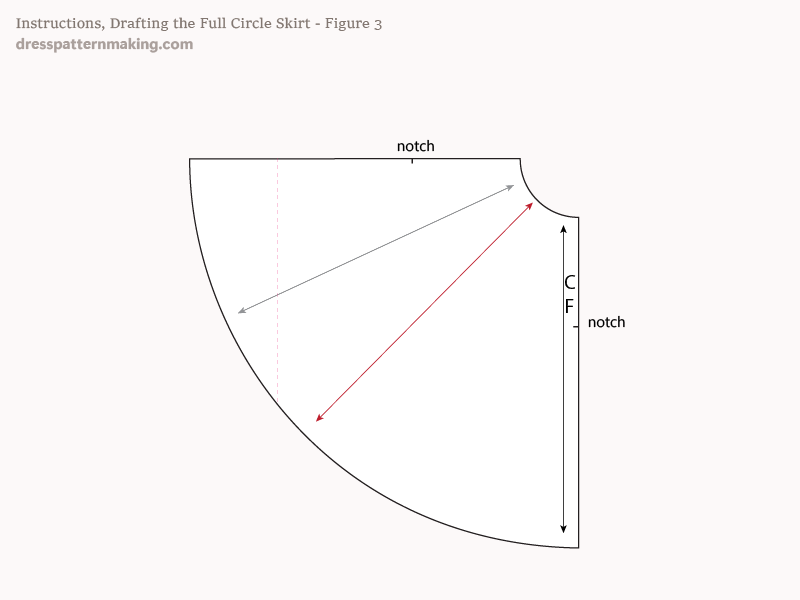
Instructions: Drafting Full Circle Skirt - Figure 3
- This is the final (working) pattern piece (i.e. seam allowance, cutting instructions still need to be added, etc).
- You could cut 4, or cut two on fold.
- If the fabric isn't wide enough you can place a seam and divide this to fit on the fabric (e.g. pink dashed line).
- Put notches in at about 8 inches down; for long skirts you may want to notch in two places.
The grainline can be placed a number of ways, depending on where you want the flares to be. The grainline parallel to CF is on the straight grain so the flares will fall more towards the sides, the red arrow is the bias grainline and you will have a flare falling at the center as well as the sides.
