Skirt with Knife Pleats
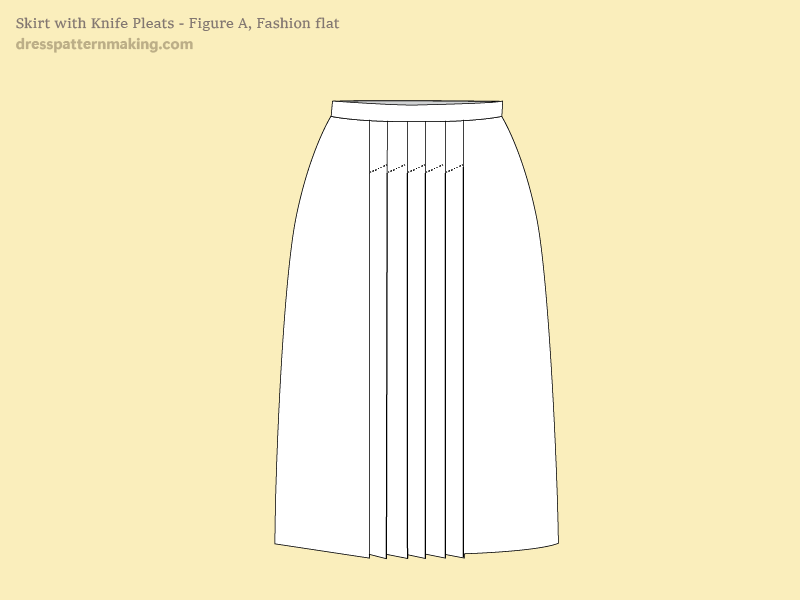
This skirt has 5 knife pleats in the center, with a pleat depth of 1.5-inches. The pleats are stitched at the top over the stomach, then open below that. There is still one waist dart in this skirt, and the second dart is incorporated the pleat closest to the side seam. A little flare is added to the hem to help the pleats stay closed when standing. (i.e. You expect the pleats to open when you are walking, but it looks nicer if they are closed when you are standing still).
Example: Outcome
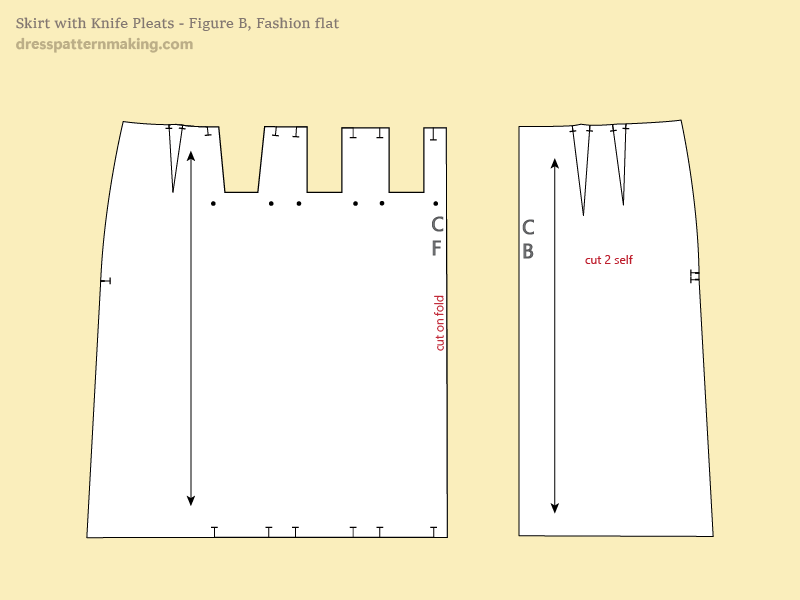
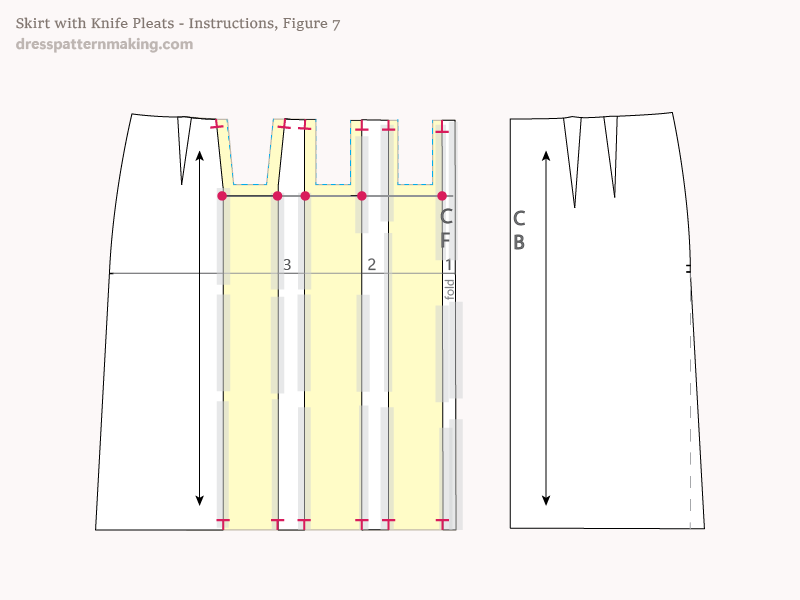
Figure B shows the final Skirt (Working*) Pattern Pieces. (The notches are markings are exaggerated in size).
- No seam allowance has been added yet except inside the pleat. These instructions are focused on drafting the pleat; this is not a final production pattern.
Instructions: Drafting the Knife Pleat Skirt - Figure 1
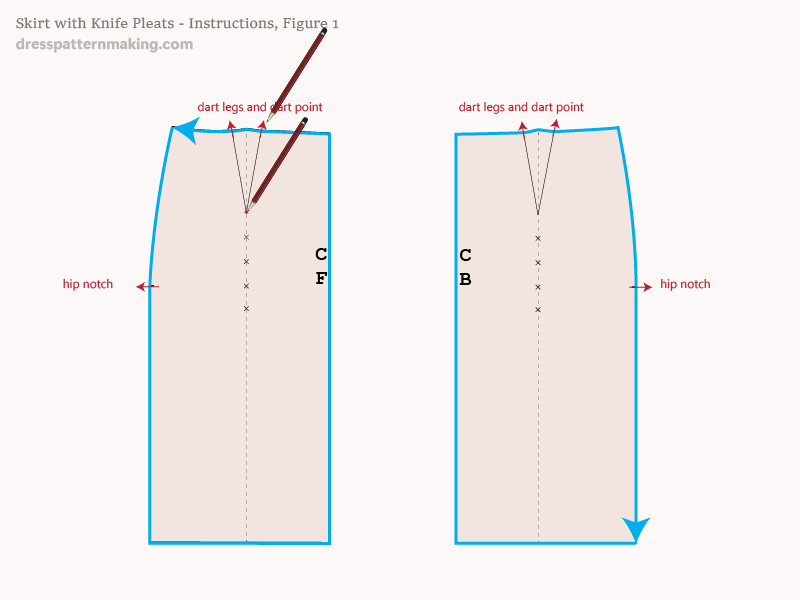
- Trace your skirt blocks onto paper.
- Make sure you mark the dart legs, the dart points and the hip notches.
Instructions: Drafting the Knife Pleat Skirt - Figure 2
Remove your block after you have finished tracing and marking points, then:
- Draw in the darts.
- Mark the CB.
I will be marking the CF after cutting and spreading. We'll add an extension to the side side; adding a slight flare will help the pleat close.
- Square out 0.75-inch from the side seam at the hem.
- Blend from that point up to the hip.
- Do this for both the front and the back.
The front skirt is finished (except for seam allowance, cutting instructions, grainline, etc), so it will not be shown again until the last image.

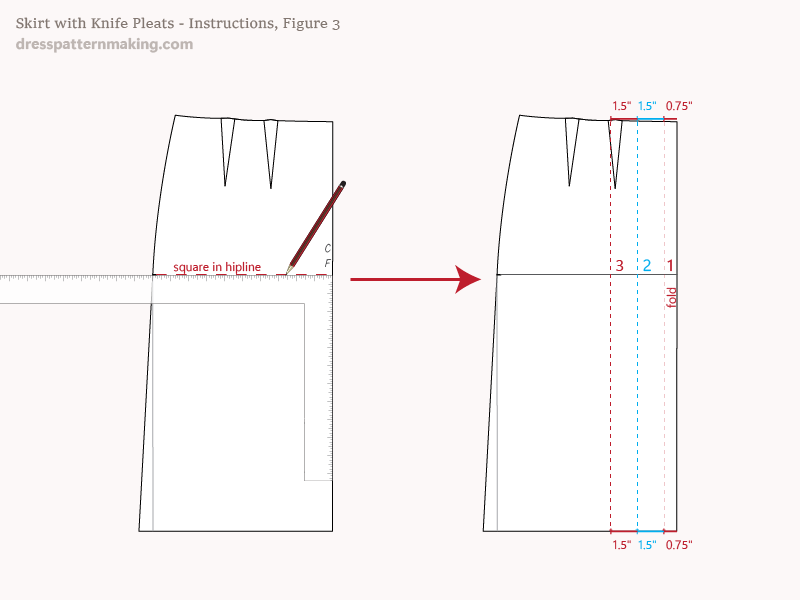
Instructions: Drafting the Knife Pleat Skirt - Figure 3
We will start by drawing in the pleat lines. These pleats will have a depth of 1.5-inches so the pleat underlay will be 3-inches.
- Draw in the hip-line, using the hip notch for the placement, and squaring off the CF line. We will use this line to help with alignment when we cut and spread.
- Measure 0.75-inch from the CF line, draw a line from waist to hem, parallel to CF
- Measure in 1-inch from the first line and draw a second line down, parallel to CF
- Repeat a third time measuring 1-inch from the second line.
- Make the pieces 1, 2 & 3.
It doesn't matter about where the third line falls at the moment in relation to the dart, we will redraw the dart in the next step.
Instructions: Drafting the Knife Pleat Skirt - Figure 4
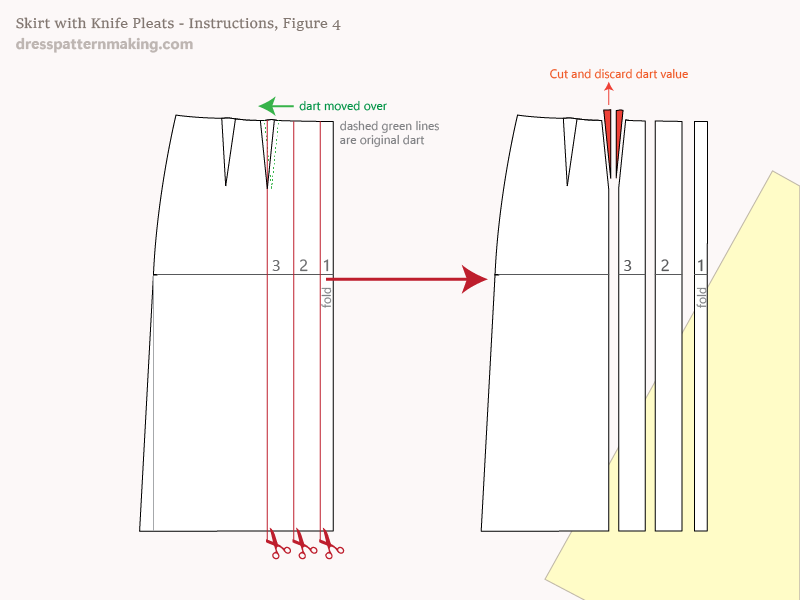
We will move the dart over so that it is centered on the pleat-line closest to the side seam.
- Measure the dart width.
- Redraw the dart on Pleat line #3 to the original dart depth.
You may want to rub out the original dart after measuring it so that those lines do not confuse you.
- Cut along lines 1, 2 & 3, separating the pieces
- You will need paper to put underneath, my paper is yellow. Don't bother placing it underneath yet; we need to draw a guideline on it first.
- It helps to cut out the dart value of the dart that is in the middle of the pleat; if that is left there is can become confusing when drawing in the seam allowance.
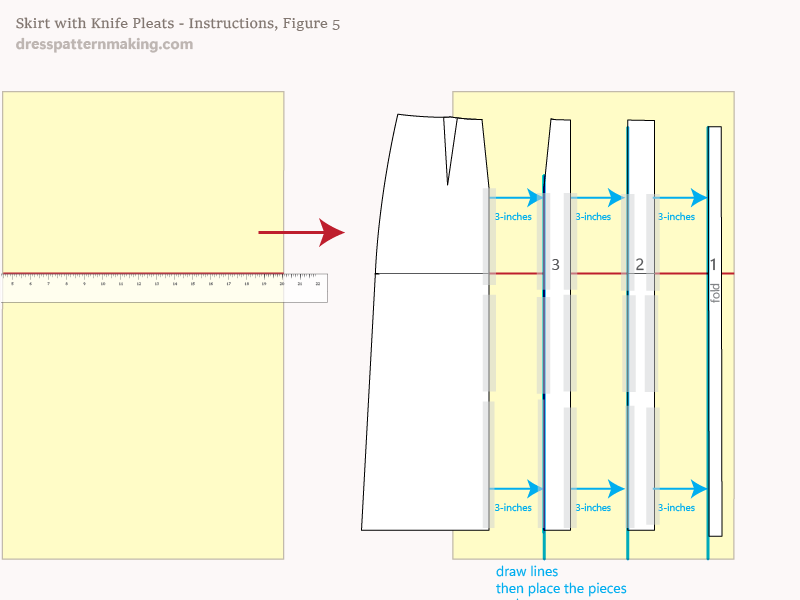
Instructions: Drafting the Knife Pleat Skirt - Figure 5
- Draw a aahorizontal line on the paper; this is the hip-line that will help you line up the pattern pieces correctly
- Place the pattern piece on the paper, allowing 3 inches in between each cut piece.
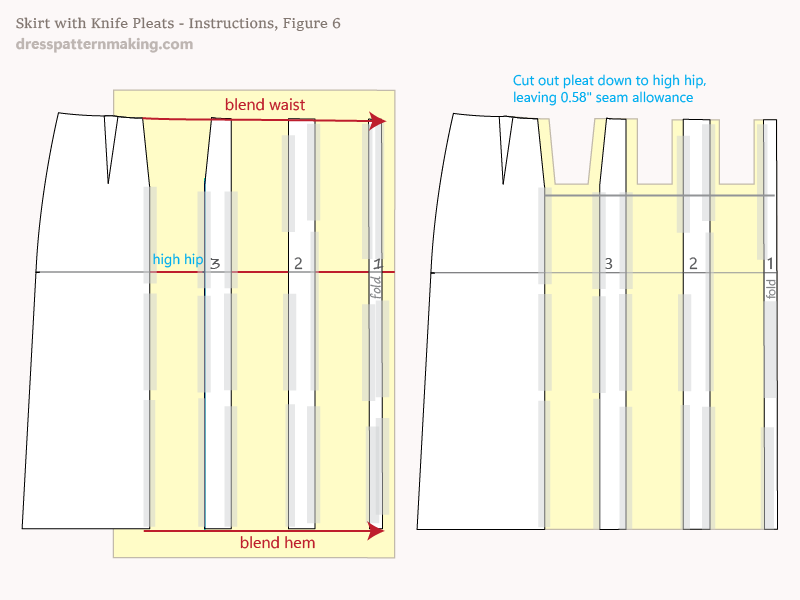
Instructions: Drafting the Knife Pleat Skirt - Figure 6
- Blend the waist
- Blend the hem
We will remove the bulk of the fabric at the top of the skirt where the stomach is.
Instructions: Drafting the Knife Pleat Skirt - Figure 7
- Draw a line onto the paper; this is the hip-line that will help you line up the pattern pieces correctly
Final Note
Trace this off onto fresh paper and add seam allowance where relevant (it is already added inside the pleats from the waist down, where the pleats will be sewed) and make sure all notches, darts and inner corner points are marked, as well as zip information. You would also need to draft a waistband or a yoke facing. You could also add arrows for pleat direction.

