My Ynes Dress Pattern
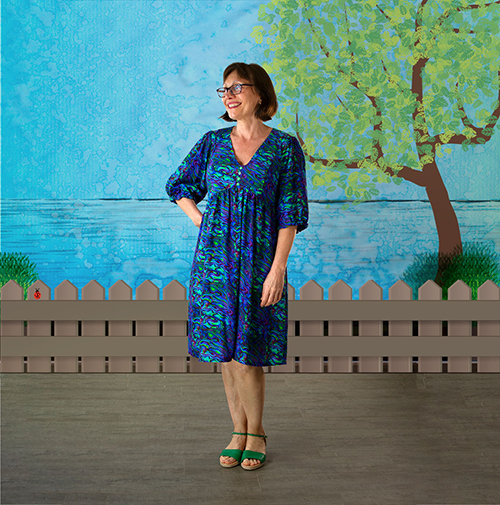
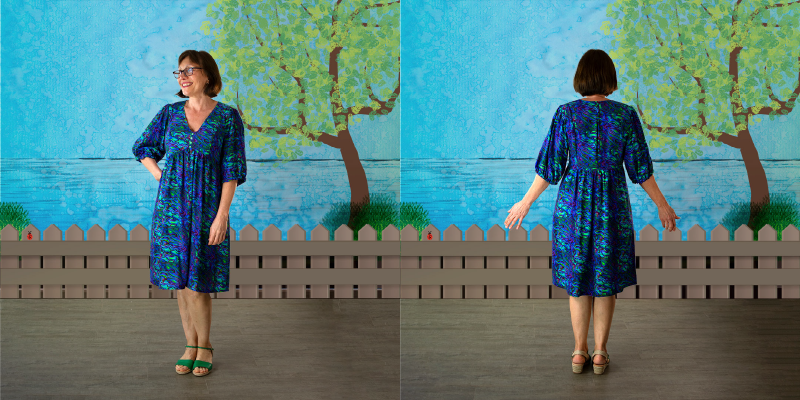
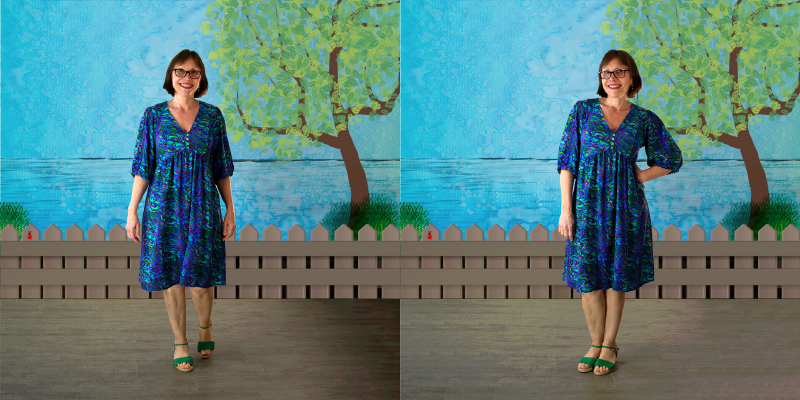
This fabric is a lovely drapey rayon that is about (my best guess) 110-120 gsm. I actually prefer heavier weight rayons (130-140gsm) to lighter rayons (80-100gsm). I love the heaviness and the swing/feel of the heavier fabric.
Yness Dress - Purple/Green Viscose
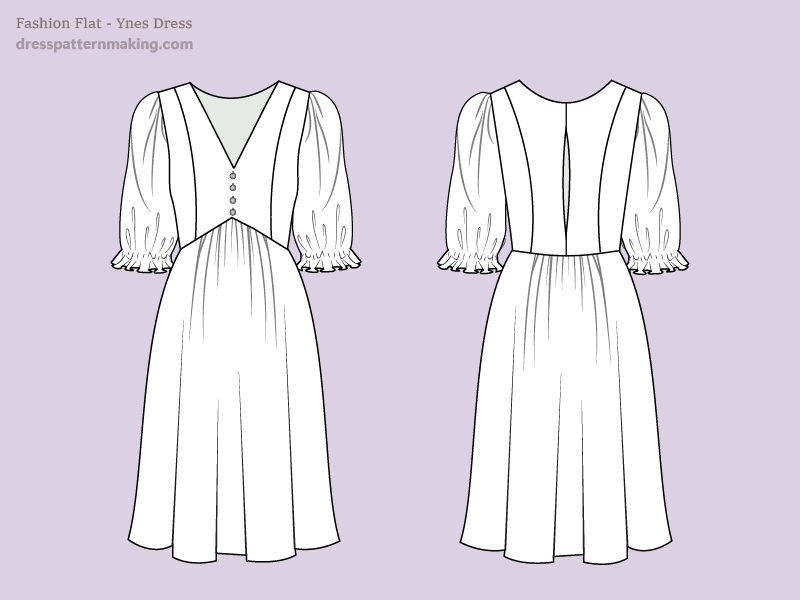
Fashion Flat
Description:
- Semi-fitted bodice with Empire Line waist, with inverted V waistline
- Shoulder Princess line
- V-Neck Bodice with a wide shoulder strap (close to neck, not out to shoulder)
- Elbow length billowy sleeves with elastic cuff
- Gathered skirt with a square/straight silhouette (very slight A-line to skirt side seams)
- Skirt waist with inverted V to match bodice
- High back neckline with CB pleat
Pattern Pieces to be drafted (looking at the Fashion Flat)
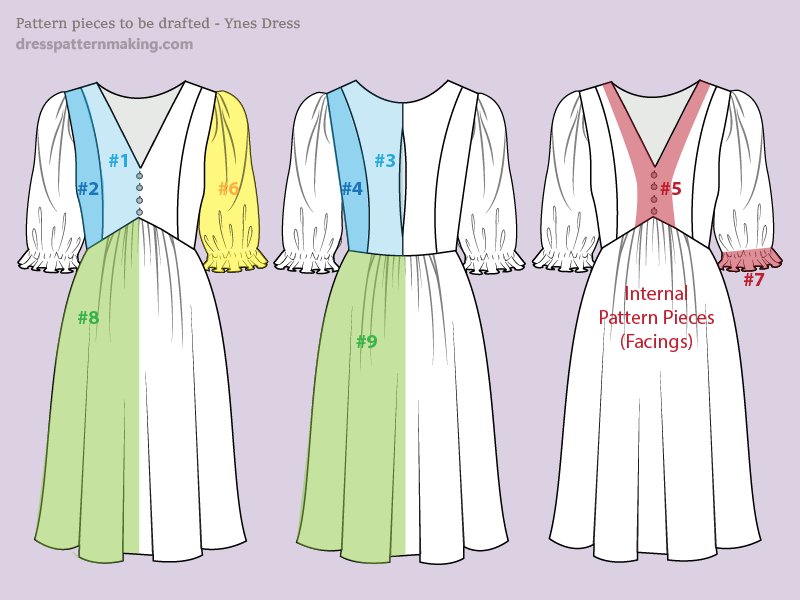
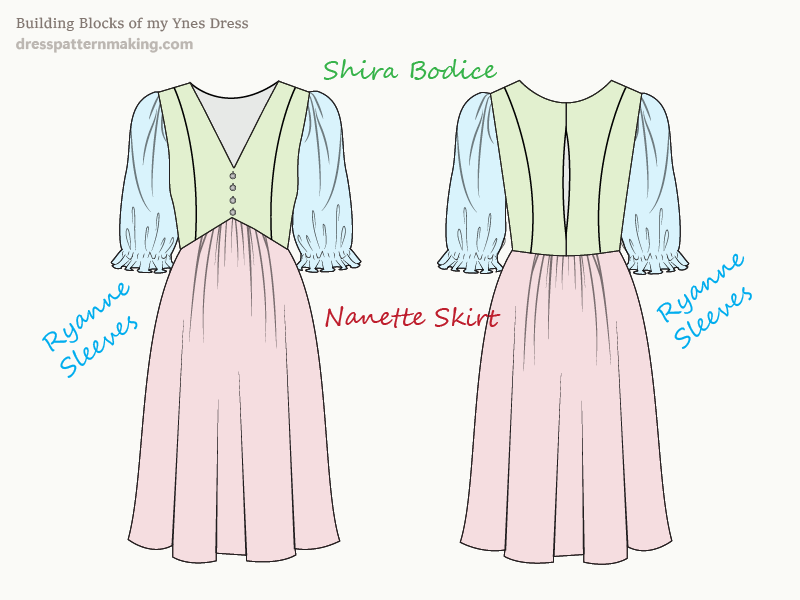
Building Blocks
With all my dresses, they are made up from different components/elements ; this dress consists of my Shira Bodice, my Nanette Skirt and my Ryelle Sleeve.
I reuse some these elements or 'building blocks' in other dresses, and this system works for me.
The Ryanne Sleeve of my Ynes Dress is based on another of my sleeves; the Gabi Sleeve. So I will show you how I drafted the Gabi Sleeve, then the modifications I made to that to make the Ryanne Sleeve. Often I start with an existing pattern and make adjustments because I think; "What would it look like with [more or less of this?] or [with this slight adjustment?] or [with loads more ease?]... And I sometimes try it out. Sometimes it's sucessful and sometimes it's not. I like experimenting.
The Nanette skirt, likewise, was made from my Xera Skirt. (See the Jasnah Dress).
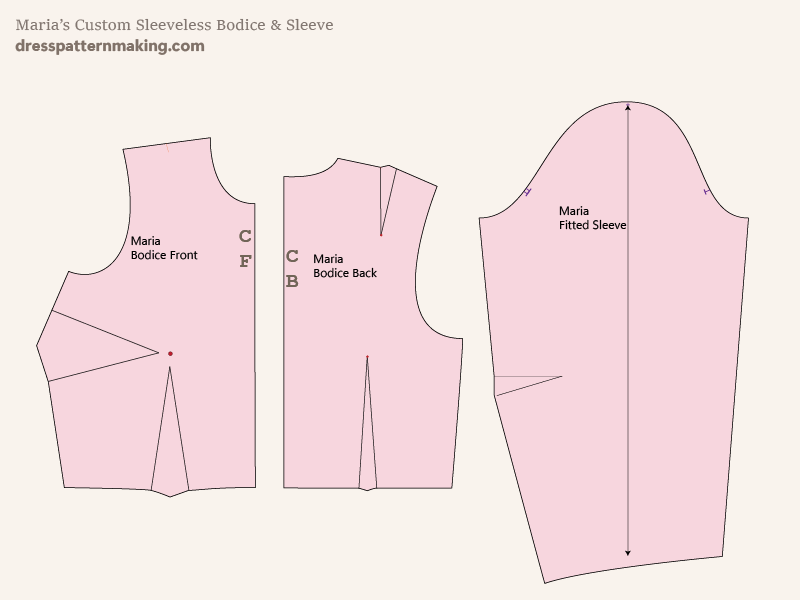
Block/s Used
I always use my Sleeveless Bodice Block, despite the fact that this dress has sleeves. The ease added in the CB in the form of a pleat and the ease added to the Sleeve bicep compensates for the reduced ease in the Sleeveless Block. I don't use a Skirt Block to draft the skirt. Since the skirt falls from the Empire waistline, I find it easier to draft it from scratch.
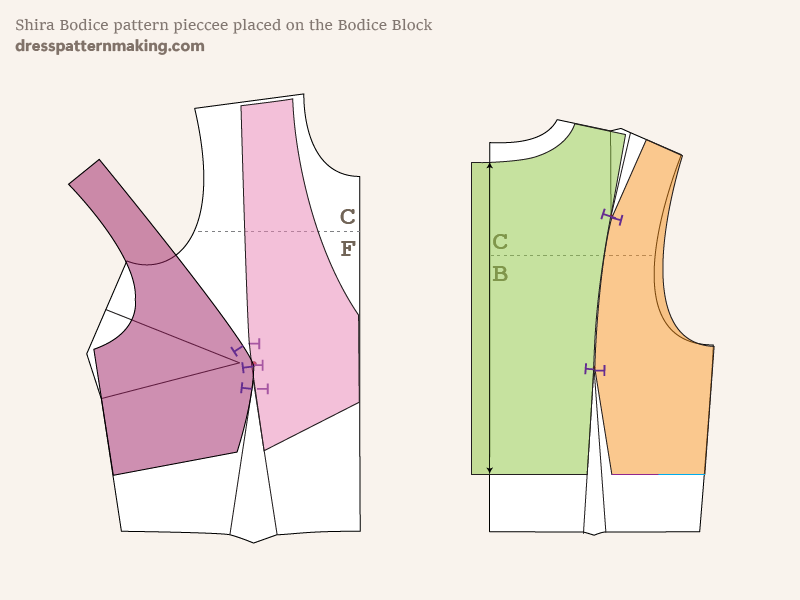
Bodice Pattern Pieces
These are the Bodice pattern pieces placed on top of the Bodice Block. If you look at the CF pattern piece (shaded in pink) it may look like there is a mistake in that the strap does not reach up to the strap of the Bodice Block shoulder line. This is not a mistake; this is the pattern piece after the low neckline gape dart has been moved into the Princess styleline.
Finished Shira Bodice Pattern Pieces with Seam Allowance
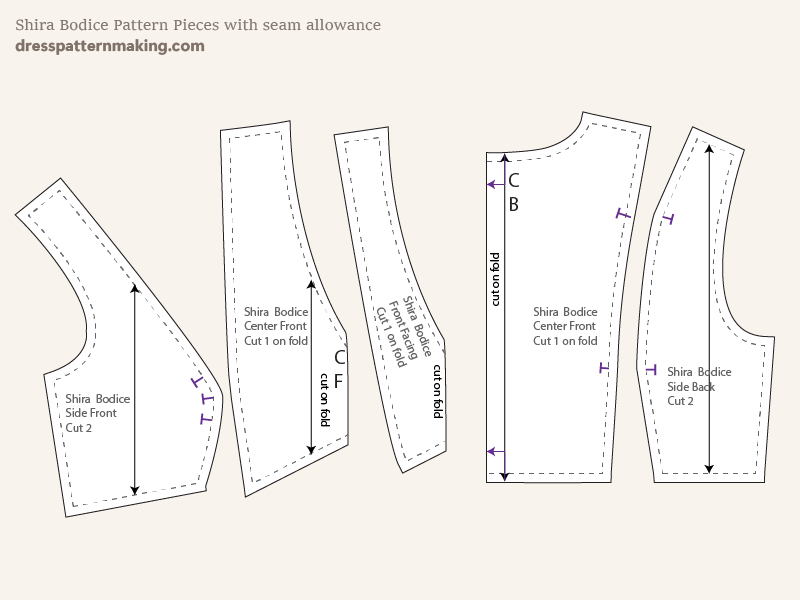
The finished Shira Bodice pattern pieces:
- Center Front Bodice
- Side Front Bodice
- CB Bodice
- Side Back Bodice
- Front Facing
The Ryanne Sleeve
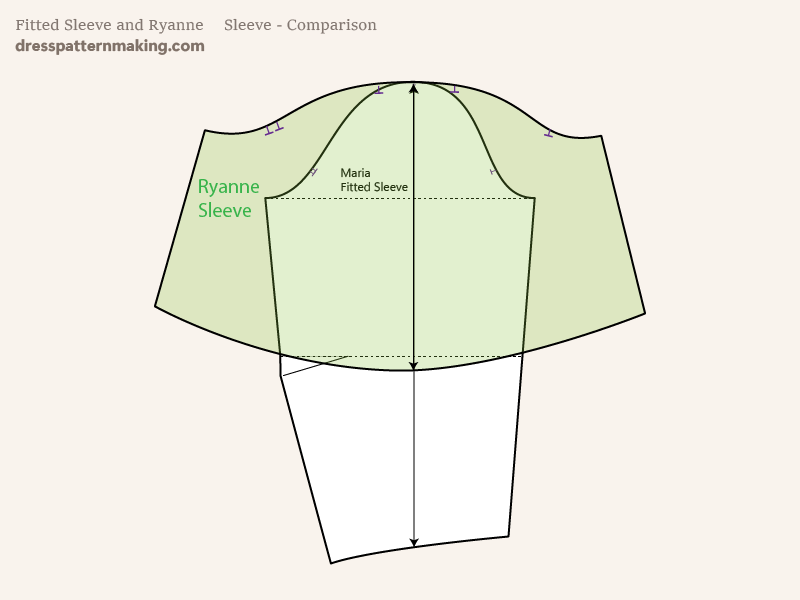
This is a comparison of the Sleeve Block (white) and the Ryanne Sleeve. You can see there is a LOT of added fullness in this sleeve.
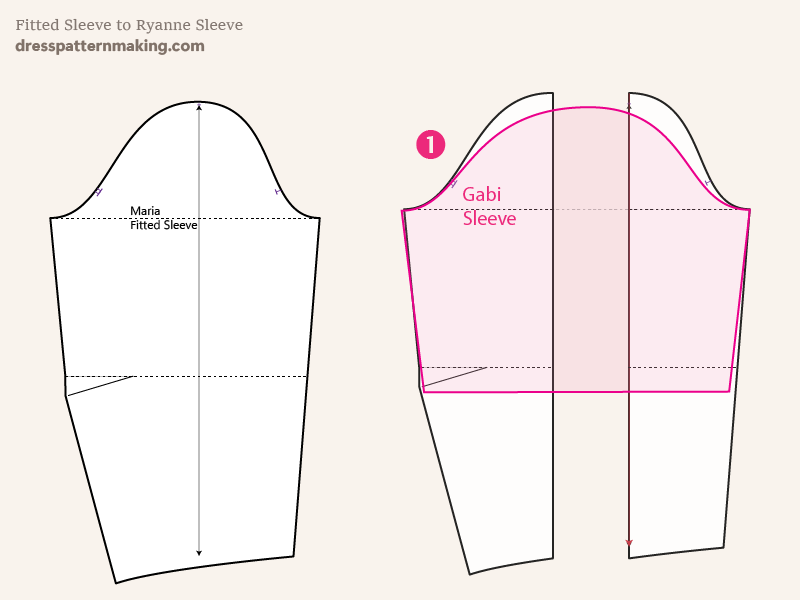
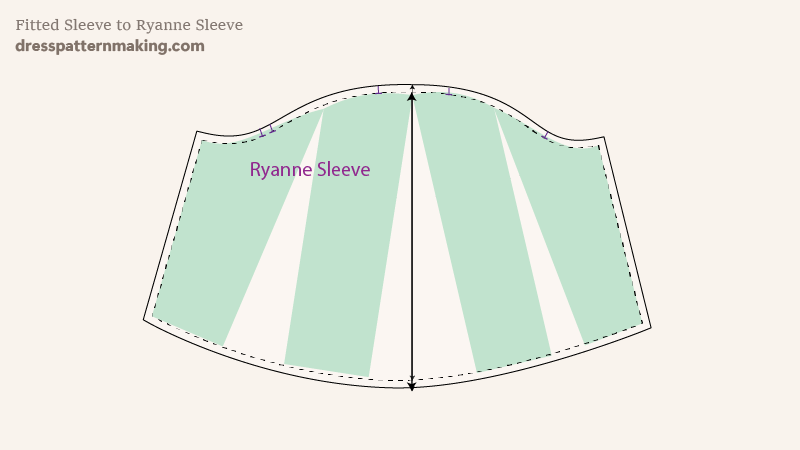
The Ryanne Sleeve was a modification of a different sleeve. On the left is my Fitted Sleeve Block and on the right is my Gabi Sleeve, which I used in another dress. Creating the Gabi Sleeve was done by cutting and spreading so that ease was added evenly down the length of the sleeve. I then reduced the cap height.
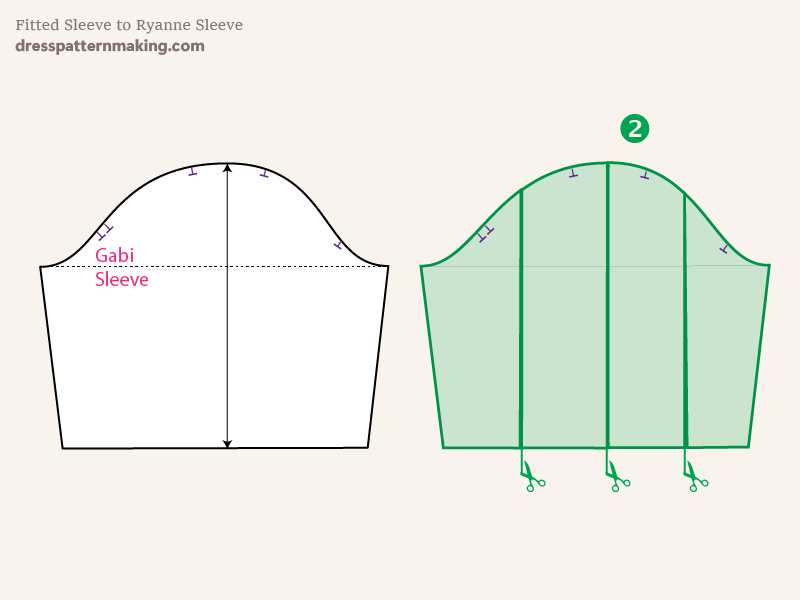
To create the Ryanne Sleeve, I then cut and spread the Gabi Sleeve to fullness in the hem only.
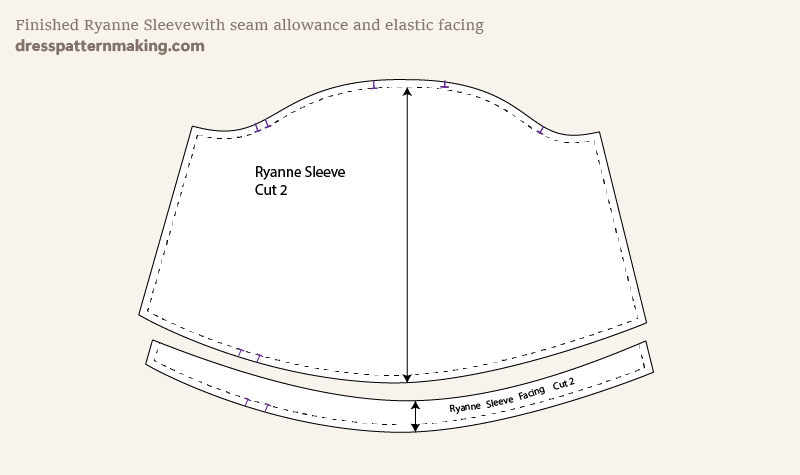
This is the finished Ryanne Sleeve. To create the facing for the elastic, I traced off the bottom portion of the Ryanne Sleeve.
The Nanette Skirt
I started out with the Xera Skirt and made changes to create the Nanette Skirt. I knew I wanted a similar skirt silhouette to the Xera (the white shape in the image), but wanted it shorter and with gathers instead of pleats. I also wanted to add more ease/gathers in to front skirt so would need to add some fullness there. Also, the bodice has an inverted V shape and I needed to add onto the skirt what I had cut out from the Shira Bodice.
This image shows the Xera skirt (white) and the green shaded section is the length I want for the Nanette Skirt. So first thing was to cut off the bottom portion. (NOTE: since I'm starting off with a completed pattern, I already have seam allowance. I need to take this into account. Note that the finished length of the Nanette skirt (green) has the seam allowance on the hem.
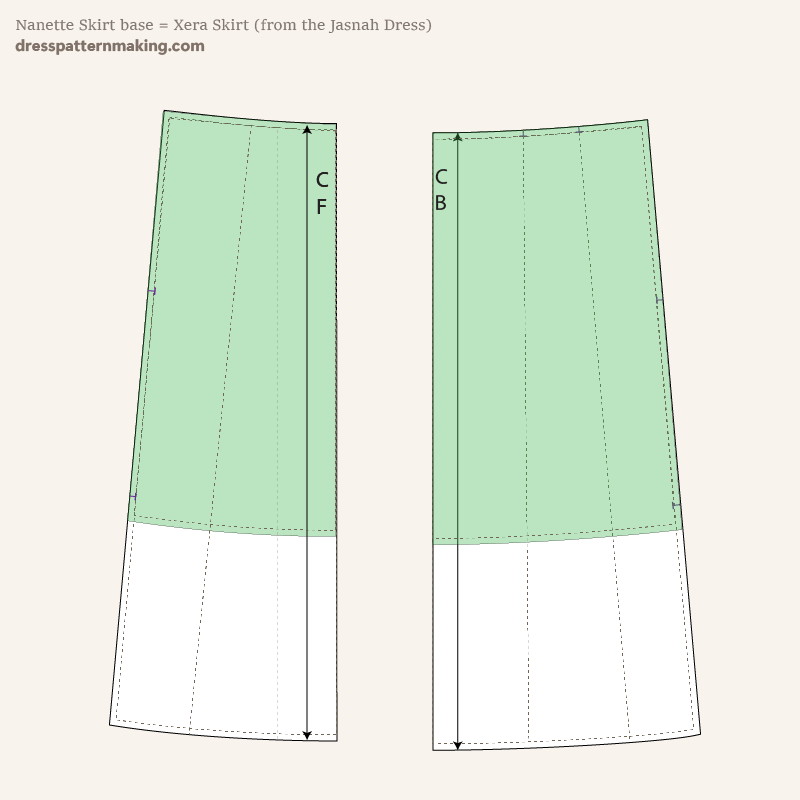
The Back skirt is finished as is. I will note the gathers (instead of the pleats that were in the back Xera skirt).
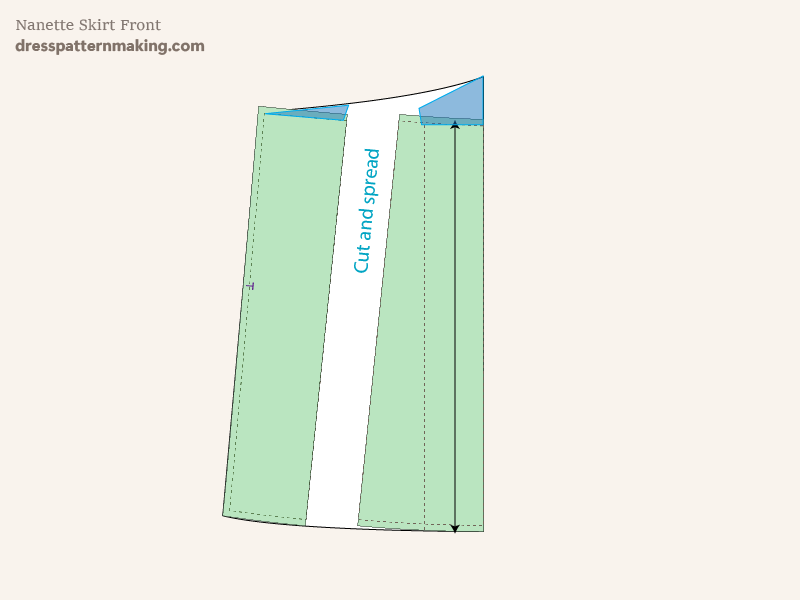
The Front Skirt needs the inverted V section from the Bodice Block added above the waist.
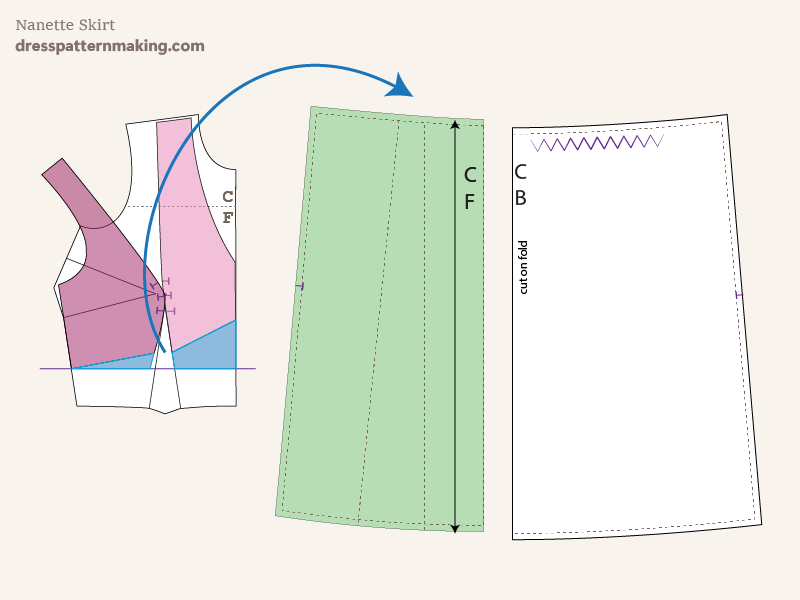
I also want to add fullness in the front for more gathers, so I cut and spread to add ease evently throughout the skirt from waist to hem. When cutting and spreading it's important to add a guideline to make sure the peices stay on the same level. (i.e. so you don't accidently move one piece vertically when you are moving it horizontally).
Note that seam allowance is currently on all seams EXCEPT THE WAIST. I will need to add that later.
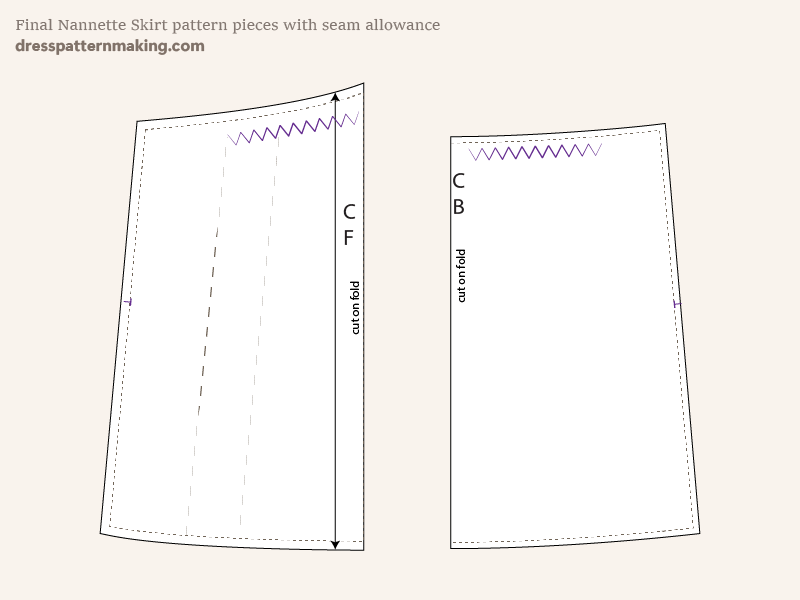
Finished Nanette Skirt Pattern Pieces
Here are the final Nanette Skirt pattern pieces with seam allowance.
Final pattern pieces for laying out on fabric
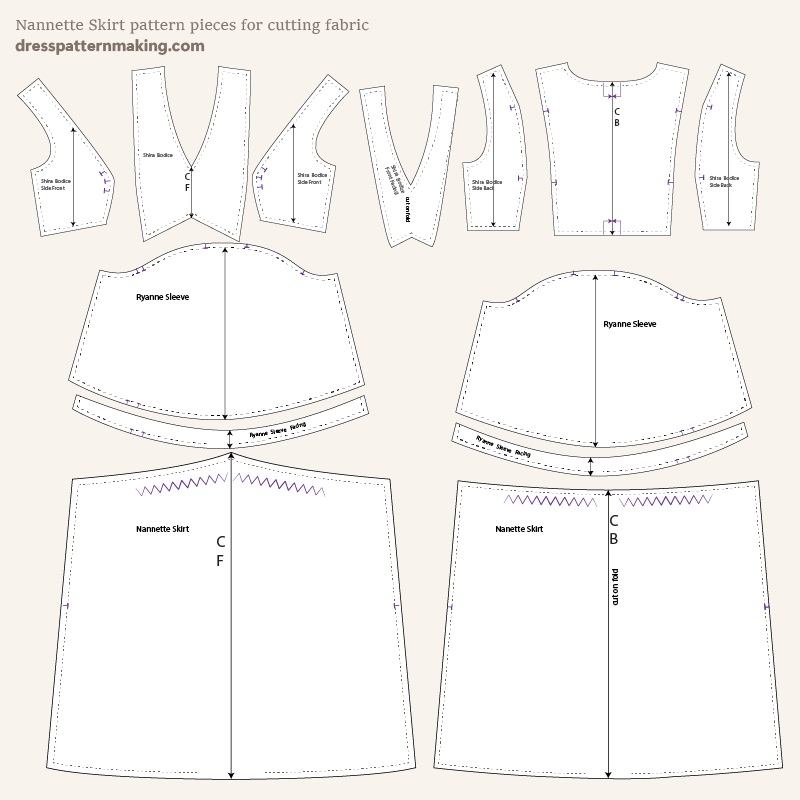
As I always cut on one layer (i.e. not On Fold), I always create full pieces and all pieces. So even though I may draft a half-pattern, I don't use that as the final pattern piece to lay on the fabric.
Here are all the pieces of for my Ynes Dress, with seam allowance.
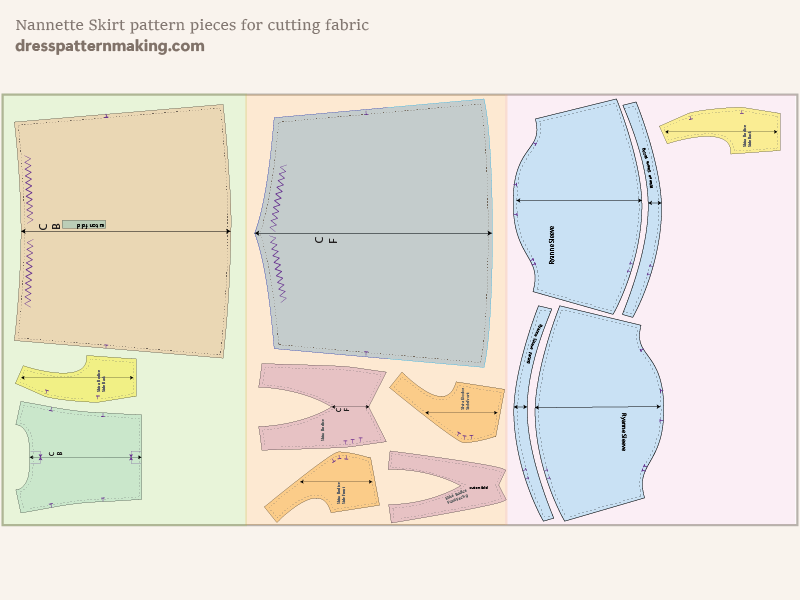
Meterage
This fabric was 136cm | 53.5 inches and I needed 2.5 metres | 2.75 years for this dress. As usual, I create my layout in sections so I can cut out smaller portions of fabric to have on my cutting table. I have quite a bit left over for bias strips, but couldn't lay it out so that I could make do with a smaller length.
Cost/Price
This fabric was about $12.60 per metre on sale, so the fabric cost AUST $31.50. The cost is only fabric, not thread or elastic.
The fabric was from one of Australia's largest fabric stores that often has specials and does have a good selection of Indian Viscose (I prefer the Indian rayon to the Chinese rayon). I would love to make this dress out of a really lovely linen, but that would increase the prices threefold.
