Bodice Front Style 44
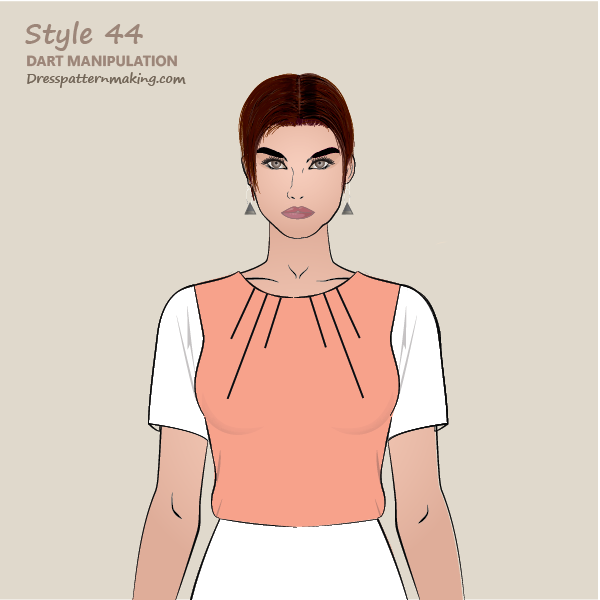
The bodice of this garment has three radiating darts in the neckline of the half-block. Of these three darts; the middle dart is quite long, the other two significantly shorter. These dart are called radiating as the mid dart points towards the Bust Point, and the other two are not parallel, but radiate outwards; i.e. the width between the darts at the neckline is narrower than at the end points. This style will be created using the cut and spread method.
Example: Outcome
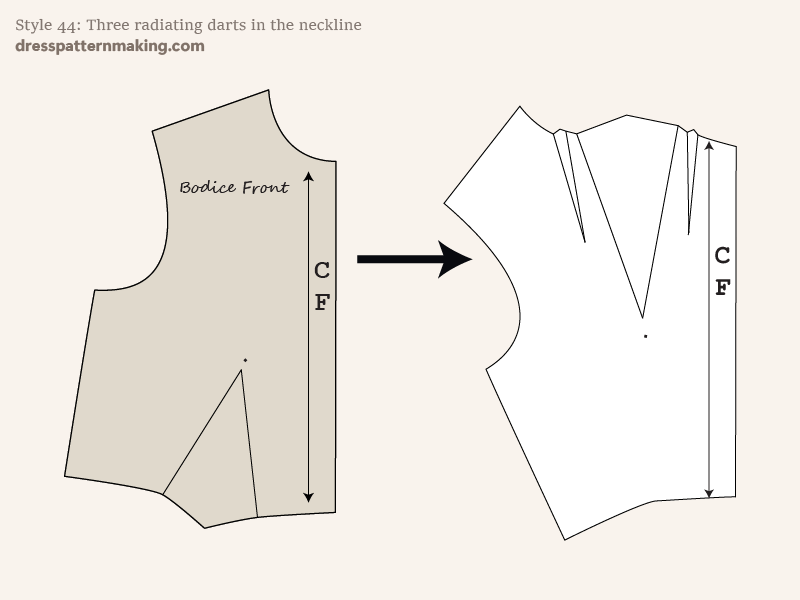
Figure B shows the block being used on the left (1-Dart Block), and the pattern that will be created (Style 03) on the right.
The focus of these instructions is covering the theory and practice of manipulating darts and the exercise finishes after the dart manipulation has been done. For production ready patterns you would need to take further steps to add seam allowance, pattern labels, pattern piece numbers, the grainline, etc.
Instructions (Style-44) - Figure 1
In the instructions color is used for emphasis, so it can be seen more easily, particularly in the current step. You will be using a hard (4H-6H pencil). As we will be cutting and spreading, chances are you do not want to cut up your block. We will trace the block onto paper first and cut and spread the paper pattern.
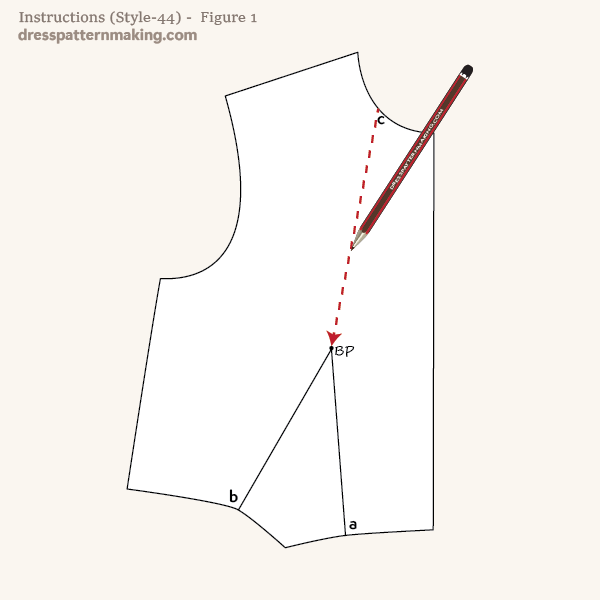
- Copy the block onto paper; mark the Bust Point and dart legs - you do not need to mark the Dart Point.
- Draw the dart legs to the Bust Point.
- Draw a line from the mid-neck point (C) to the Bust Point - Shown in this image by the dashed red line.
Instructions (Style-44) - Figure 2
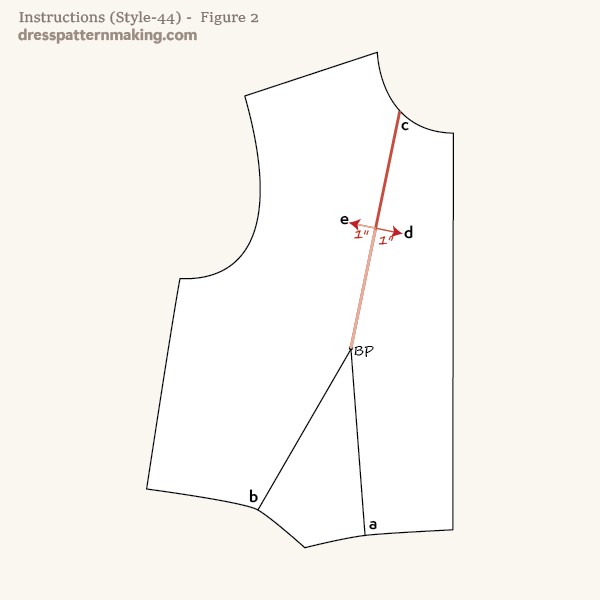
- Measure the line from C to the BP, and mark the half-way point.
- At the half-way point, and at right angles to the line C-BP, draw a line that extends 1 inch either side of the line C~BP. Note points D & E.
Instructions (Style-44) - Figure 3
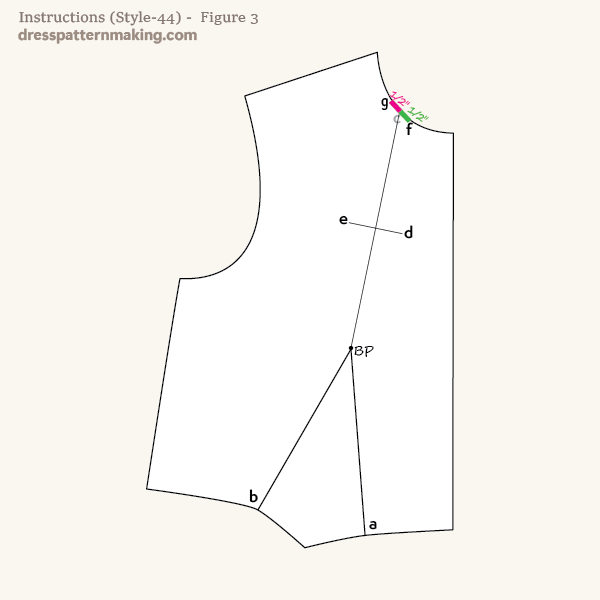
- At the neckline, measure 1/2-inch either side of point C and mark points F & G.
Instructions (Style-44) - Figure 4
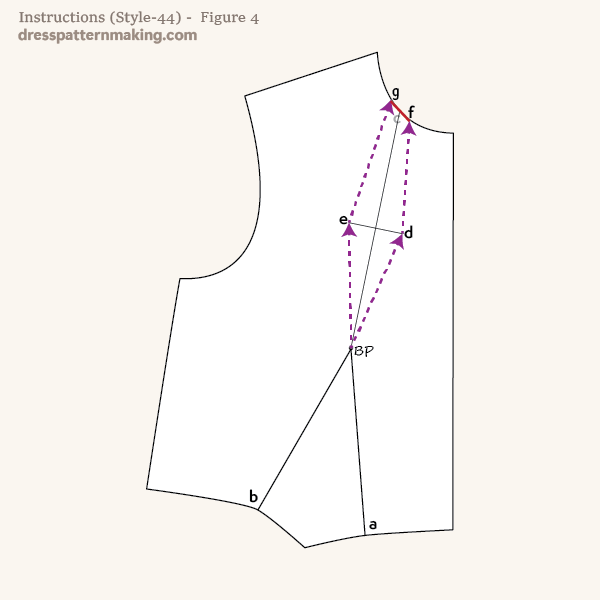
- Draw a line from the BP to E, then from E to G.
- Draw a line from BP to D, then from D to F.
Instructions (Style-44) - Figure 5
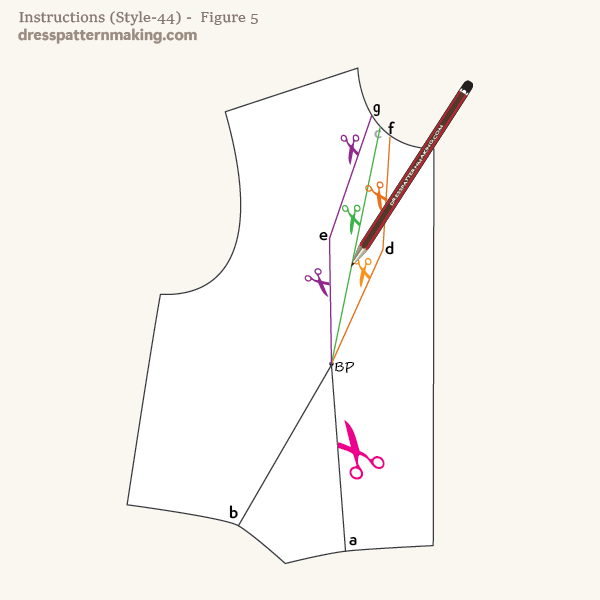
- Cut from point G to E, then E to Bust Point.
- Cut from point C to Bust Point.
- Cut from point F to D, then from D to Bust Point.
- Cut from the BP through the dart leg to point A.
You will have four pieces. I will also cut the pattern the pattern out of the paper at this stage.
Instructions (Style-44) - Figure 6
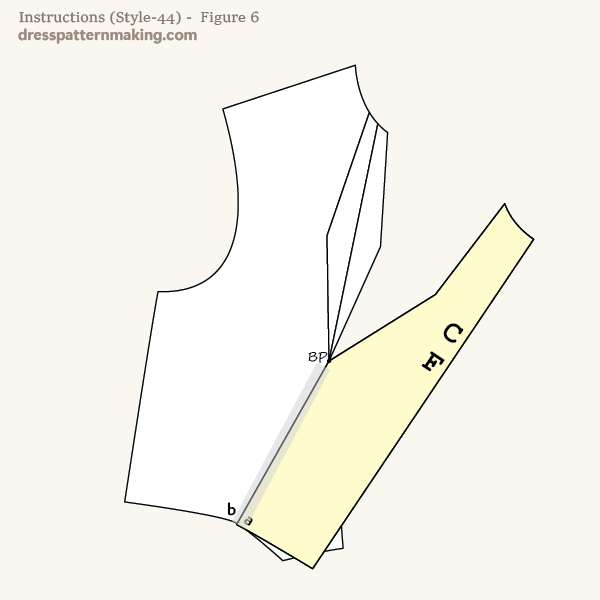
- Put some paper underneath for securing the cut pieces.
- Pivot the CF piece (colored yellow for emphasis in the image) on the Bust Point until the waist dart is closed (i.e. until dart leg A reaches dart leg B).
- Secure with tape
Instructions (Style-44) - Figure 7
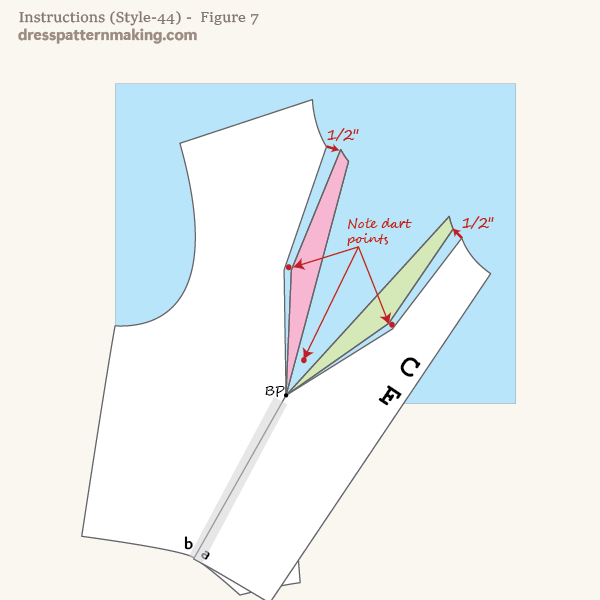
- Pivot the second piece (colored green for emphasis in the image) until it is 1/2-inch away from the CF piece at the neckline.
- Secure with sticky-tape.
- Pivot the third piece (colored pink for emphasis in the image) until it is 1/2-inch away from the side seam piece at the neckline.
- Secure with tape.
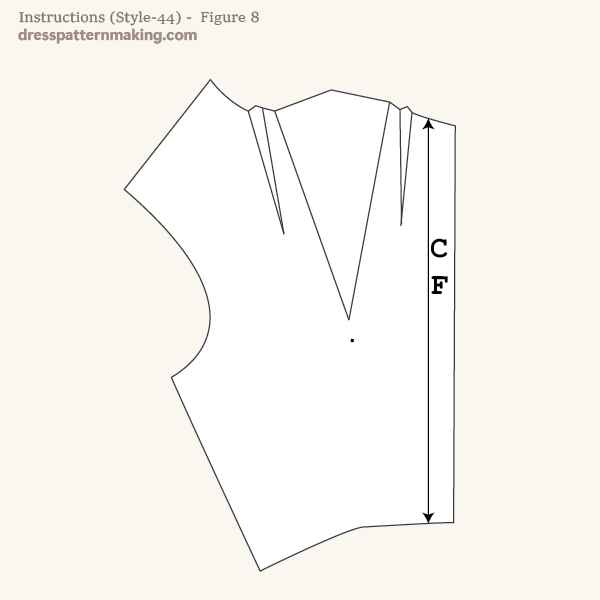
Note that the center dart is much larger than the two side darts, as this is the dart that points to the Bust Point. If you have a large bust cup, this center dart will end up very large; in this case you could increase the width of the other darts to 3/4-inch. If you do have a very large bust cup, you need to take this into account with certain styles - there are some styles that just will not work well for D, DD and bigger bust cups. (i.e. Make styles that suit your figure. Styles like this with one very large dart will not work well for you). The reason you do not spread the dart value evenly between the three darts is that the side darts end up very far from the Bust Point (see Figure 8 for clarification). If you had very large darts pointing to these dart points, it would create a very strange fullness at these points.
Instructions (Style-44) - Figure 8
- Finish off the darts.
- If this were a pattern piece, you would need to add seam allowance, the grainline, pattern piece, cutting instructions, etc.
