Making Toiles for Fitting
Some people may disagree with some (or a lot) of what I am going to suggest. This works for me and the reason I use this system is:
- my focus is on fitting, not having a pretty toile
- I want to make it easy
- I want to make it quick
- I want to be able to see where things are right/wrong
- drawing lines corresponding to most measurements (e.g. Upper Bust, Shoulder Slope, Across Chest..) helps in understanding the measurements, the toile and the fitting.
In these examples, I am going to use the Bodice Block toile (Bodice Front, Bodice Back & Sleeve), but the same system will work for other blocks. Feel free to not use this system, or to disagree with me. I am just telling you what I do and why.
Preface: Difficulties
The main difficulty is that you are making a bodice that is to be used with a sleeve. However, I recommend you first fit with bodice without the sleeves. The inherent difficulty in fitting it first without the sleeves is that it may seem too loose, you may be expecting the close fit of a sleeveless bodice. Remember are trying on a garment that has the ease needed for the sleeves, without the sleeves. The problem is you may over-fit. You need about 5 inches ease at the Upper Bust/Armhole Level, so you should be able to pinch 2.5 inches ease on each side. If you make the bodice with the sleeve in the first instance, it may be difficulty to differentiate between the fitting issues if there are any. Once you are happy with the fit of the Bodice Block, you then add the sleeves. It may take two or three toiles (or more?) to get the Bodice Block right. It may then take three toiles with sleeves to get the sleeves right. If you think this is excessive, note that this is the same for experienced dressmakers and fitters. I spend as little time as possible on creating the toile and the sewing. The few toiles I made (I can't believe this, looking back), I put buttons on the front. (!!). So these suggestions below are what I learned to do to speed up the process of making the toile, cutting it out and sewing it up. Note: I have since come across the concept of the bodice block moulage, where you make a very close fitting block with only 1 inch ease. After you have perfected the fit, you then add ease and sleeves. This makes much more sense to me, and will test this out and write about sometime down the track.
How I do it - Overview
I don't make a pattern from my block. I trace around my block with marker, and mark the darts and bust point with the marker also. I want to see the markings, and they make the block easier to sew up and see if and where you make mistakes. The first few times, until you are certain about the measurements, I would also suggest using a marker (a different color?) to make the important measurements to help you with fitting. These are the thing you can mark to help you understand and help fix any fitting issues:
- Upper Bust - Front/Back
- Bust - Front/Back
- Shoulder Slope Front/Back
- Across Chest/Back
- Horizontal Balance Line - Front/Back
Details
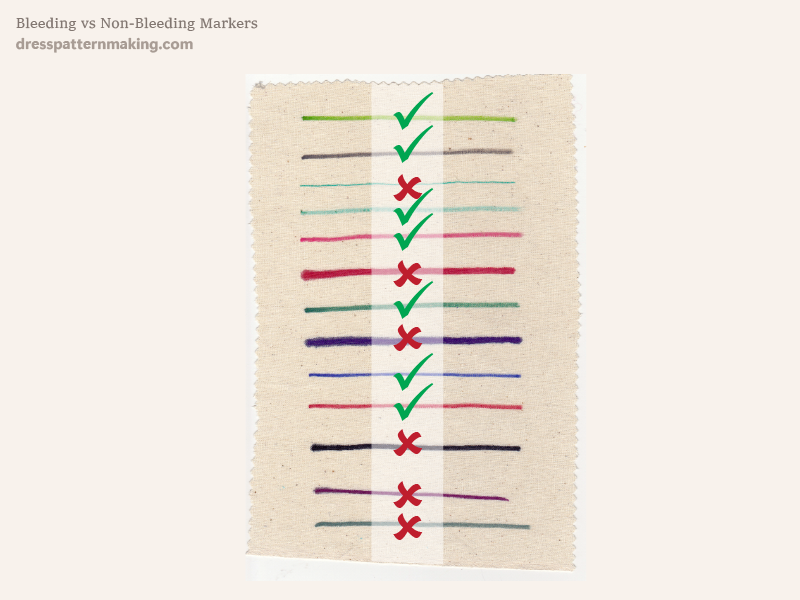
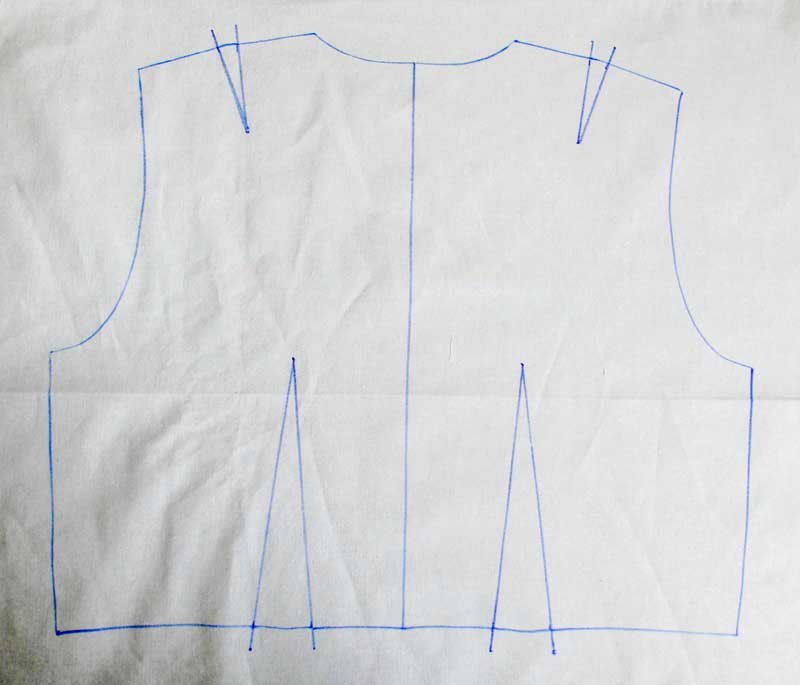
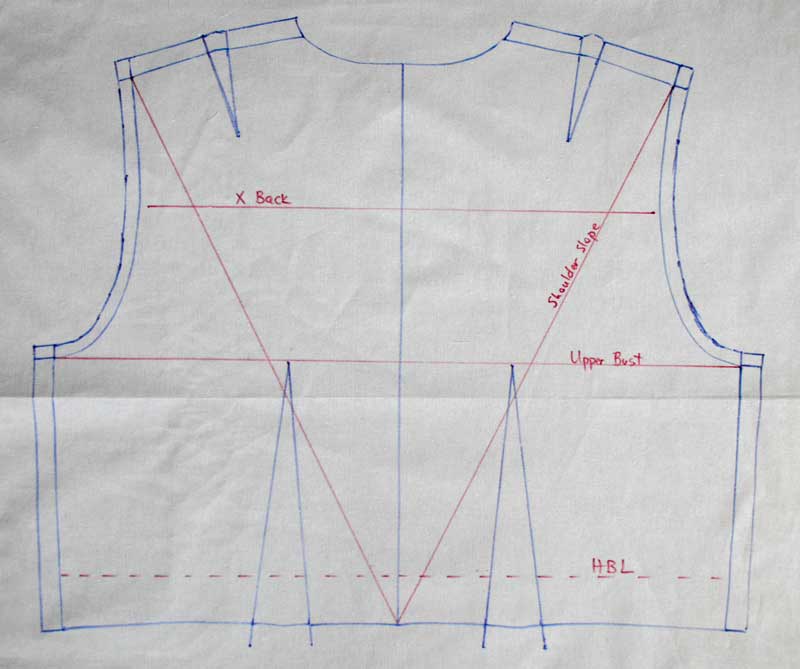
It's important to use a non-bleeding marker, and one that is reasonably thick. The thin ones catch in the fabric and it makes it difficult and time-consuming to trace around the block. Here I have traced around the Bodice Back and drawn in the darts. While drawing the darts I've extended them out 1.5cm as I will need to add seam allowance to the block - I might as well add that at the same time. Note that I have drawn in the Center Back Line.
I then add the seam allowance, note that I do not need seam allowance at the neckline or the waist.
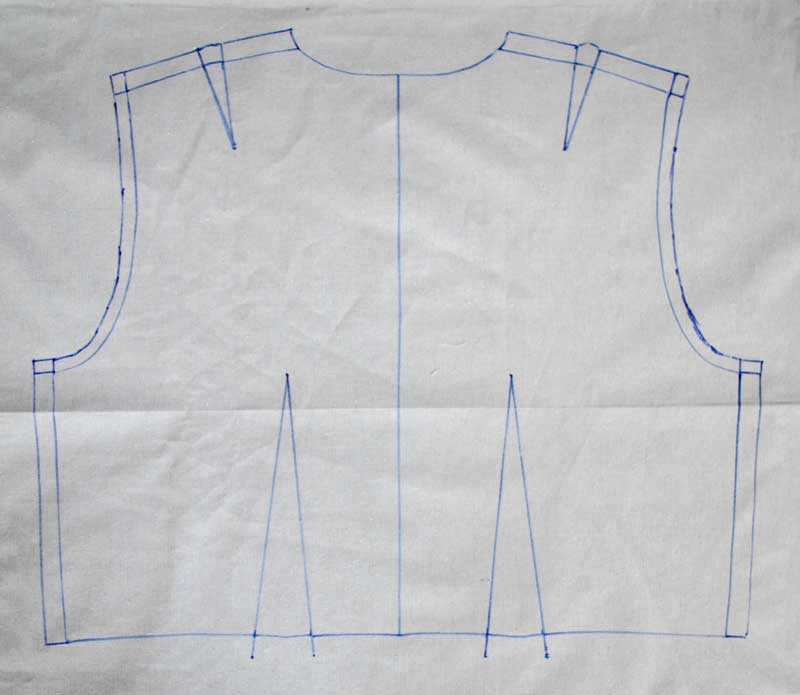
Marking some of the important measurements on the toile helps when you are doing the fitting.
Since the toile will be pinned Center Front, I add about 4cm (1.5 in) to one side, and 6cm (2.3 in) to the other. The one with the 4cm extension will be folded on the Center Front line and sewn just along the Center Front edge. The one with the 6cm extension will be folded at the half-point of the extension, so an extension remains to pin the other piece at Center Front. This reinforcement is needed to be able to easily pin the Center Front together.
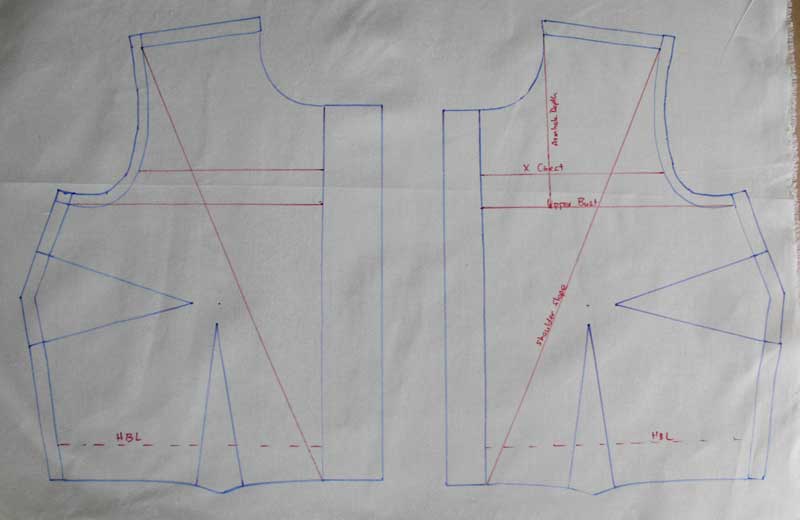
With the toile cut out and the extensions folded back and sewn flat; the toile has a reinforced front and you can clearly see the Center Front Lines.

Before sewing it up
In the images above, there is seam allowance added at the armholes; this is needed when you sew on the sleeves. Herein lies a difficulty; if you are trying it on before putting sleeves on, this extra 1cm (.5 in) around the armhole can make it seem too tight....
Now sew it up
You should be able to sew it up without notching or pinning; the marker can be seen on the other side and makes it easy to line up the darts and seams.
Trying it on
I have to stress this point, as it can be very tricky. Since it's a toile that you want to work with a sleeve, the armhole area will have excess ease. Don't expect it to necessarily fall flat and be perfectly round as it would/should be for a sleeveless armhole. Expect the armhole to be a bit (not a lot) on the large side. If you are confident you have taken your measurements correctly and otherwise it's OK, but the armhole is a bit imperfect, try putting the sleeve on.
The issue of the seam allowance around the armhole
Here is another difficulty; if you want to sew the sleeve onto this first toile, you will need to add the seam allowance around the armhole for the sleeve. BUT... if/when you added a sleeve, you would cut back and clip this seam allowance, as it is taking up part of your armhole. If you cut back and clip this seam allowance before putting the sleeve on - you won't be able to sew the sleeve on. I guess what I'm saying is... you will need to make it first without the seam allowance.

