Basic Collar (Camp Collar)
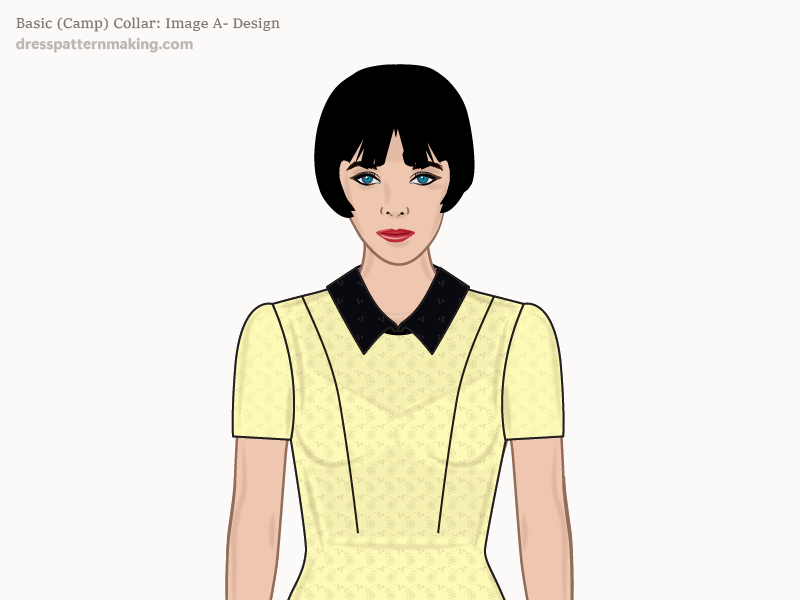
The basic collar is a convertible collar that can be worn open or closed. All you need to make this collar is the neckline measurements of your block; the front neck and the back neck measurements.
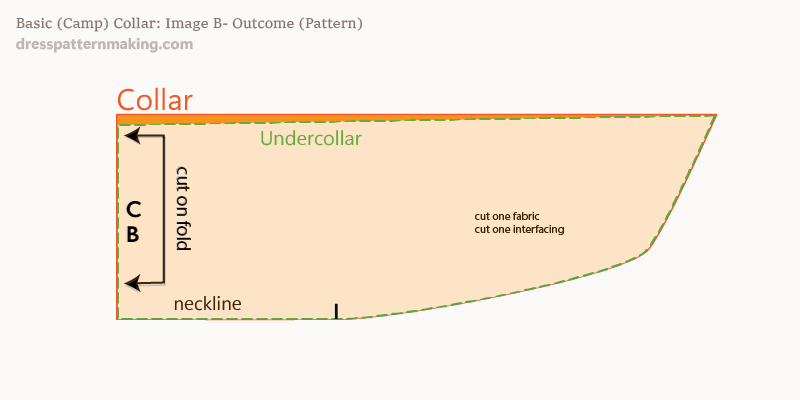
Example: Outcome
Figure B shows the collar that will be created in the step-by-step instructions below. The collar and the under-collar have bee superimposed: the white (semi-transparent) shape on top is the under-collar, the red underneath the collar. (No seam allowance has been added). Note that the collar is drafted as a half-collar. In this case the grain-line is going down the CB. It is more usual for collars to have the grain-line going across the width of the collar, in which case (if this is what you wanted), then you can draft the pattern with the CB line on a folded piece of paper, so that when you cut and open it out you have a full collar. The half-collar is then traced to create the under-collar; this is because the under-collar is slightly smaller (a tiny bit is taken off the width) to make sure the stitch-line is hidden. (The under-collar is not shown).
(Compare with the Basic collar which is created as a half-collar but on the fold. The basic collar under-collar is the same as the upper-collar, meaning a separate pattern piece is not required).
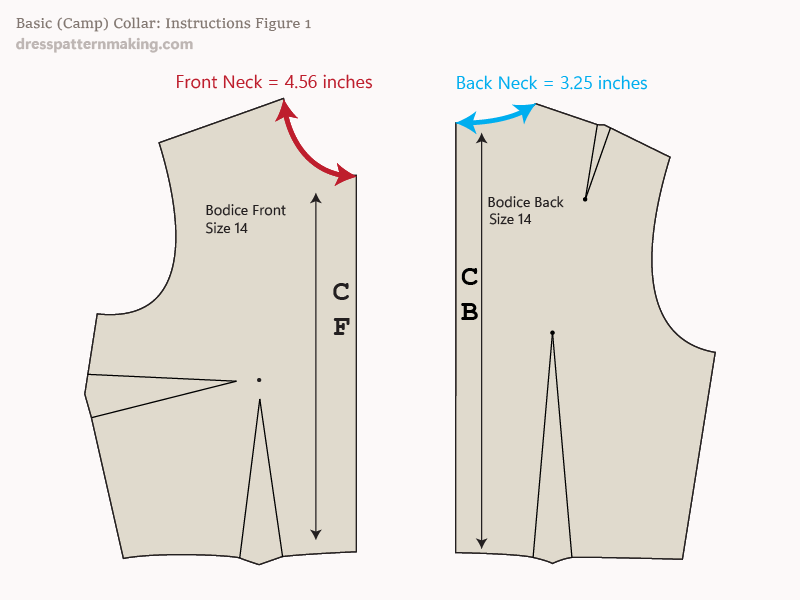
Instructions (Basic Collar) - Figure 1
- Measure the Back Neck curve and Front Neck curve of your Bodice Block.
- Add these two measurements together
In this example the Front Neck is 4.56 inches and the Back Neck is 3.25 inches. Total neckline measurement (for half-block) = 7.81-inches.
Instructions (Basic Collar) - Figure 2
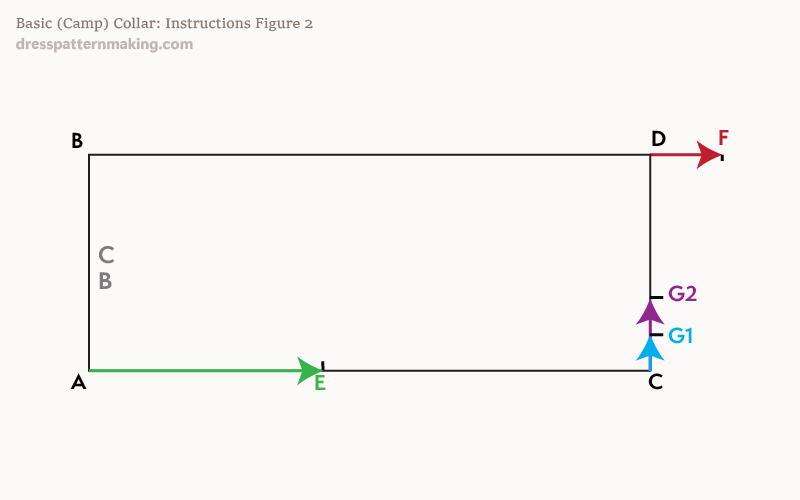
This basic collar can be between 2.5 and 4 inches wide. It is a one-piece collar, and therefore the collar width consists of the stand and the fall of the collar. The roll line, (so where the stand finishes and the fall begins) is generally 1-inch up from the neck. The neckline edge can be straight or slightly convex. Draw a rectangle:
- the height of the rectangle is the collar width (A to B) - I will make it 3-inches.
- the length of the rectangle is the Total Neckline measurement (A to C). In my example 7.81 inches.
Instructions (Basic Collar) - Figure 3
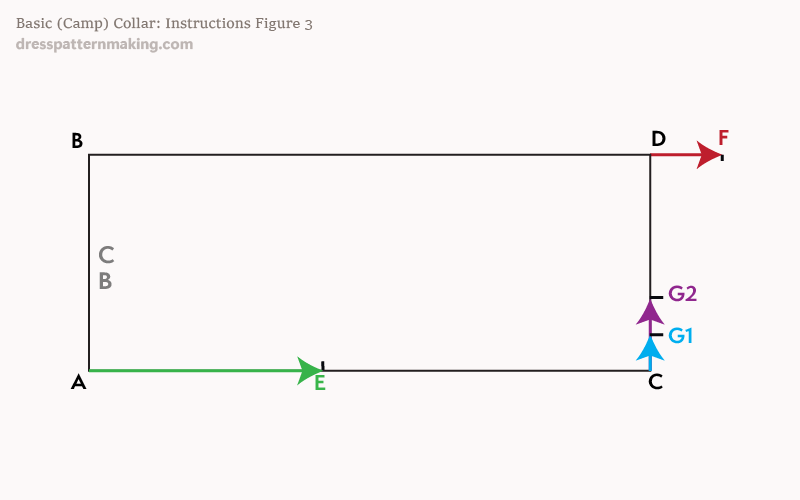
- Using the Back Neck measurement, measure from point A and mark the Shoulder Point E.
- Extend the B~D line for 1-inch and mark point F.
- Measure up from C to mark point G. Point G can be between 0.5-inch and 1-inch from C - it depends on the shape your want for your collar. (See Figure 4).
Instructions (Basic Collar) - Figure 4
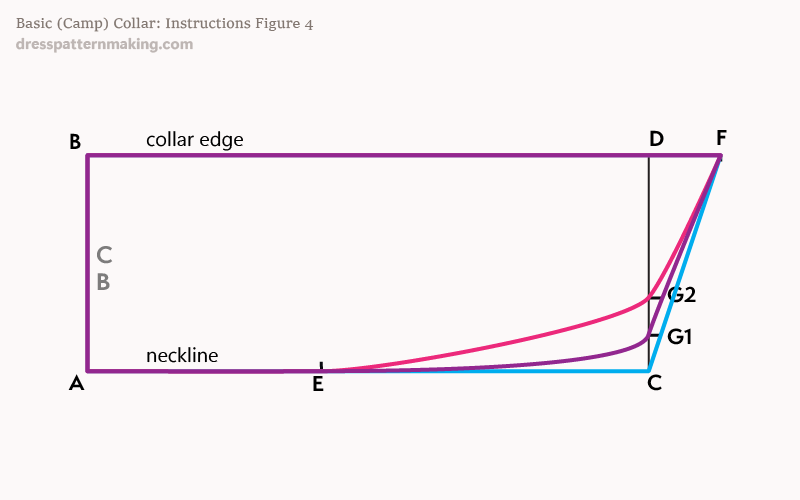
You can create a few different collar Shapes.
- For a collar with a straight neckline edge, draw a line from F to C.
- For a collar with a curved neckline edge, draw a line from F to E, passing through G1.
- For a collar with a more curved neckline edge, draw a line from F to E, passing through G2.
See Figure 5 to better see the shapes of these three collars.
Instructions (Basic Collar) - Figure 5
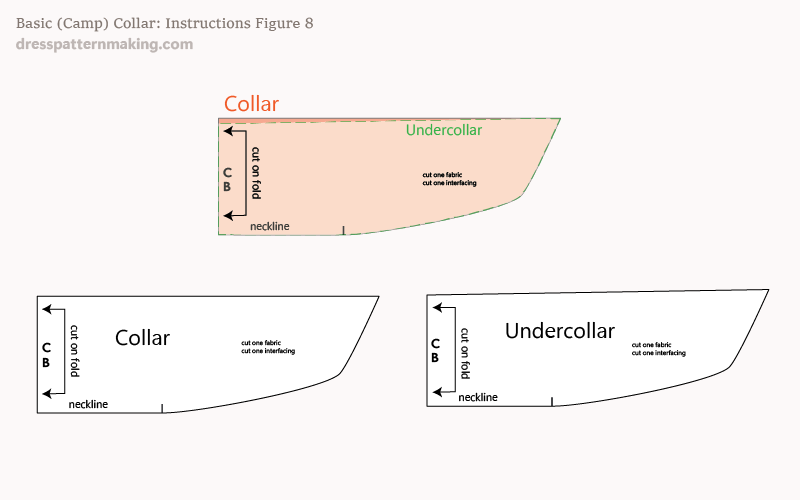
Image 5 shows you the three collars made from the options in Figure 4. Note that this is just the basic shape; the collar edge can be shaped various ways - see Figure 6 for some examples.
Instructions (Basic Collar) - Figure 6
This gives an example of various ways you can shape the collar edge of the Basic Collar. I am using one of the three shapes from Figure 6 - you can apply this to any of them.
Instructions (Basic Collar) - Figure 7
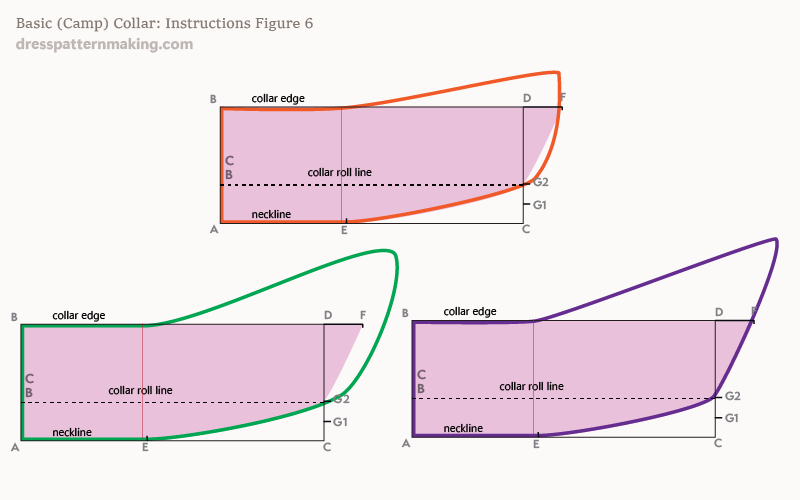
Now for the under-collar - this is a separate pattern piece because it is slightly smaller than the upper collar, so that the seam-line doesn't show. Confession: Now it is essential in the garment production industry to have a separate pattern piece for the collar and the under-collar - for various reasons. The garment pieces are cut by machines, and there are many different people doing different things that need to tie in together, and so separate pattern pieces are necessary. But as far as I'm concerned, creating a separate pattern piece is too much trouble for me; I prefer to use the one pattern piece, cut two of them, and trim a little of the collar edge of one of fabric pieces. That's so much easier than making a separate pattern piece. Your choice if you want to go to this trouble, if you are making your own patterns for yourself.
- Trace the collar pattern piece.
- Mark down 1/8-inch from the collar edge of the CF and draw a line to the collar tip.
- Remove this piece (shown as red shading in the image) for an under-collar pattern piece.
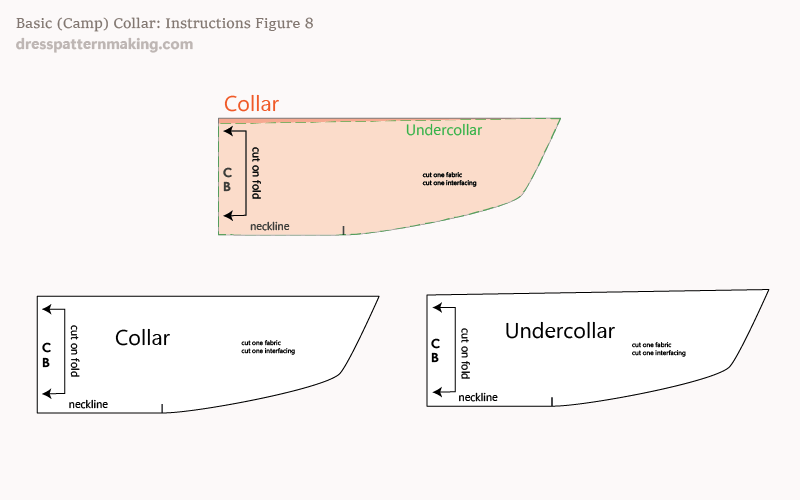
Instructions (Basic Collar) - Figure 8
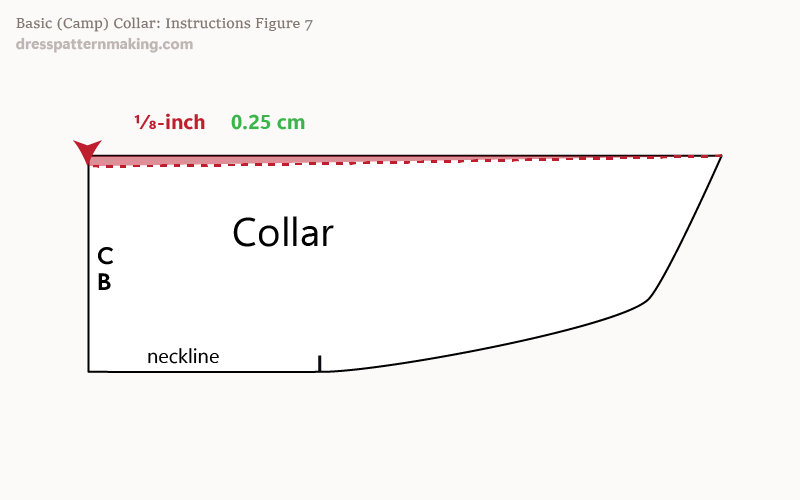
- Don't forget to write cutting instructions, mark the neckline notch, label your pattern piece, etc.
- Also add seam allowance (not done here).
The collar, the under-collar, and both superimposed are shown; the under-collar is semi-transparent white, the collar is the red underneath.
