Skirt with Lowered Waist
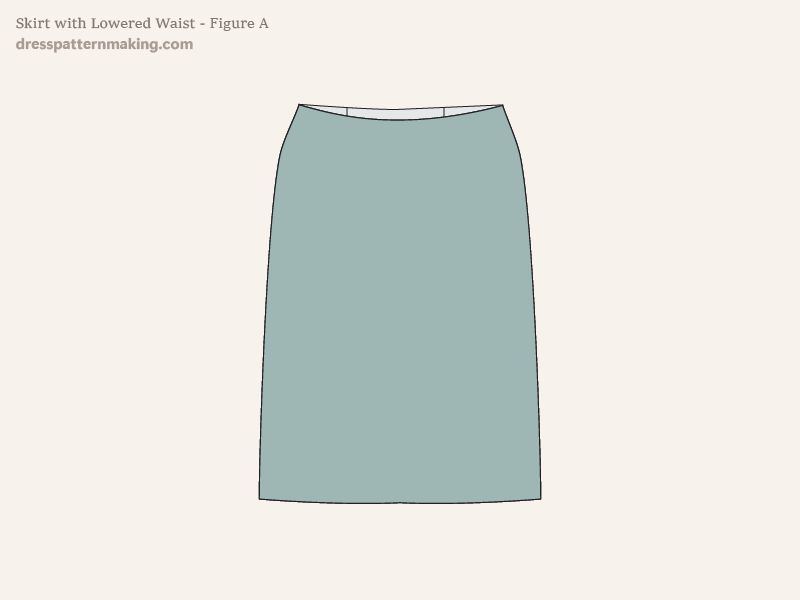
This skirt is lowed 2.38-inches (6 cm) from the waist. When the skirt is lowered like this you may be able to do away with the need for darts. This will depend on the individual figure. With a lowered waist you will need to finish off the waist with either a contoured waistband or a facing. You cannot finish it off with a straight waistband. Can you also attach a lining to the facing if you want a fully lined skirt. Note that is you only lower the skirt 1 inch or less, you will still need to have darts. The more lowered the waist, the easier it is to do away with the darts. The lowered waist can be added to any skirt, in this case I am just using the standard straight skirt that is made from the block without any additional design details. You could add flare, design lines (turn it into a 6-gore skirt), etc.
Example: Outcome
Figure B shows the final flared skirts overlaid on the original 2-Dart block.
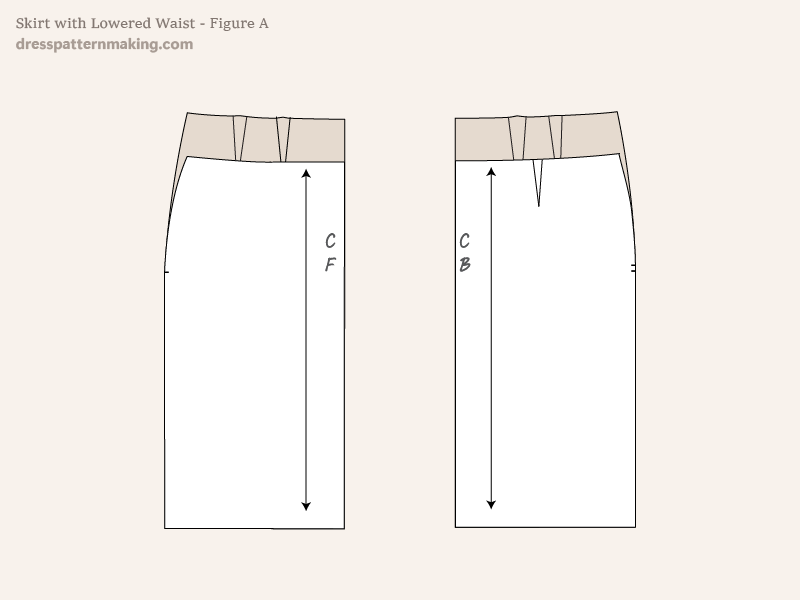
Instructions: Skirt with Lowered Waist - Figure 1
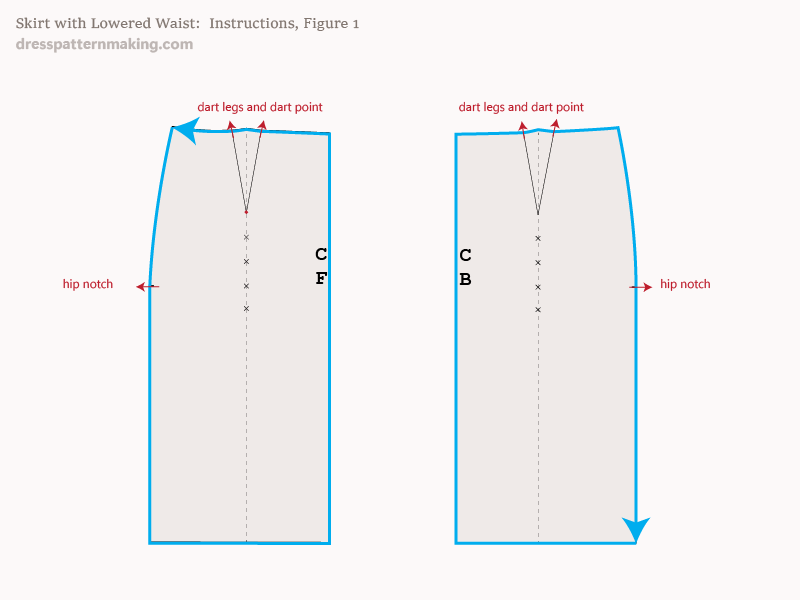
- Trace your block onto paper.
- Make sure you mark the dart legs, the dart points and the hip notches.
Instructions: Skirt with Lowered Waist - Figure 2
Remove your block after you have finished tracing and marking points, then:
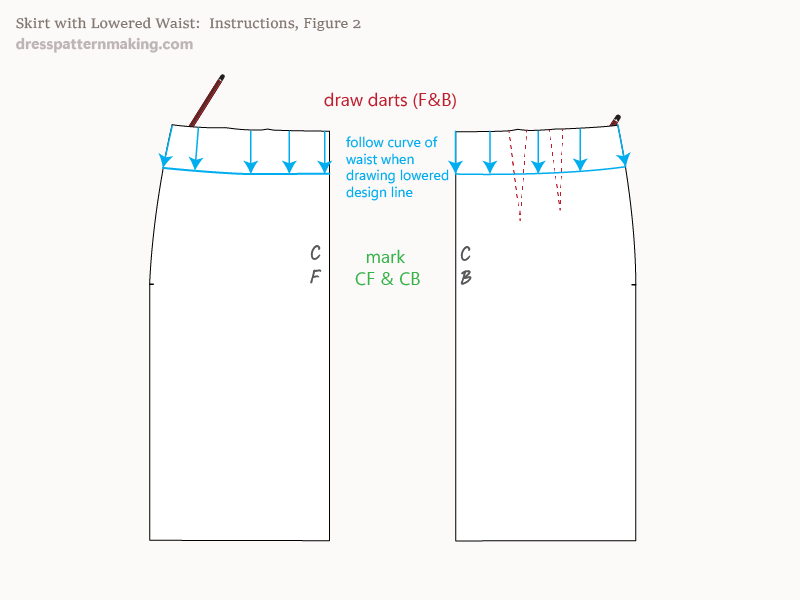
- Draw in the darts.
- Mark the CF and CB on the working pattern pieces.
- Measure down from the waist for 2.38 inches (6 cm) and draw the new waistline. Make sure you measure down 6cm all along to end up with the same curve. Do not draw a straight line across.
Instructions: Skirt with Lowered Waist - Figure 3
Although you need ease in the waist of a skirt at the natural waistline, you actually don't need ease at a lowered waistline. Due to the shape of the body in most cases the lowered waist with ease will mean the skirt will fall even lower on the hip.
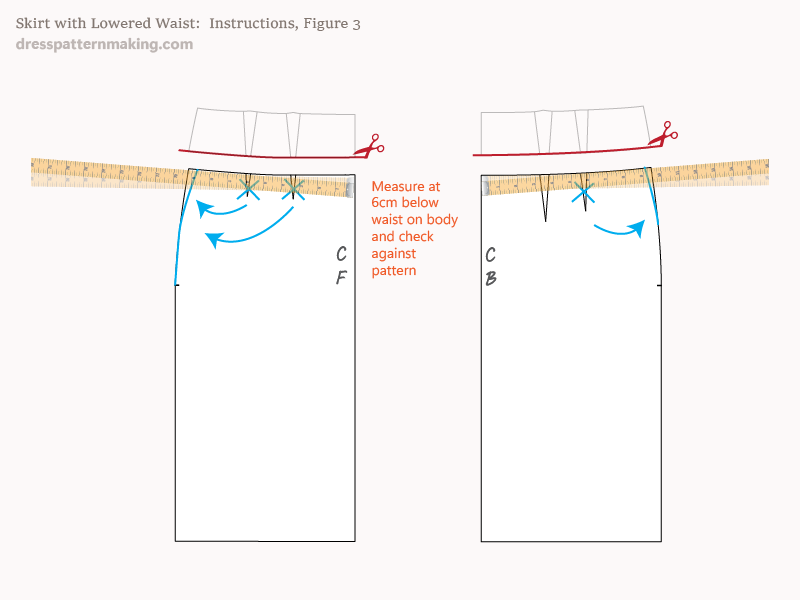
- Cut along the new waistline and discard the top portion.
- Measure your body at 6cm below your waist, measure the pattern at the new waistline and compare.
- You will try to move what remains of the waist darts AND any ease into the side seam. Moving more than half-inch into the side seam is not recommended, so in some cases you may still need a dart.
If you do move 0.5-inch into the side seam but that leaves you with very small darts, you could just use a dart. In most cases you wouldn't want or need two darts, so you could move them together. All of this depends on the individual figure. You may find that there is a lot of ease when you compare it to your body, and need to at least one dart. In this image I moving all the front darts into the side seam, but leaving one dart in the back.
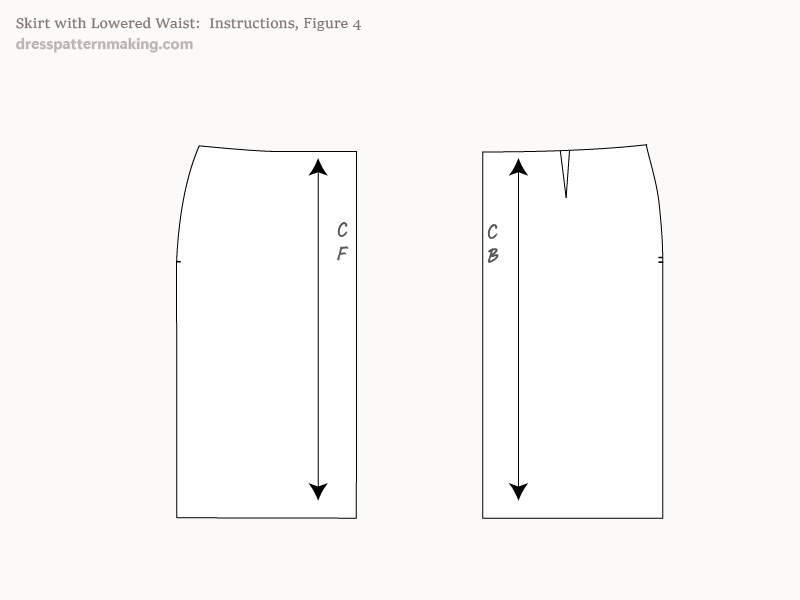
Instructions: Skirt with Lowered Waist - Figure 4
These are the final pattern pieces. I have moved the back waist dart over so that it is in-between where the two original darts were.
- Add grainline.
- You could put a contoured waistband on this, or finish it off with a facing.
- You would still need to add seam allowance and other details (placement of zip, etc).
