Skirt with Accordion Pleat
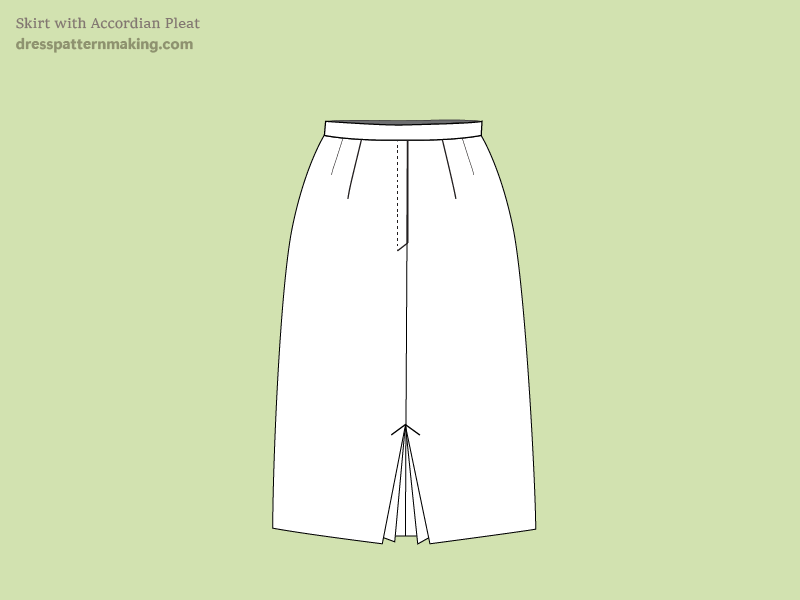
This is a straight skirt with an accordion (kick) pleat that allows a little more 'stride room' when walking. Traditionally accordion pleats are put in the back of the skirt. In these instructions I will also add a little flare to the side seam as well. If you wanted to make this a pencil skirt you could add more stride room by adding a slit up the back or slits at the side seams. Note that accordion pleats are generally defined as pleats that are the same width through the whole pleat, but in this kick pleat they are narrower at the top than at the bottom.
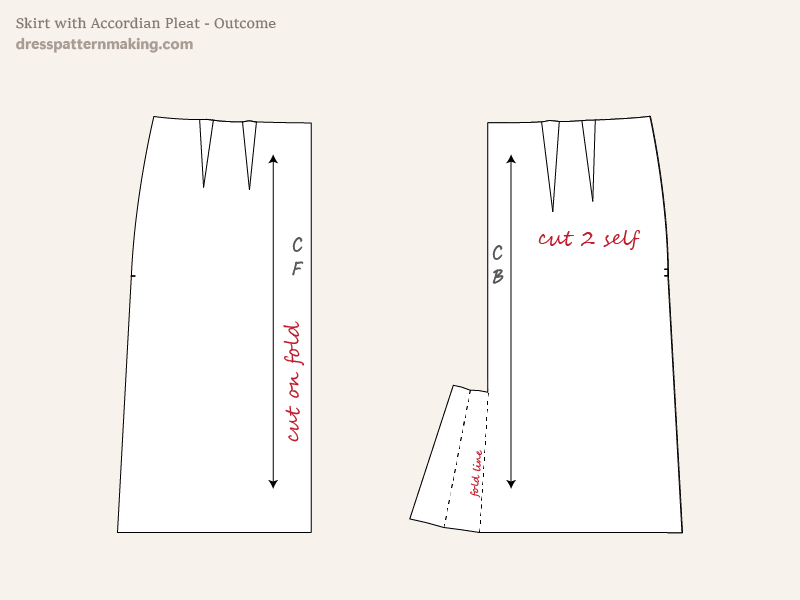
Example: Outcome
Figure A shows the final Skirt (Working*) Pattern Pieces.
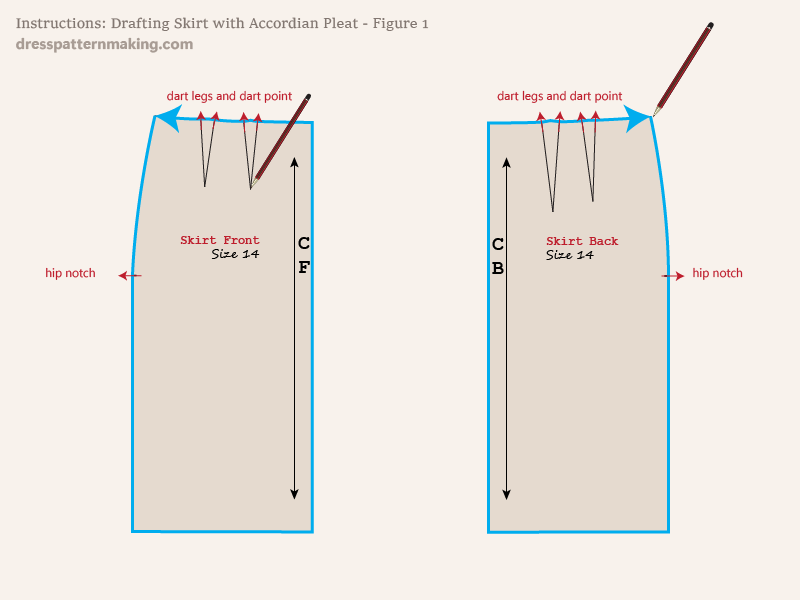
Instructions: Drafting the Accordion Pleat Skirt - Figure 1
- Trace your skirt blocks onto paper.
- Make sure you mark the dart legs, the dart points and the hip notches.
Instructions: Drafting the Accordion Pleat Skirt - Figure 2
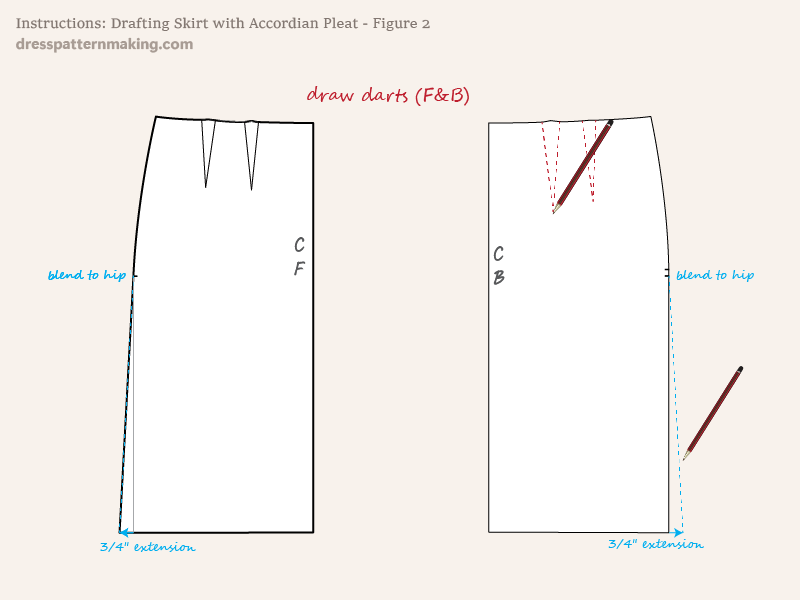
Remove your block after you have finished tracing and marking points, then:
- Draw in the darts.
- Mark the CF and CB.
We'll add an extension to the side side; adding a slight flare will help the pleat close.
- Square out 0.75-inch from the side seam at the hem.
- Blend from that point up to the hip.
- Do this for both the front and the back.
The front skirt is finished (except for seam allowance, cutting instructions, grainline, etc), so it will not be shown again until the last image.
Instructions: Drafting the Accordion Pleat Skirt - Figure 3
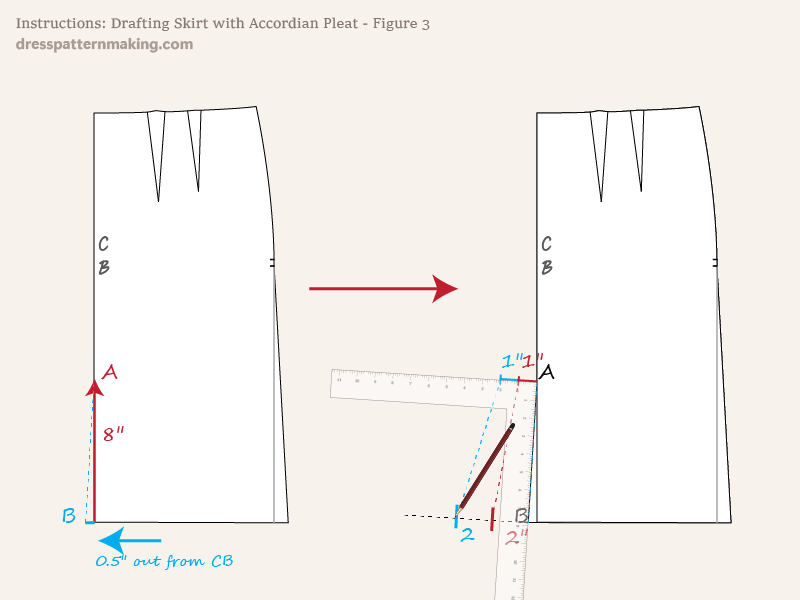
- On the CB line, measure up 8-inches from the hem to point A.
- Measure out 0.5-inch from the hem fro point B.
- Draw a line from A to B.
This is the line on which we will build the pleat. Squaring the pleat from this angled line rather than straight from the CB line will help the pleat stay closed.
- Squaring from the A~B line, measure out from A and mark at 1-inch and 2-inches.
- Squaring from the A~B line, measure out from B and mark at 2-inches and 4-inches.
Instructions: Drafting the Accordion Pleat Skirt - Figure 4
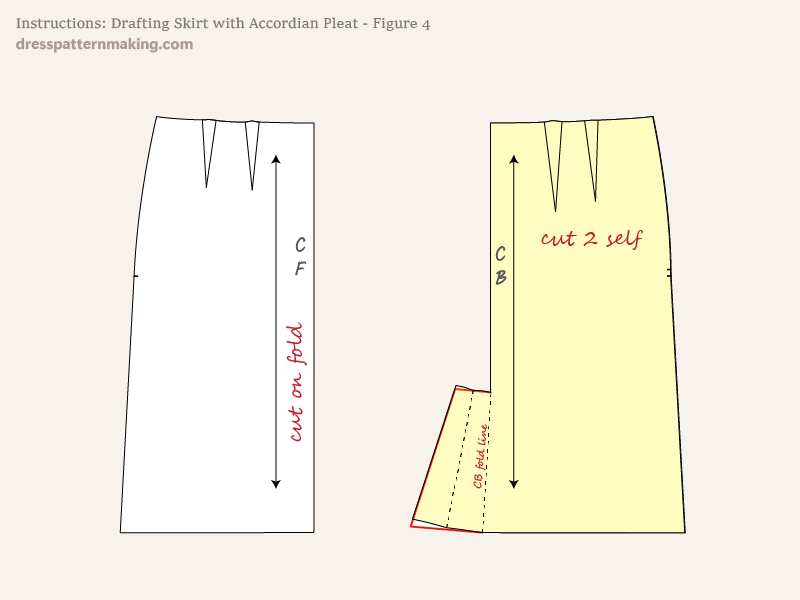
The final thing to do to finish off the pleat is true the base and the top of the pleat so that when they are folded they align to each other at the top and align to the hem at the bottom. In the image the grey line shows what we had at the end of Figure 3, and the pattern shows how it has been finished off. One way to do this, and what is mostly suggested in patternmaking books is to fold up the paper you are working with; you fold the pleats as they would sit when sewn up, and either trace the hemline with a tracing wheel, or just cut with scissors. You will end up with a hemline as shown in this image.
However, if this is confusing, or your paper is very stiff and you find it hard to do, you can create the same shape by taking and applying measurements. See Figure 5 for instructions to finish off the top and bottom of the pleat with that method. You then need to finish of this pattern as it does not pertain to the pleat (e.g. mark zip placement), add seam allowance, etc. Remember to mark the corner point so that you don't forgot to indicate this on your final production pattern.
Instructions: Drafting the Accordion Pleat Skirt - Figure 5
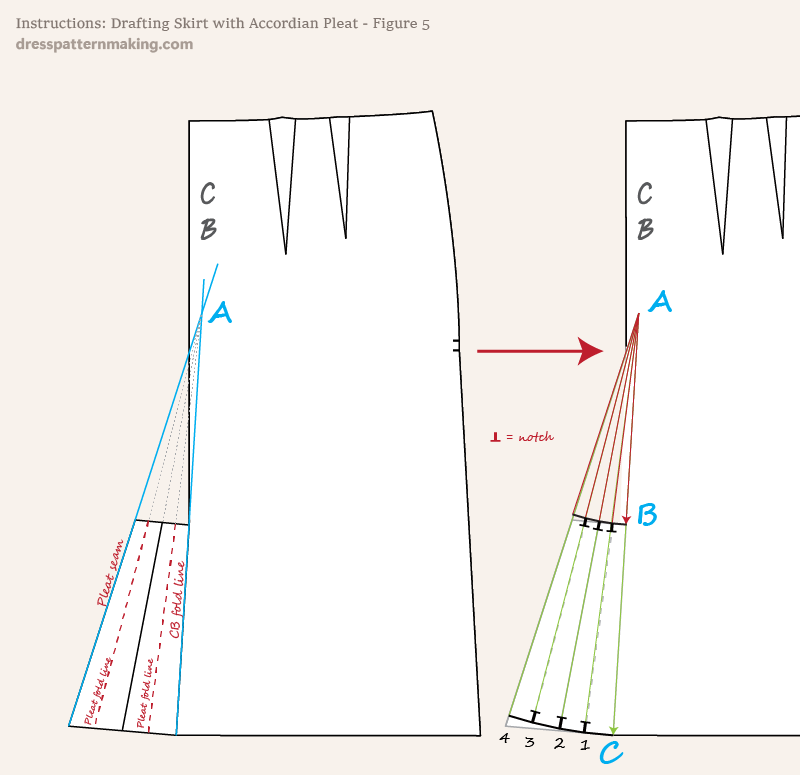
- Continue both the CB fold line (from the hem upwards), and the pleat seam line (from the hem upwards), until they cross.
- At the top and bottom of the pleats mark the fold lines in the middle of each pleat (indicated by dashed red lines).
- Measure down from point A to B, which is the top of the pleat at the CB line.
- Using the A~B measurement, measure down from A towards points 1 to 4, and make a mark.
- Measure down from point A to C, which is the bottom of the pleat fold line.
- Using the A~C measurement, measure down from A towards points 1 to 4, and make a mark.
- Draw a line joining the 5 points at the top of the pleat.
- Draw a line joining the 5 points at the bottom of the pleat.
- You would usually copy this working pattern to make a clean production pattern), when you do so make sure you notch points 1, 2 & 3 at the top and bottom of the pleat. (shown by the black notch marks). These will help you fold the pleat.
Note that although in this image it may seem that the pleat top and bottom are curved, there are in fact four straight lines between the points.
Final Note
Trace this off onto fresh paper and add seam allowance and make sure all notches, darts and inner corner points are marked, as well as zip information. You would also need to draft a waistband*, or continue working on this pattern and draft the yoke, etc.

