Bodice Front Style 40
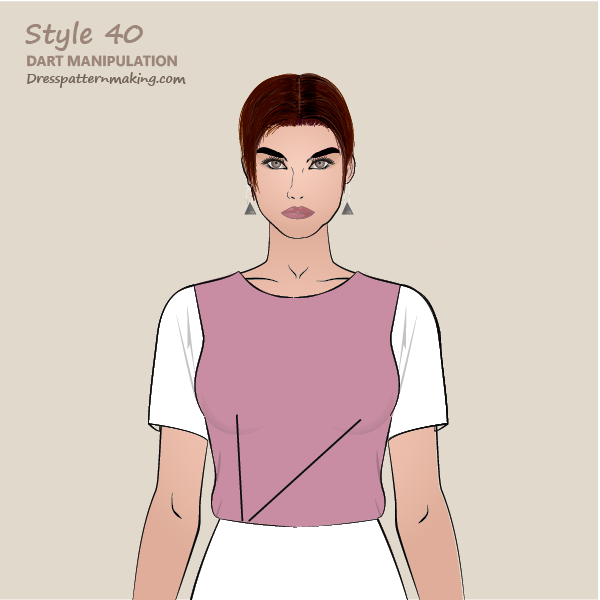
The bodice of this garment has two asymmetric darts. The dart on the left runs from the Bust Point to the waist . The dart on the right runs from the Bust Point to the same waist point as the first dart. This creates an asymmetric V-shape.
Example: Outcome
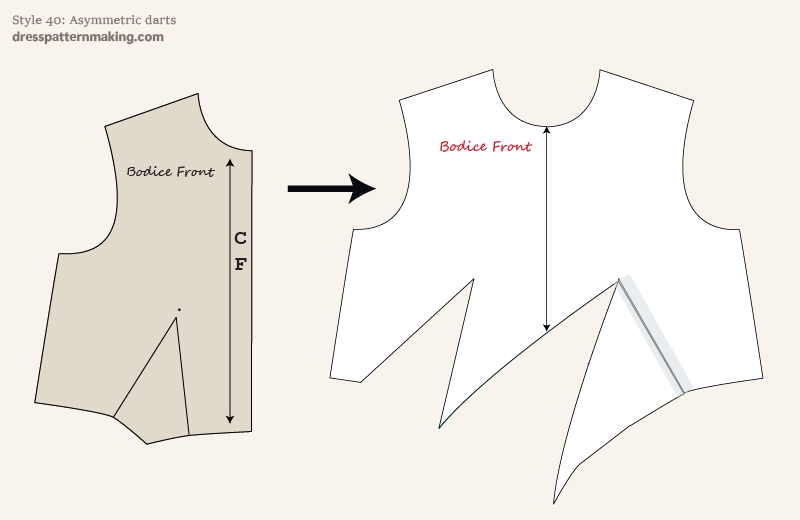
Figure B shows the block being used on the left (1-Dart Block), and the pattern that will be created (Style 40) on the right.
The focus of these instructions is covering the theory and practice of manipulating darts and the exercise finishes after the dart manipulation has been done. For production ready patterns you would need to take further steps to add seam allowance, pattern labels, pattern piece numbers, the grainline, etc.
Overview: how to approach this manipulation
This style will be created by
- pivoting the full dart value into the waist dart style-line on the left half-block.
- turning the block over and tracing the other half-block (creating a full-block pattern).
- then using the cut-and-spread method to finish creating the pattern.
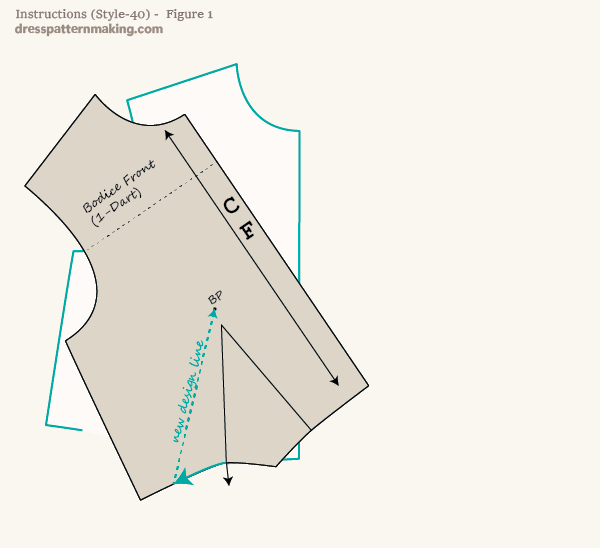
Instructions (Style-40) - Figure 1
You can use either the 1-Dart or 2-Dart Block for this style. I will be using the 1-Dart Block.
- Draw the new style-line according to the image flat.
- Trace the half-block and move the waist dart into the new style-line.*
- Make sure you mark the Bust Point.
*Moving the waist dart of the 1-Dart Block into the new style-line is only indicated in the image, it is not covered in step-by-step detail. This is because this is basic dart manipulation which you should be able to do yourself by this stage. If you are unsure of how to do this, revise Styles 01 - 16.
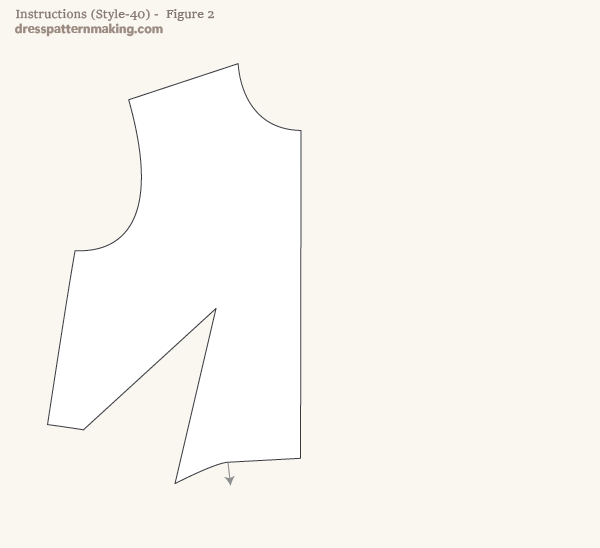
Instructions (Style-40) - Figure 2
- Draw the dart legs to the Bust Point. You do not need to finish off the dart or create a dart point.
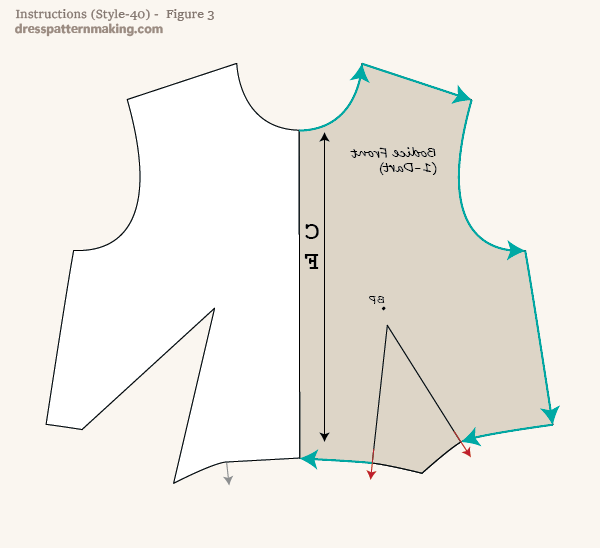
Instructions (Style-40) - Figure 3
- Turn the block over, lining up the CF, and trace the block as is (i.e. no pivoting the dart).
- Mark the Bust Point.
- Mark the dart legs.
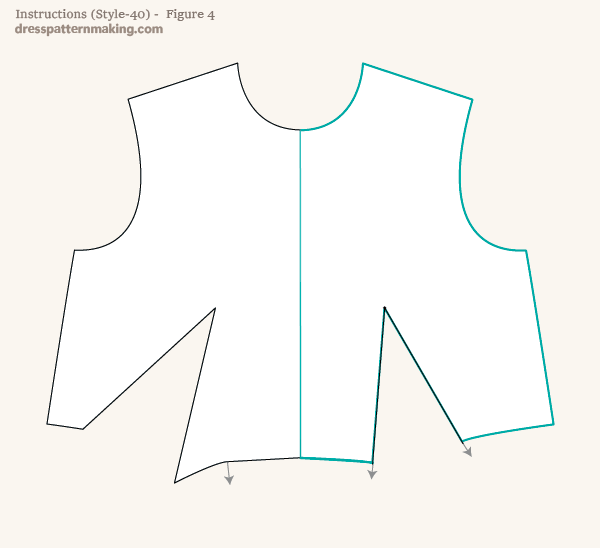
Instructions (Style-40) - Figure 4
- Draw the dart legs of the right hand side of the pattern to the Bust Point. Again, you do not need to finish off the dart or create a dart point.
Instructions (Style-40) - Figure 5
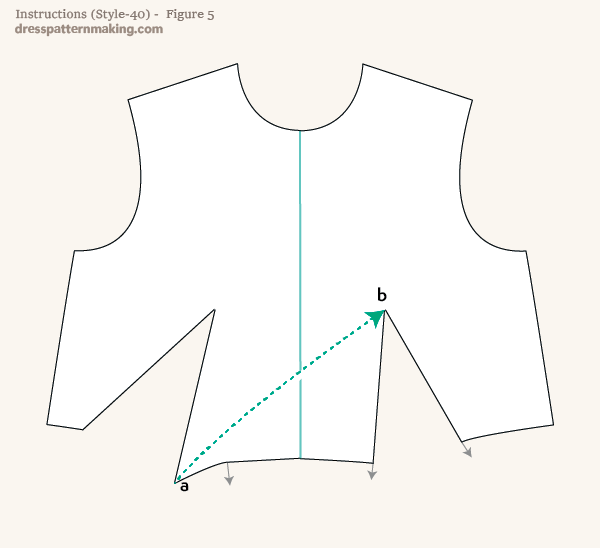
- Draw a design line, as per the design flat, from waist point (A) to Bust Point (B).
Instructions (Style-40) - Figure 6
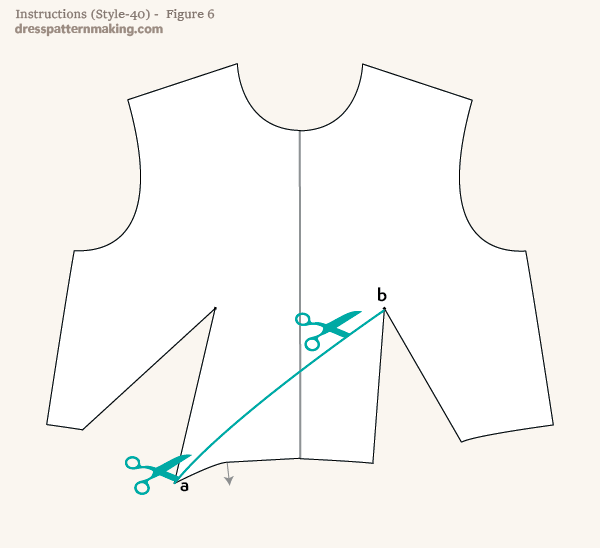
- Cut along the design line, leaving a hinge at point B.
Instructions (Style-40) - Figure 7
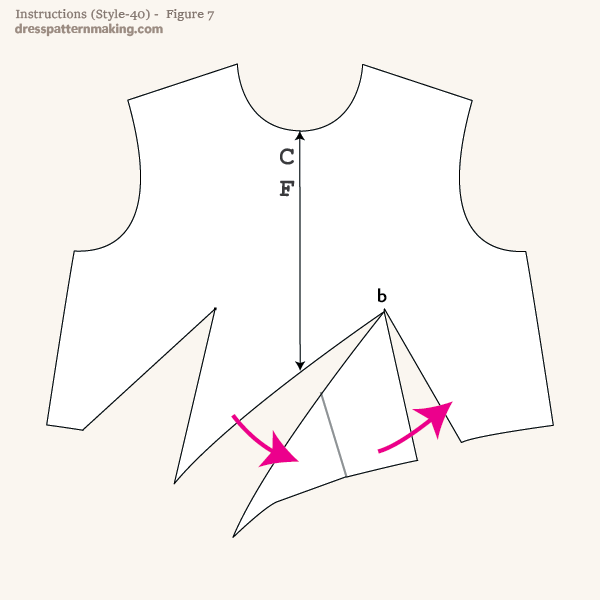
- Close the right hand side seam dart.
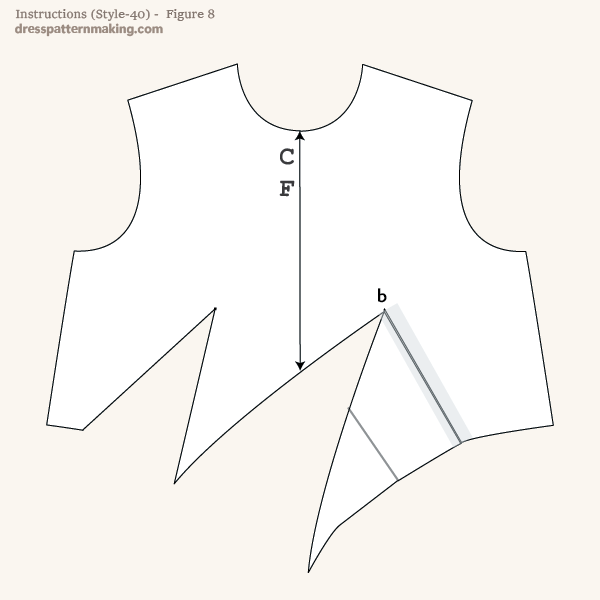
Instructions (Style-40) - Figure 8
- Secure sticky tape.
The working copy is shown. You may prefer to create a clean copy before adding seam allowance, cutting instructions, grainline, etc.
