A-Line Skirt from 1-Dart Block
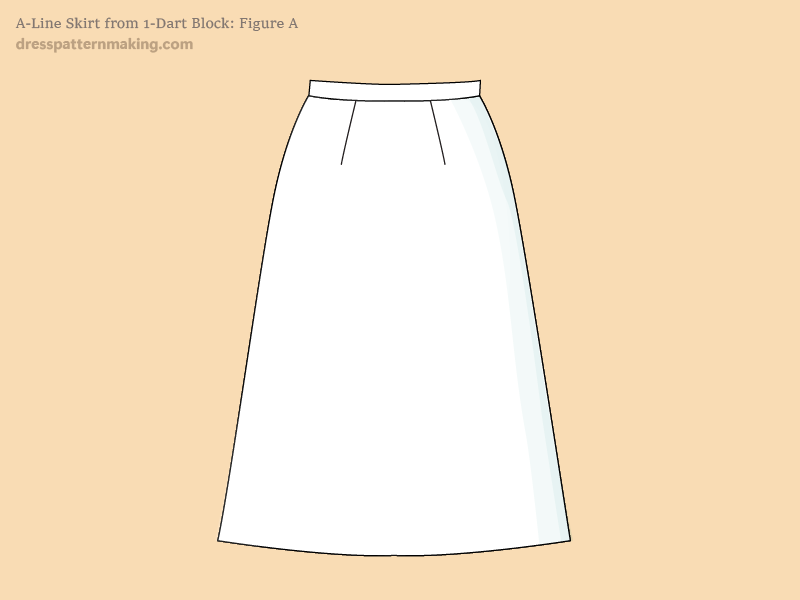
This A-line skirt is created by closing part of the waist dart and adding an extension to the side. I will be using the cut and spread method in these instructions. Note that this A-Line Style 01 differs from Style 02 made with the 2-Dart Block in that is has less flare in the hemline; a total of 12 inches is added to the hemline of the block.
Example: Outcome
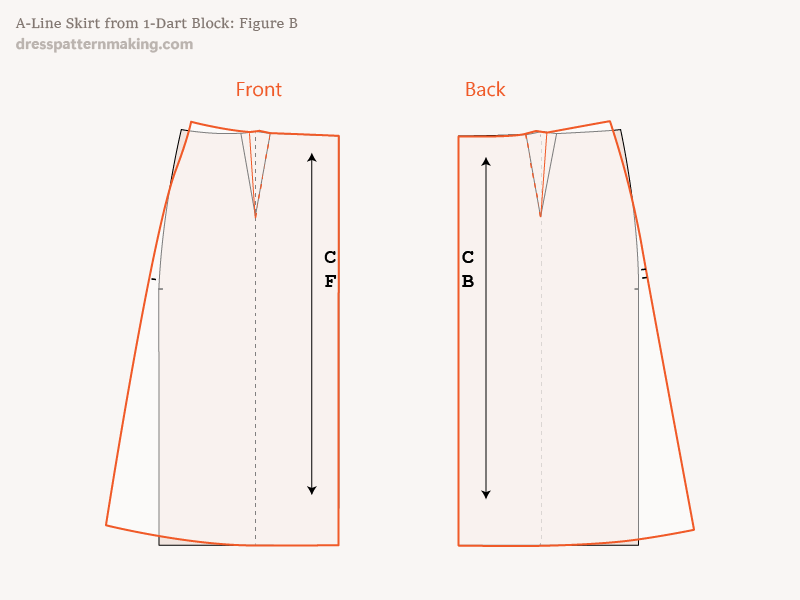
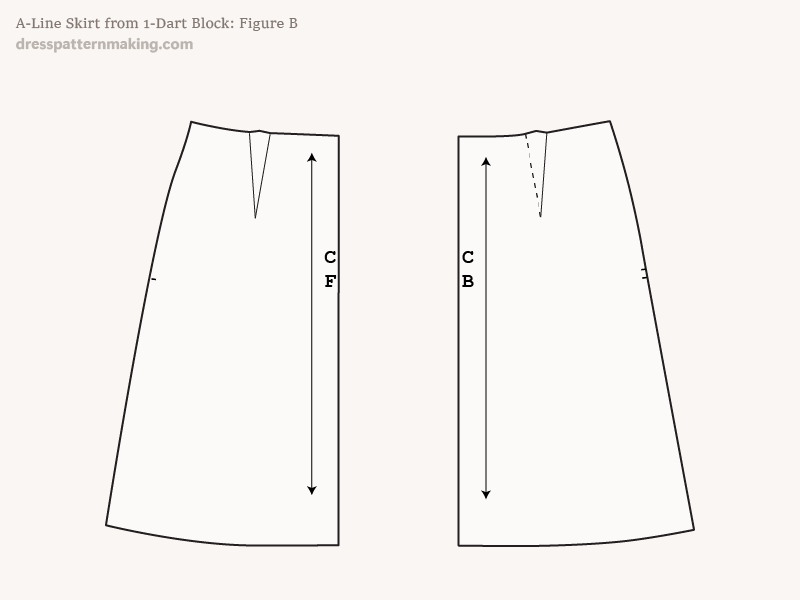
Figure B shows the final flared skirts overlaid on the original 1-dart block. Although the Front & Back may seem identical in this image, often there is some difference. The widths of the block may be different, and the dart values of the front and back are often different. If the front and back are identical in width and dart values, you could just draft one pattern piece, then trace it out twice to get your Front and Back pieces (to add details such as zip, etc that would only be marked on only the front or the back).
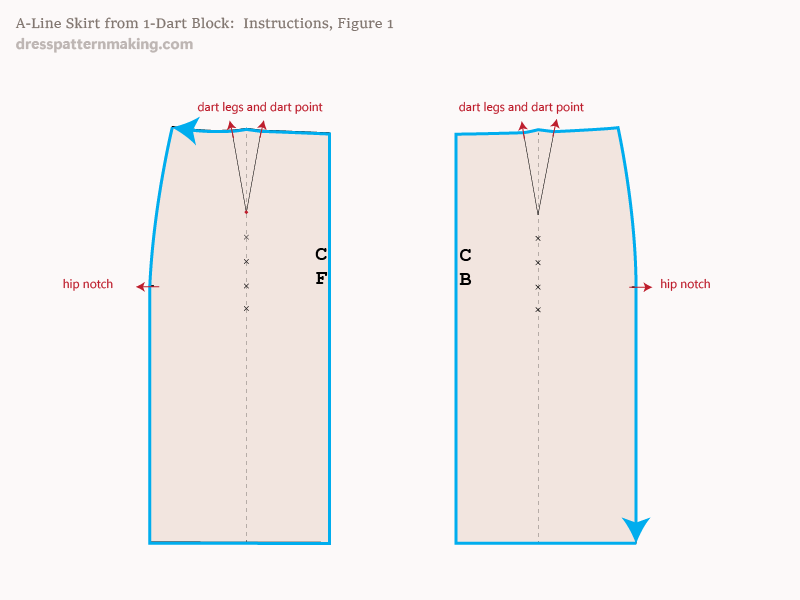
Instructions (A Line Skirt from 1-Dart Block) - Figure 1
- Trace your block onto paper.
- Make sure you mark the dart legs, the dart points and the hip notches.
Important Note: I am showing you the drafting of the Front and Back at the same time, but you would normally first draft the Front, then when finished that, draft the Back.
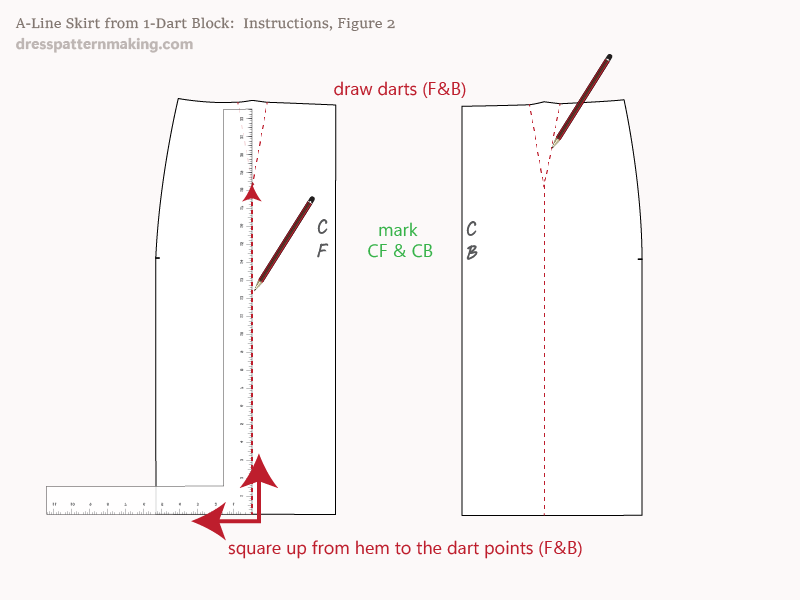
Instructions (A Line Skirt from 1-Dart Block) - Figure 2
Remove your block after you have finished tracing and marking points, then:
- Draw in the darts.
- Mark the CF and CB on the working pattern pieces.
- Draw lines from the hem to the waist dart points, squaring up from the hemline.
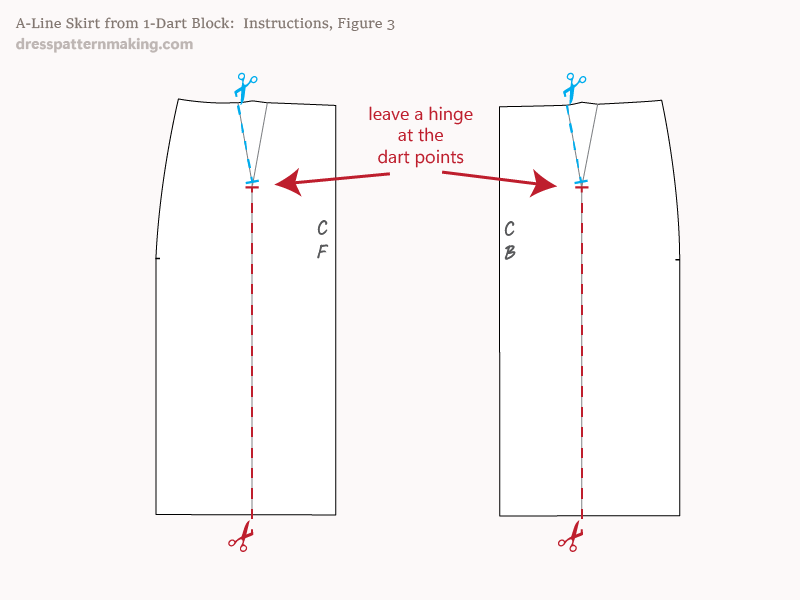
Instructions (A Line Skirt from 1-Dart Block) - Figure 3
- Cut along the line drawn in the last step; from the hemline to just before the dart point.
- Cut along one of the dart lines from the waist towards the dart point, stopping just before the dart point and leaving a hinge of about 1/8-inch.
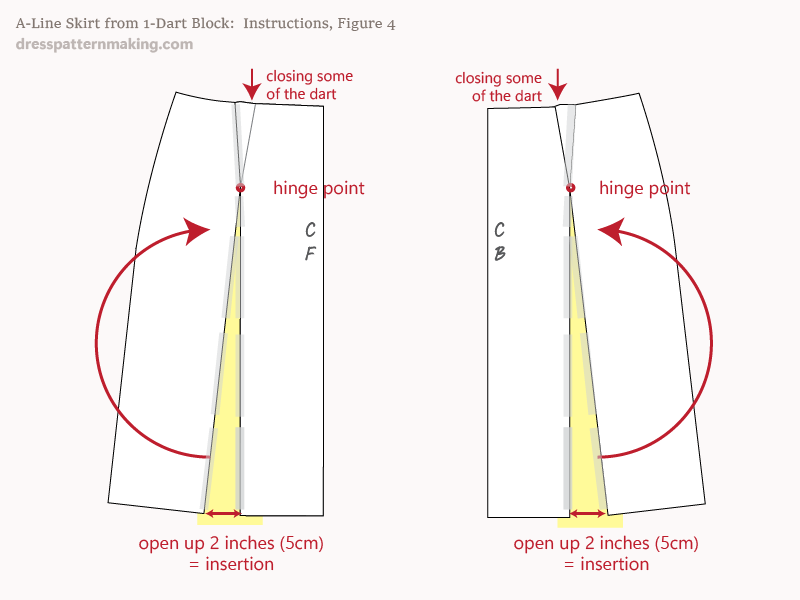
Instructions (A Line Skirt from 1-Dart Block) - Figure 4
I am going to add 12 inches to the total hem of this skirt which will be spread evenly between the front and the back. This means 3 inches for the Front, and 3 inches for the Back, since we are working with half-blocks. Firstly we'll insert 2 inches in the hem. In the next step we'll add a 1-inch extension to the side*.
- Pivot the side pattern piece to close some of the waist dart; close it until the bottom opens 2 inches.
- Put paper underneath to fill in the open section.
- Tape the pieces together.
In this image the paper is shown in yellow.
*Flare is usually added an insertion and and an extension. The extension amount is half the amount of the insertion.
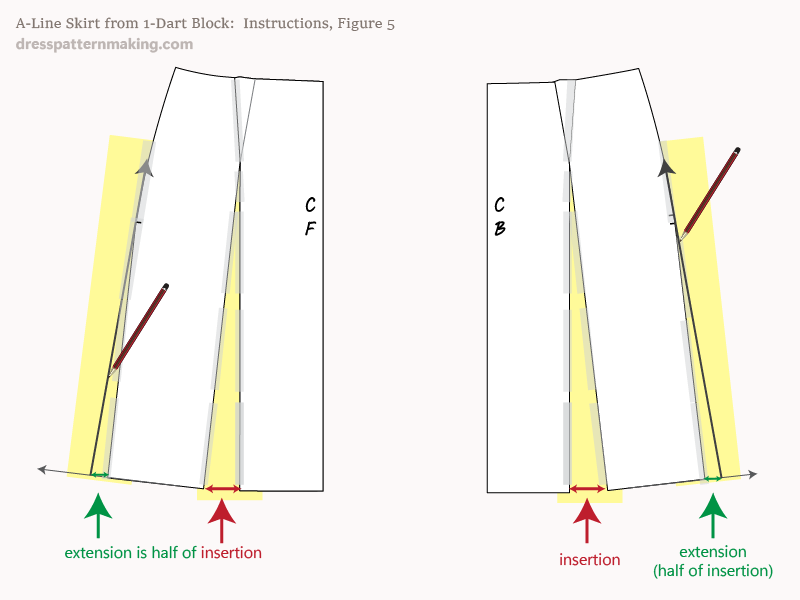
Instructions (A Line Skirt from 1-Dart Block) - Figure 5
- Measure out at the side seam for half the amount that was inserted - in this case, half of the 2 inch insertion means a 1 inch extension.
- Draw a line from that point up to blend to the hip.
Instructions (A Line Skirt from 1-Dart Block) - Figure 6
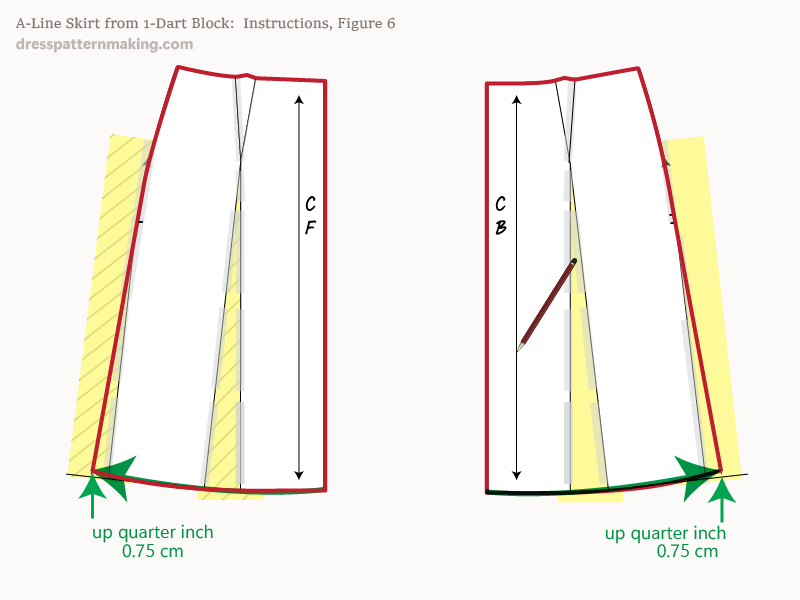
- The hemline needs to be redrawn. Raise the side seam edge 1/4-inch, then blend from CF to the that new point using a curved ruler.
- Finish cutting out the pattern (outline shown in red).
- You also need to add the grainline; the A-line skirt is always cut on the straight grain to give the straight line to the hem. I have double headed arrow, if you have directional fabric, you would place the arrow in one direction only.
Pattern Pieces
Figure 7 shows the cleaned up pattern pieces. This is not a final pattern as there still various finishes; zip placement, waistband, seam allowance, cuttting instructions, etc.
Final Note
Generally this would be the working pattern. You would trace this off onto fresh paper and add seam allowance, cutting instructions etc. You would also need to draft a waistband*, or continue working on this pattern and draft the yoke, etc.
** In these Elements pages I am not giving instructions to create a final pattern; that is found in the Pattern Menu. In these pages I am covering the theory for key parts of drafting patterns. In the menu there will be further information on Skirt Finishes such as straight waistbands, contoured waistbands, yokes, etc. You will need to use this in conjunction with other elements to create a finished pattern.

