Flared Skirt 1
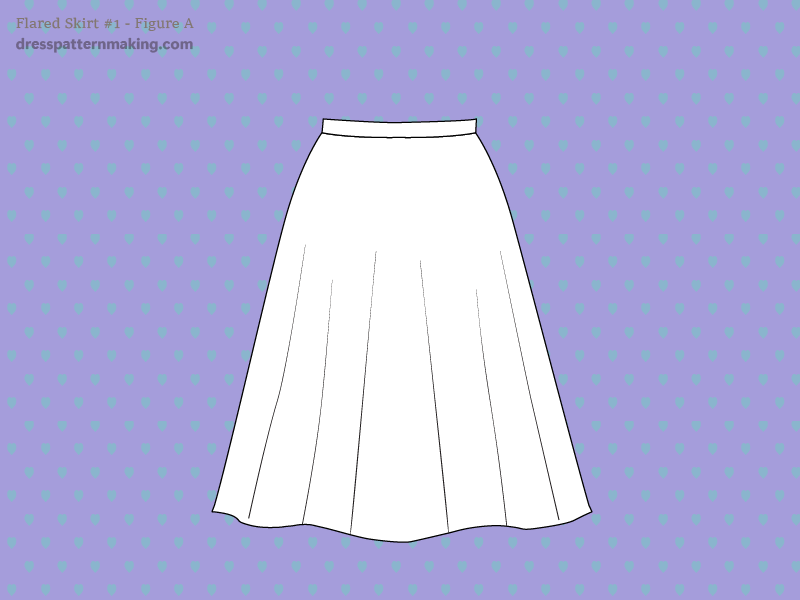
This flared skirt has more hem area added by closing the waist darts; the waist darts are closing completely and that value is transferred to the hem. An extension can also be added to the side seam to give a bit more flare and further flare can be added by cutting and spreading beyond the darts (See Flare Skirt #2). I will be creating the basic flared skirt using the 2-Dart Block and adding an extension to the side seam. If you create this flared skirt with the 1-Dart Block, you will actually get less flare in the skirt front than with the 2-Dart Block. This is assuming you have created the 1-Dart Skirt Block from the instructions on this website. If you want an explanation of why this is, see Figures 4 & 5 in the article: A-Line & Flared Skirts.
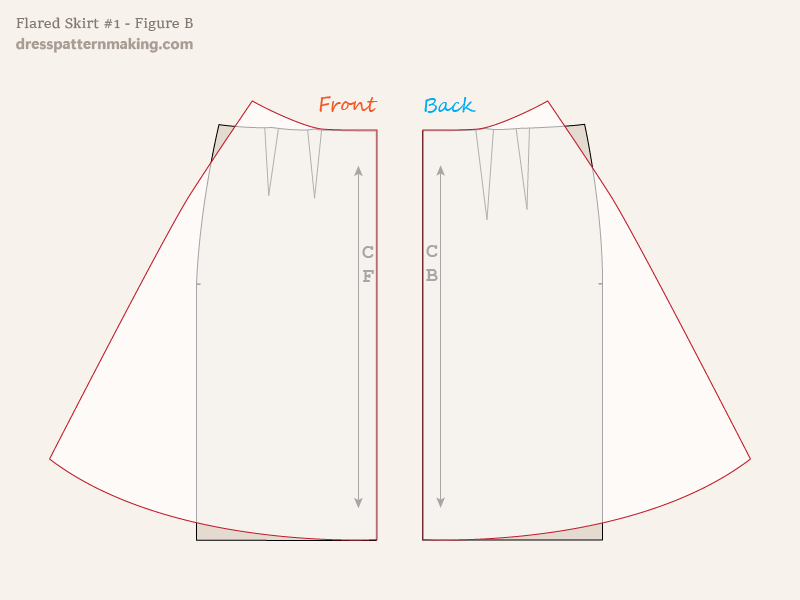
Figure B: Example Outcome
Figure B shows the final flared skirts overlaid on the original 2-Dart block. The front skirt initially ends up with more flare than the back, but then I equalized the difference so that both pattern pieces are identical in shape. (You may still need separate pattern pieces for placement of zip, etc).
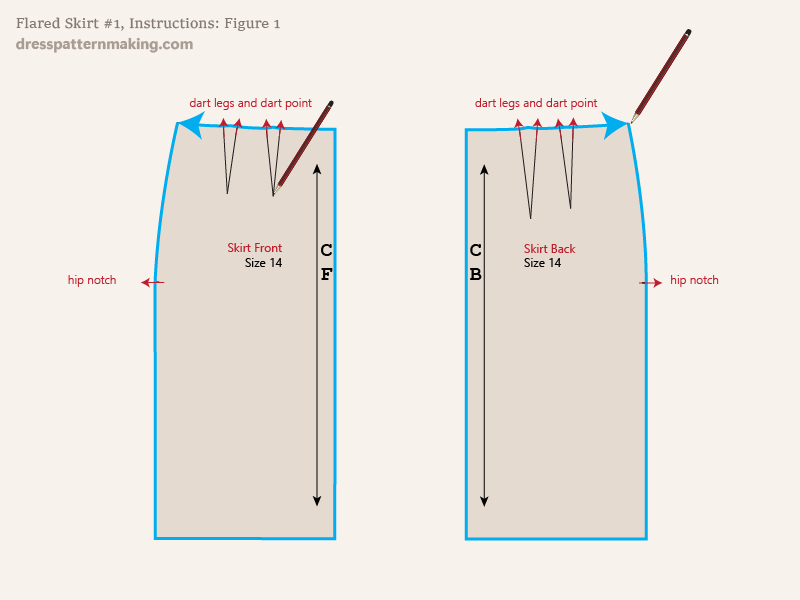
Instructions: Drafting Flared Skirt 01 - Figure 1
- Trace the 2-Dart block onto paper.
- Make sure you mark the dart legs, the dart points and the hip notches.
Important Note: I am showing you the drafting of the Front and Back at the same time, but you would normally first draft the Front, then when finished that, draft the Back.
Instructions: Drafting Flared Skirt 01 - Figure 2
Remove your block after you have finished tracing and marking points, then:
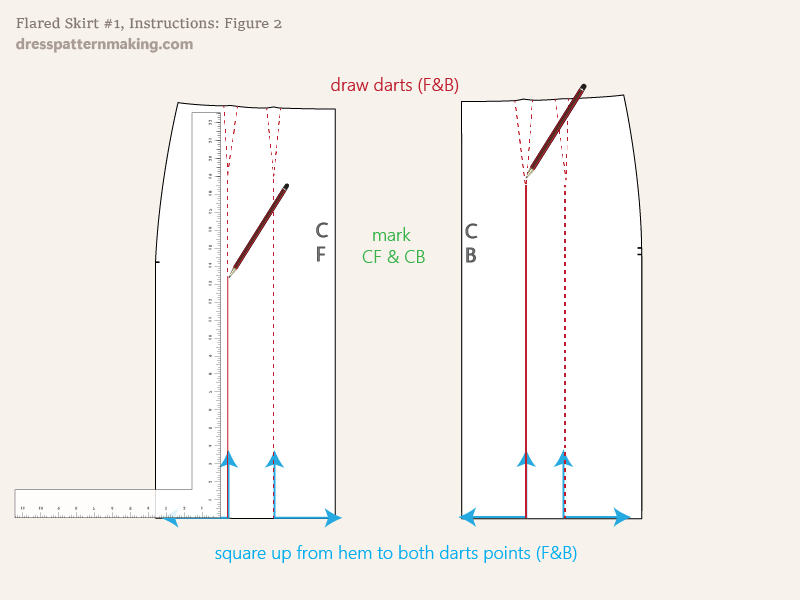
- Draw in the darts.
- Mark the CF and CB on the working pattern pieces.
- Draw lines from the hem to the both waist dart points in both the front and the back, squaring up from the hemline.
Instructions: Drafting Flared Skirt 01 - Figure 3
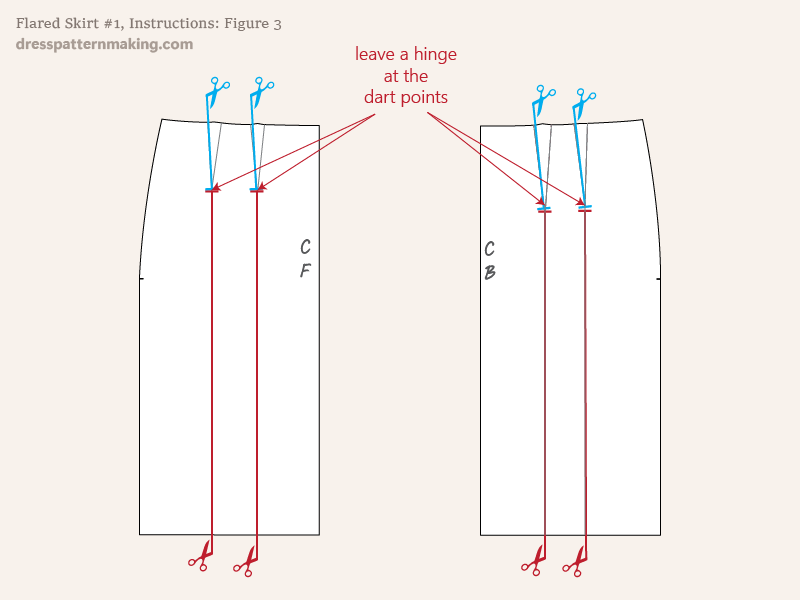
- Cut along the lines drawn in the last step; from the hemline to just before the dart point. Do this for both lines for front and back.
- Cut along one of the dart legs of each dart to just before the dart point, leaving a hinge of about 1/8-inch.
Instructions: Drafting Flared Skirt 01 - Figure 4
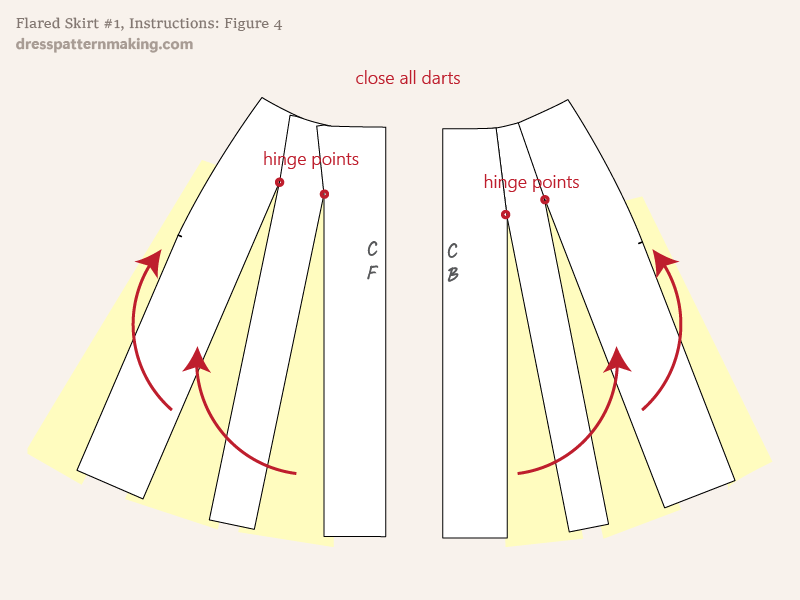
- Pivot all the waist darts closed on the dart hinge points.
- Put paper underneath to fill in the open sections.
In this image the paper is shown in yellow.
Instructions: Drafting Flared Skirt 01 - Figure 5
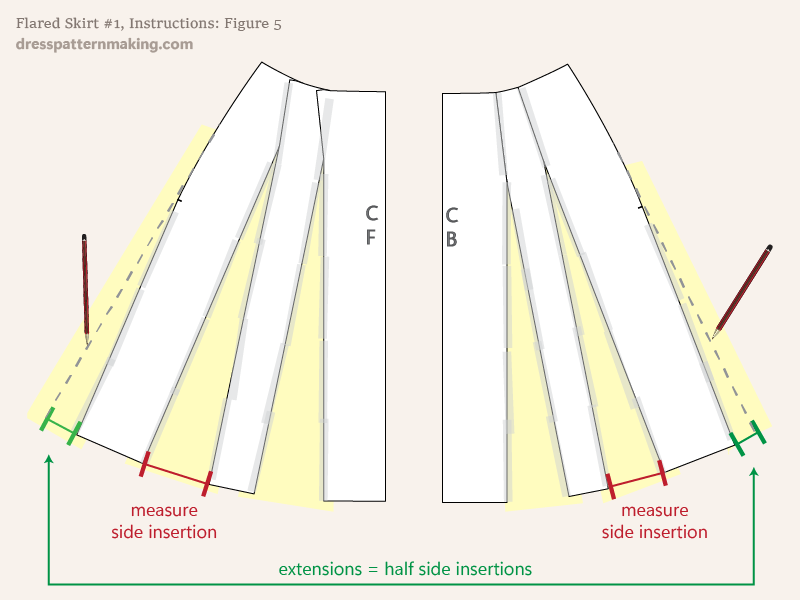
- Tape all the cut pattern pieces onto the paper underneath.
- Measure out at the side seam for half the amount of the side insertion, for both the front and the back.
- Draw a line from that point up to blend to the hip, for both the front and the back.
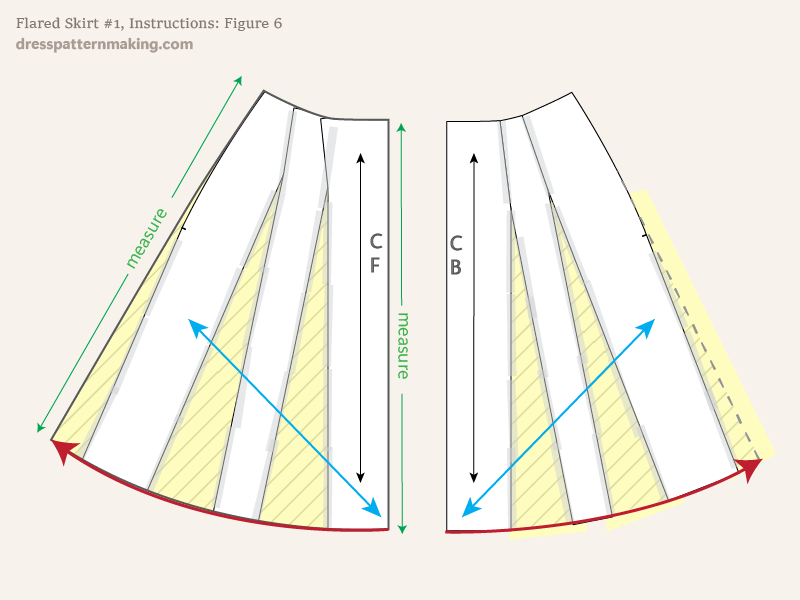
Instructions: Drafting Flared Skirt 01 - Figure 6
To draw the hemline:
- Measure the CF length.
- Measure the Side Front Length.
- If this skirt is going to be cut on the straight grain (black grainline) , make the side length 1/2 inch shorter than the CF (since this seam will be on the bias it will stretch a little).
- If this skirt is going to be cut on the bias (blue grainline), make the side length the same as the CF length.
- Repeat for the back hemline.
The grainlines have double arrows; if your fabric is directional you would have the arrowhead in one direction only. After drawing the hemline the front piece can be cut out. Don't cut the back piece yet.
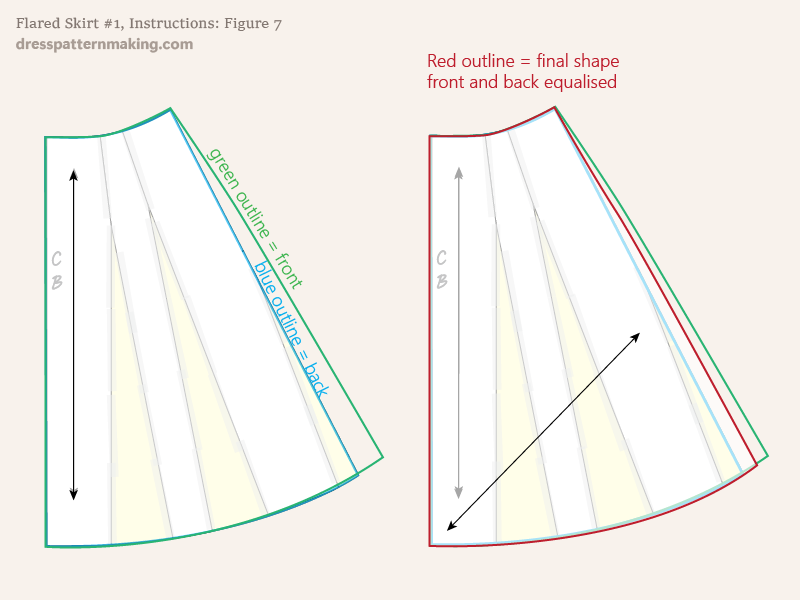
Instructions: Drafting Flared Skirt 01 - Figure 7
- Cut the front out, turn it upside down and line up the CF with the CB. I've indicated the shape of the front with the thick green line.
- Measure the equalize the difference between the front and the back.
- The red outline shows the final equalized shape for the front and the back.
- Cut out two of the final shape, one for the front and one for the back.
Final Note
Generally this would be the working pattern. You would trace this off onto fresh paper and add seam allowance, cutting instructions etc. You would also need to draft a waistband and finish other details.
** See the menu for the Skirts Details items such as waistbands, pockets, etc.

