Peter Pan Collar
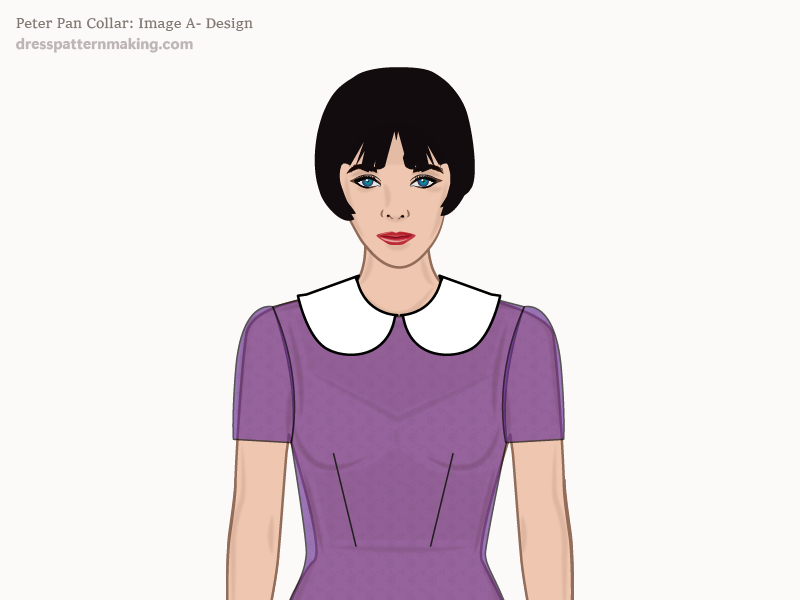
The Peter Pan collar is an applied, flat, non-convertible collar. The Peter Pan collar is generally considered a flat (low-stand) collar, BUT... the Peter Pan can actually have a stand between 1/8-inch (which is flat) and 1-inch (which is the same as a shirt collar with a high stand). The difference is that the Peter Pan is not convertible - it retains the same shape regardless of the height of the stand and whether it is buttoned up or unbuttoned. Shirt collars and other convertible collars have a different look when buttoned up to unbuttoned. Note that the Peter Pan collar with a high stand and a pointed front (rather than rounded) is called an Eton Collar. The instructions below are for creating the flat Peter Pan with approx 1/8-inch stand. To create it with a 1-inch stand, see the menu for the Eton Collar; the Eton Collar is basically the same as the Peter Pan but with a 1-inch stand and sharp V-type edge at the neckline instead of the curved shape of the Peter Pan. So to create a PP with a 1-inch stand, follow the directions of the Eton, then just change the collar shape at the end. You can stands in between the 1/8-inch and the 1-inch; you should be able to work this out from the two extremes. In terms of drafting a pattern, unlike the High Stand collars, the pattern is created from the Bodice Front and Bodice Back Blocks. (The Mandarin, Shirt, Convertible collars are created from the neckline measurements).
Example: Outcome
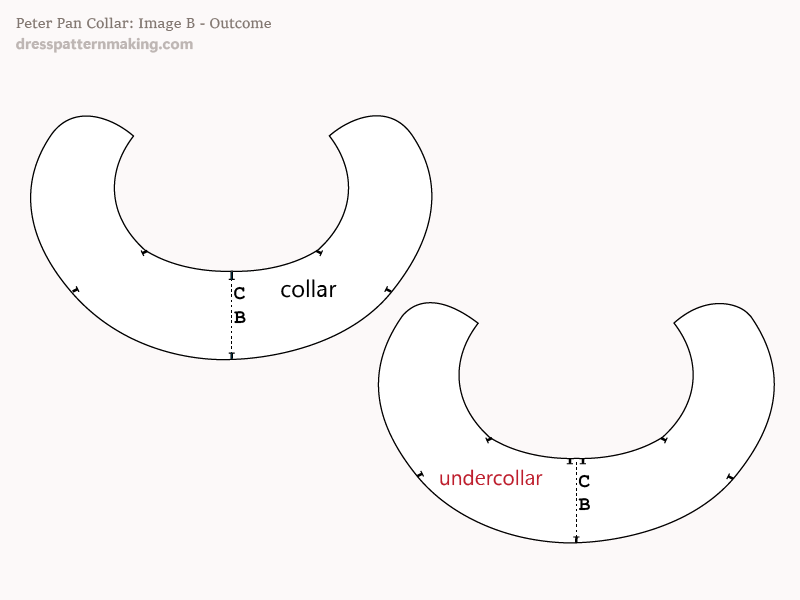
Figure B shows the collar that will be created in the step-by-step instructions below. Seam allowance, cutting instructions etc., have not been added.
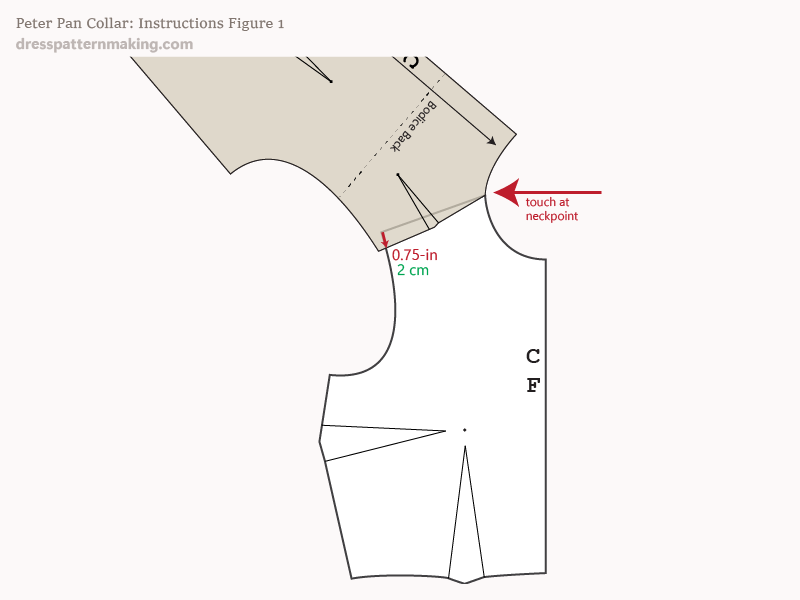
Instructions (Peter Pan Collar) - Figure 1
- Trace the top part of the Bodice Front.
- Put the Bodice Back down with the shoulder line matching and touching at the neck point.
- Pivot the Bodice Back as shown, so that the blocks overlap at the shoulder point for 0.75-inch.
- Trace the top part of the Bodice Back.
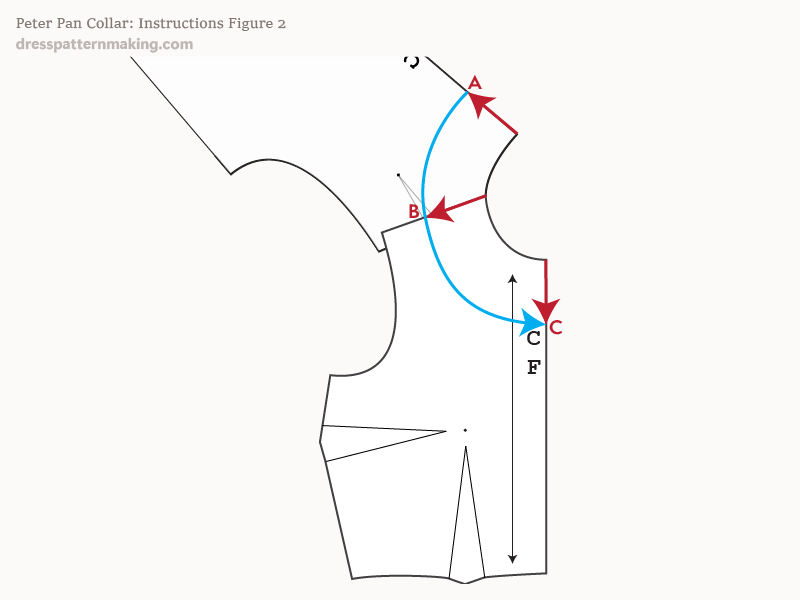
Instructions (Peter Pan Collar) - Figure 2
Decide the width you want for your collar; I am making this 3-inches wide.
- Draw the collar line on your blocks as shown; I have marked 3-inches down the Center Back (point A), on the shoulder line (point B) and down the Center Front (point C), and joined these three points with a curve.
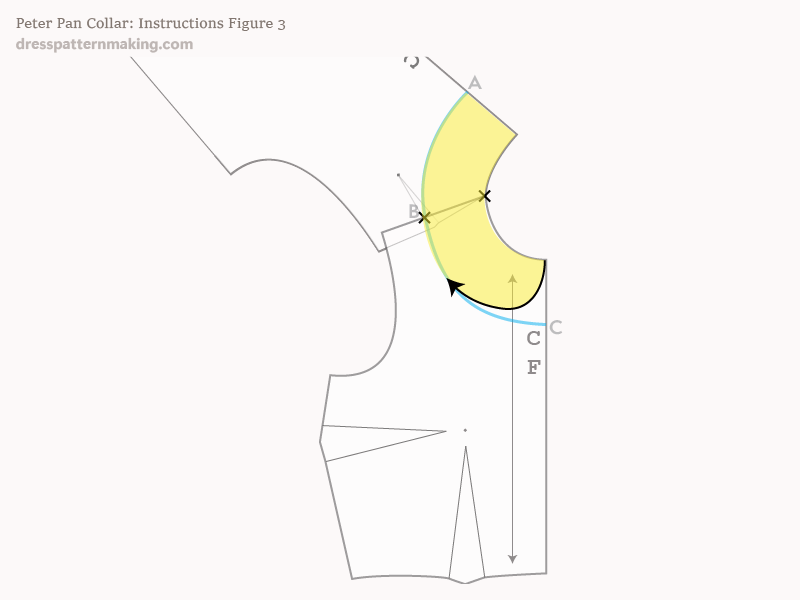
Instructions (Peter Pan Collar) - Figure 3
- Draw the neckline curve from point D at the back, to point E at the front, touching at the shoulder point.
- Mark two notches as shown; the neckline and the shoulder line.
- The pattern piece is the shaded yellow area.
Now we may need to make some adjustments to the neckline curve, and we also need to make a whole pattern piece, and we also need to make an under-collar piece. This process will take a few steps and there are a few different ways it can be done -.e.g cutting out the half-pattern, tracing it, perhaps sticking it back on another piece of paper if some adjustments are needed, retracing it for the under-collar... etc. OR using tracing paper to trace the half-pattern, flip it over to trace the other half, etc. etc. etc. I will point out what you need to do to create the pattern and I will show you my work flow, but my work flow may not work for you, or you may prefer another method.
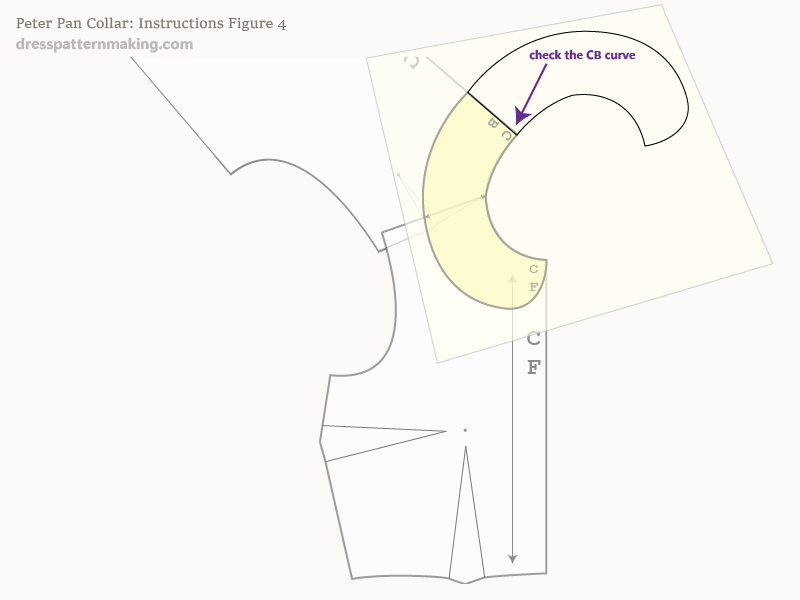
Instructions (Peter Pan Collar) - Figure 4
- Trace the collar piece.
- Turn the tracing paper over and match up the CB line.
- Check the neckline curve and the collar curve - see Figure 4b.
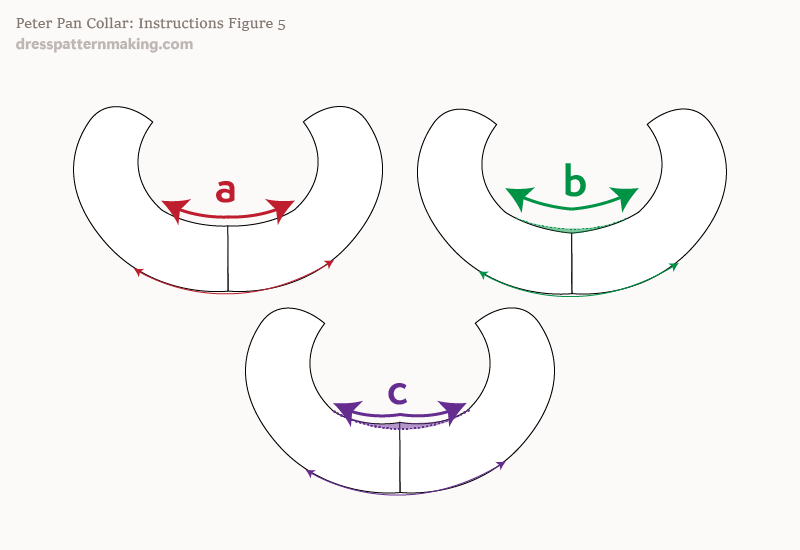
Instructions (Peter Pan Collar) - Figure 5
This is to show you what the CB neckline may look like; smooth (A), pokes up a bit at CB (B), and dips down a bit (C). You need to smooth out that curve. You may also need to smooth out the collar edge at the CB if you did not make the design line was at right angles at the CB (which obviously I didn't).
Instructions (Peter Pan Collar) - Figure 6
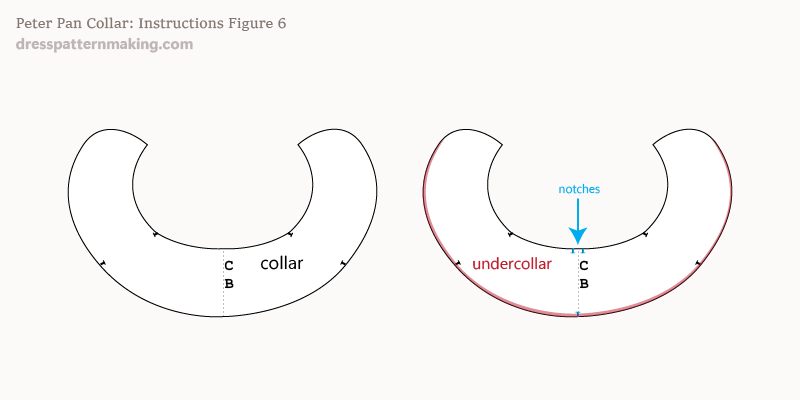
You need to make an under-collar* so that the seam-line does not show; since it is smaller, it will pull the seam-line under.
- Shave 1/8-inch off the collar from the collar edge (not the neckline edge) - that is, 1/8-inch at the CB line, reducing to zero when moving towards the CF.
- Mark two notches either side of the CB neckline edge - about 1/4-inch from the CB line.
You will also need to finish off the pattern pieces (not all shown in this image):
- label
- mark grain-line
- make sure you have all necessary notches
- add seam allowance
*Note: As I've mentioned previously, making an under-collar pattern piece is necessary in the fashion/garment production industry (if an under-collar is required). However, if I am making the pattern just for myself and I am doing everything (i.e. not relying on someone else to know what the process is), I just make the collar pattern piece and cut two of the fabric; then I trim the piece from the fabric for the under-collar. I prefer this to spending the time creating the second pattern piece.
