Truing
Truing is the process of checking that adjoining pattern pieces match and any curve that continues from one piece to the next is a smooth curve. When making Blocks or Patterns, the adjoining pieces need to be checked against each other; lines that are sewn together need to be the same length, such as side seams and the shoulder line. Curves that cross over pattern pieces, such as the armhole or the neckline, need to flow smoothly rather than be angular. See Examples 1 & 2 below.
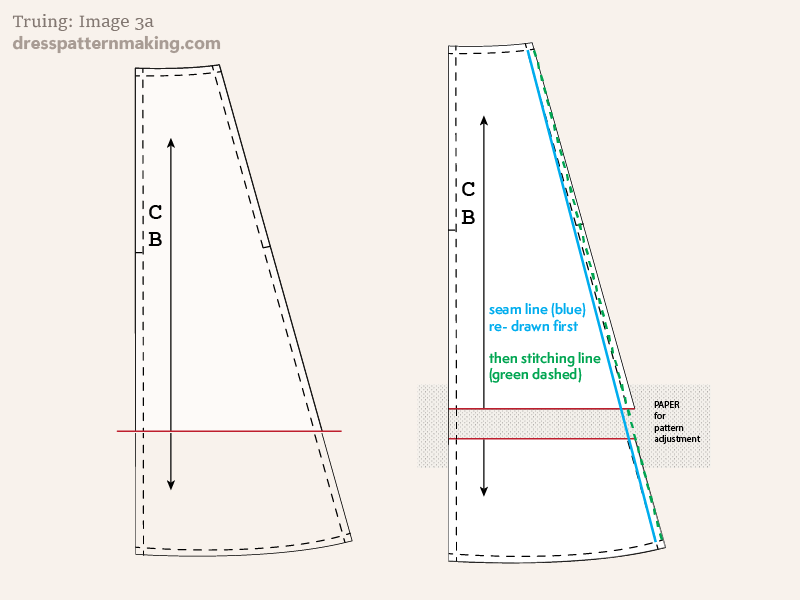
When making alterations to a commercial pattern piece, sometimes the seam line needs be redrawn. Adjusting the seam'-line and cutting line to retain smooth lines and/or ensure it retains its integrity to match adjoining pattern pieces is called truing and blending. When making changes to commercial patterns, it is essential to consider how any change will affect any adjoining pattern piece. See Example 3 below.
Examples
(1) Bodice Block - Truing the Side Seam and the Armhole
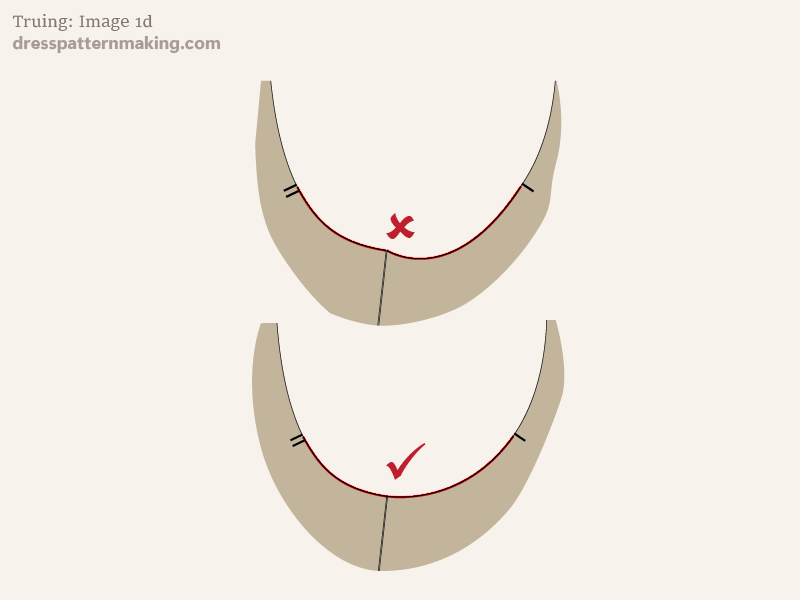
When making a personalized Bodice Block, you need to check that the side seams are the same length on the front and back (Image 1a & Image 1b) and that the Armhole curve is smooth (Image 1c & Image 1d).
Image 1a: Line the side seams up from the armhole. Make a mark on the Bodice Back Block where it lines up to the Front Bodice Block side seam dart.
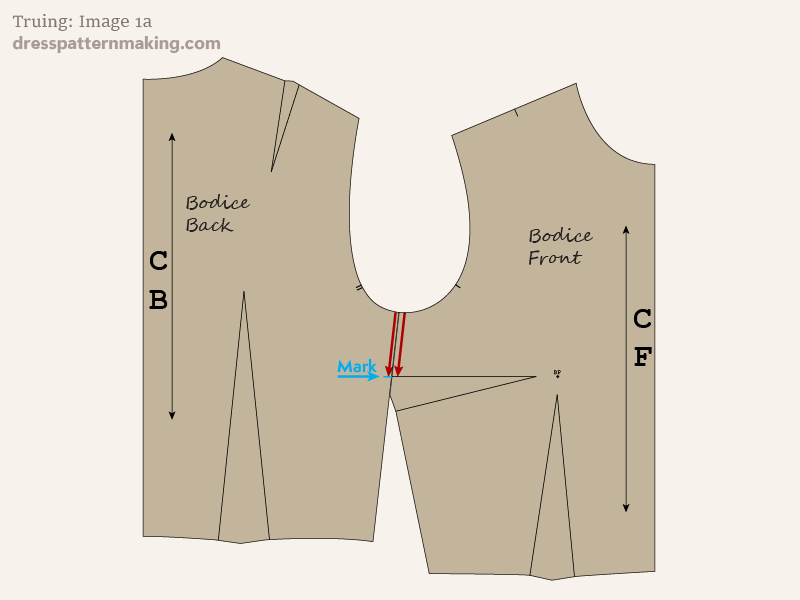
Image 1b: Move the Bodice Front so that the bottom dart leg matches up with the notch/mark made in the previous step. Check that the remainder on both block pieces are the same. If there is any discrepancy, first check the correct measurement (the Side Seam Length used to make the block), and determine which one, front or back, is incorrect. If the different is slight (e.g. 1/8 inch), extend or shorten the incorrect side seam and redraw the waist line. If there is a larger discrepancy, you should recheck your block creation steps.
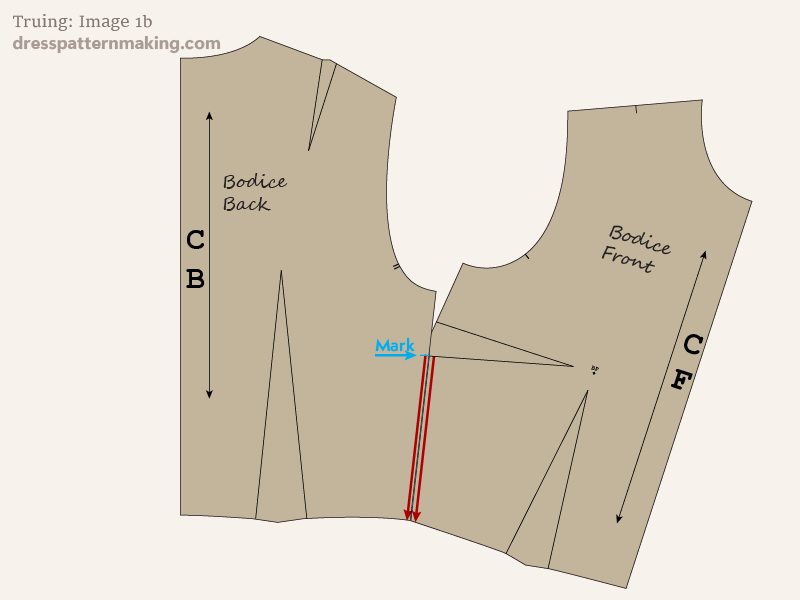
Image 1c: Put both blocks side by side at the underarm and the side seam. Check that the curve from the back to the front is smooth - shown in red on the image.
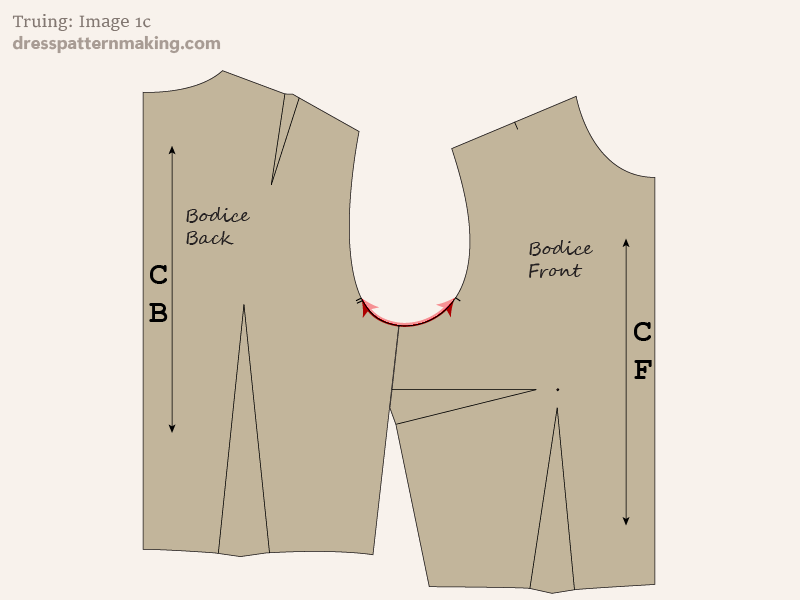
Image 1d: This image gives an example of an armhole curve that is not smooth, and the same one after it has been trued.
(2) Bodice Block - Truing the Shoulder Seam and the Neckline Curve
Image 2a: Line the shoulder seams up from the neck. Make a mark on the Bodice Back Front where it lines up to the Back Bodice Block shoulder dart.
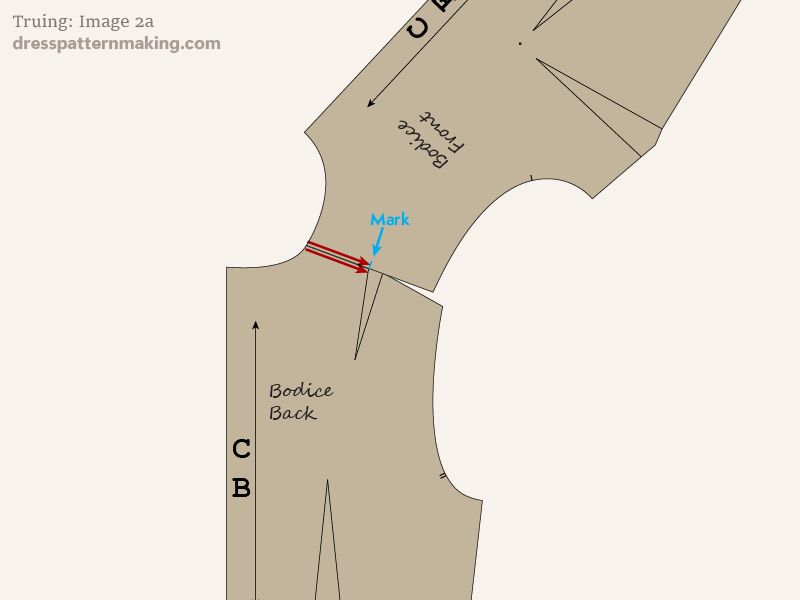
Image 2b: Move the Bodice Front over so that the notch is on the other side of the dart. Check that the remaining length is the same for both Blocks. If there is a a discrepancy, check the correct measurements (from your measurements chart), and change the incorrect Block. Make the changes at the armhole end of the shoulder line; make sure you check the armhole curve after making changes.
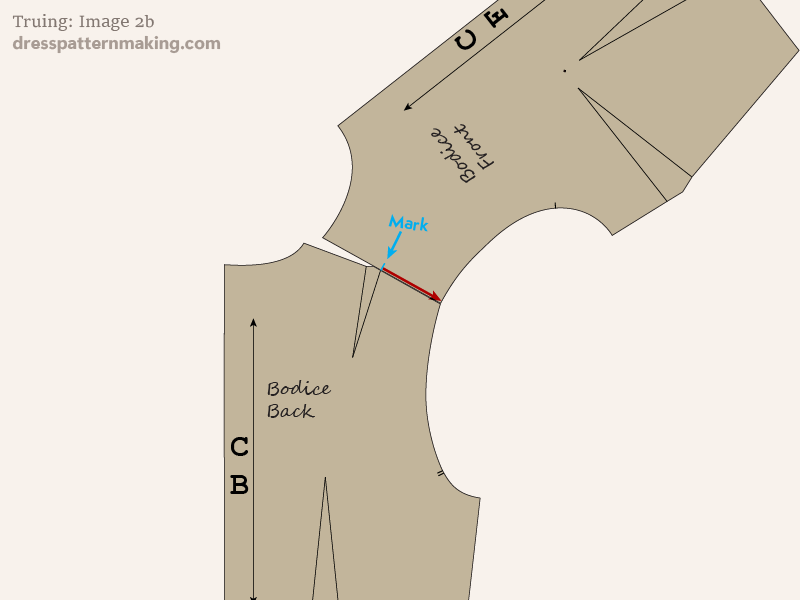
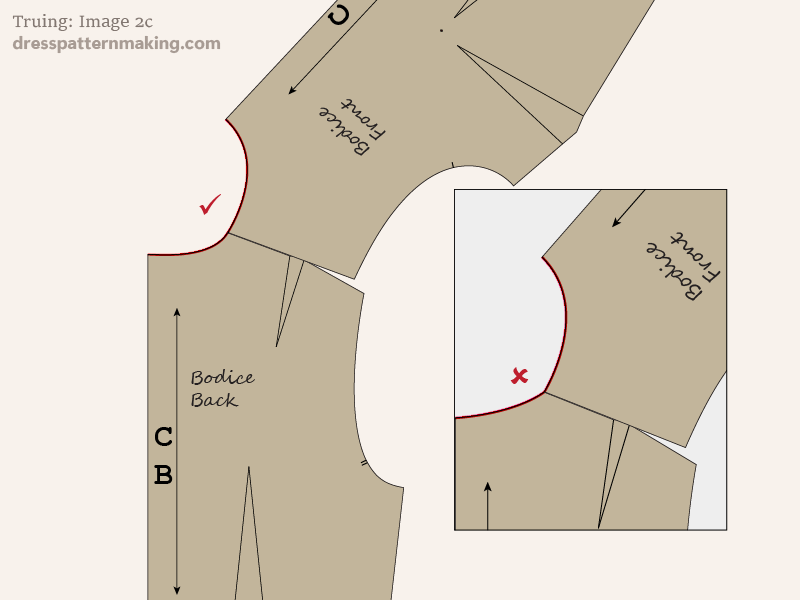
Image 2c: Line the blocks up at the neckline and check that the curve is smooth rather than angular.
(3) Making Adjustments to Commercial Patterns
Image 3a: The skirt pattern piece is being adjusted to make it longer (on the left). Length will be added by cutting along the red line and separating the pieces the required amount. On the right is the new pattern piece, which has to be adjusted by adding some paper between the two pieces of the original pattern. The side seam line needs to be redrawn (or trued). It is important to true the stitching line first (blue line), then add the seam allowance (green dashed line). (Any adjacent pattern pieces will also need to be amended.)
