Mandarin Collar

The Mandarin collar is a close-fitting stand up collar. All you need to make this collar is the neckline measurements of your block; the front neck and the back neck measurements. Note that the Mandarin collar is also the base for the two-piece shirt collar; i.e. the two pieces consist of a stand (also called a band) and a collar - the stand is the Mandarin collar.
Example: Outcome
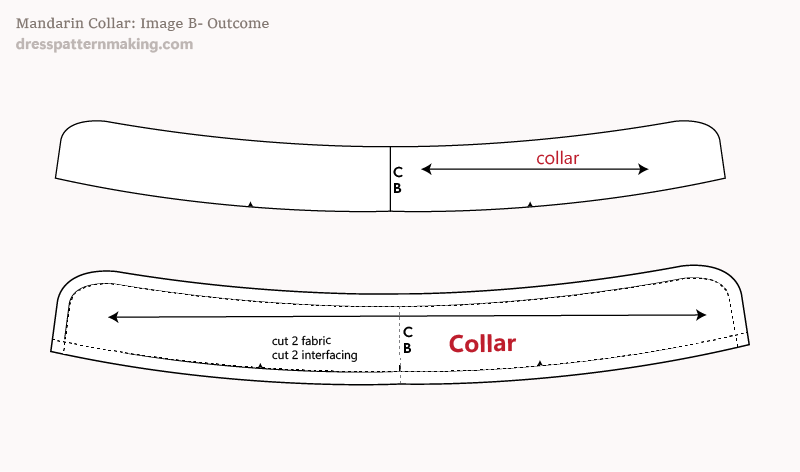
Figure B shows the collar that will be created in the step-by-step instructions below. Note that the collar is drafted as a half-collar, but with the CB on the fold of a piece of paper. When you open it out you have a whole pattern piece. This is done when you want the straight grain to go the length of the collar; i.e. if you place the CB on the fold, the straight grain will go up and down rather than the length of the collar. As you don't want the collar base to stretch, you need a full pattern piece.
Instructions (Mandarin Collar) - Figure 1
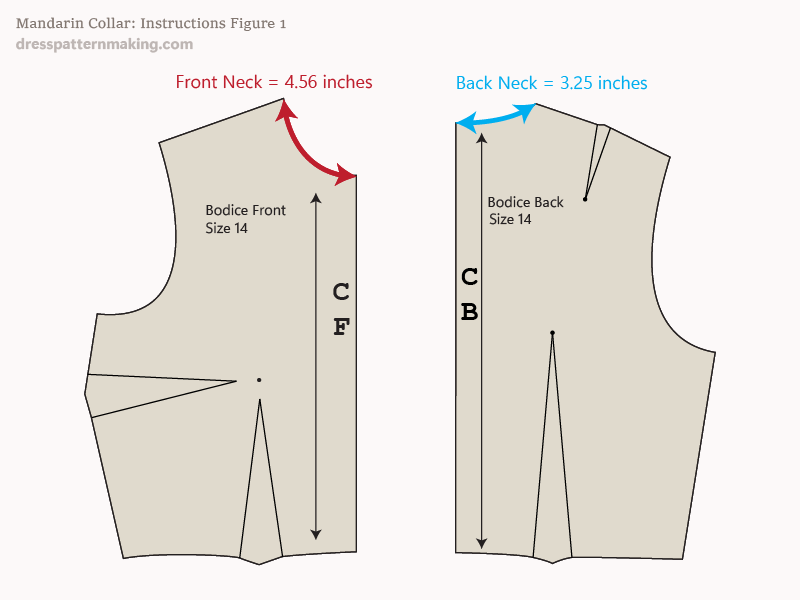
- Measure the Back Neck curve and Front Neck curve of your Bodice Block.
- Add these two measurements together
In this example the Front Neck is 4.56 inches and the Back Neck is 3.25 inches. Total neckline measurement (for half-block) = 7.81-inches.
Instructions (Mandarin Collar) - Figure 2
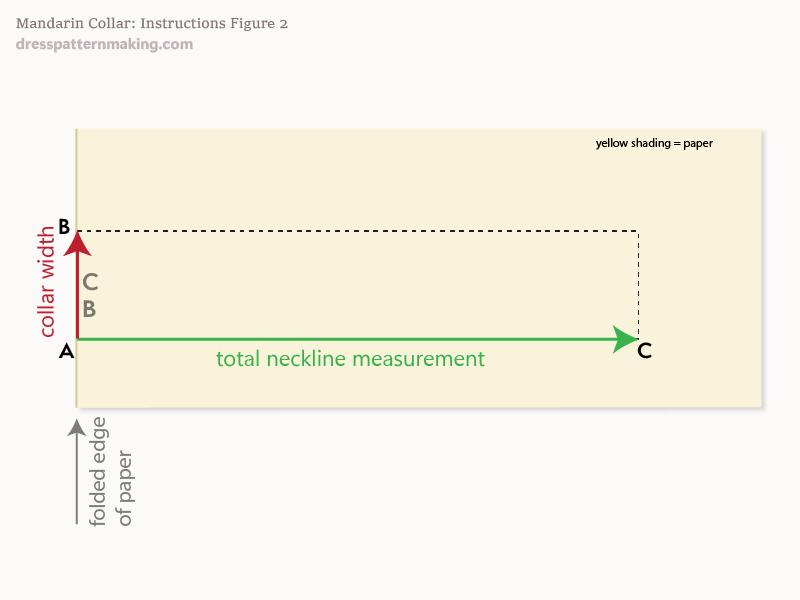
This mandarin collar will be 1.5-inches wide. If you want to end up with the whole collar pattern piece (rather than just half to cut-on-fold), fold a piece of paper and put the CB line on the fold. (Whether you create the full pattern piece or the half to cut-on-fold is up to you, taking you design and worth methods into consideration. Sometimes you may not want to the straight grain to go down the center back and so need the whole pattern piece).
- Draw a rectangle:
- the height of the rectangle is the collar width (A to B) - 1.5 inches.
- the length of the rectangle is the Total Neckline measurement (A to C). In my example 7.81 inches.
Instructions (Mandarin Collar) - Figure 3
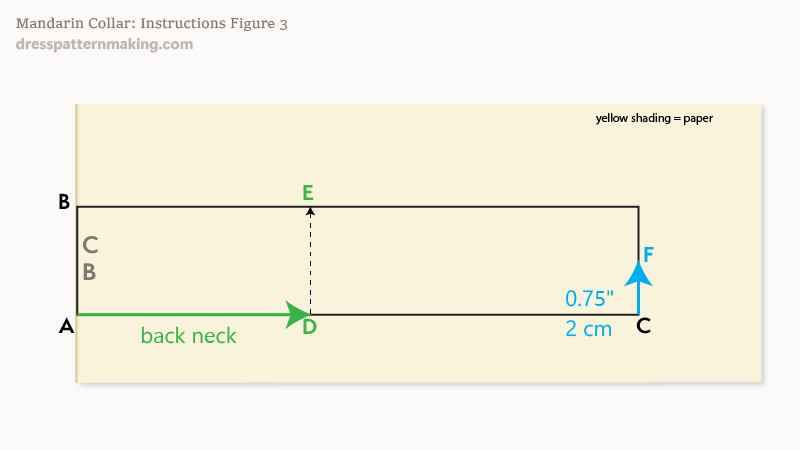
- Using the Back Neck measurement, measure from point A and mark the Shoulder Point D.
- Square up from D and mark point E on the top line.
- Measure up for 0.75-inch from point C and mark point F.
Instructions (Mandarin Collar) - Figure 4
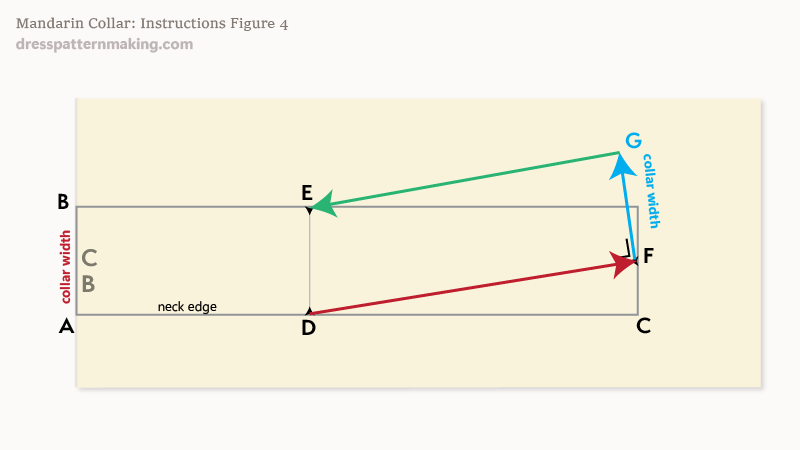
- Draw a line from D to F.
- Using the collar width measurement (1.5-inches), measure up from F at right angles to the D~F line, and label point G.
- Draw a line from E to G.
Instructions (Mandarin Collar) - Figure 5
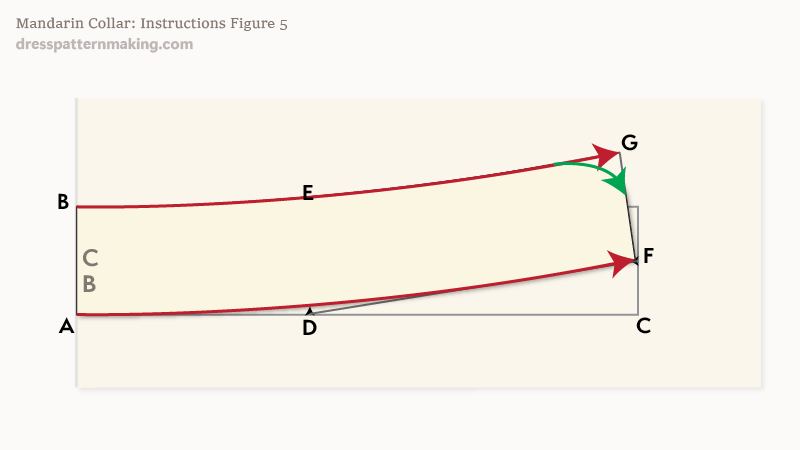
- Draw a curve a the top front (point G) as shown.
Instructions (Mandarin Collar) - Figure 6
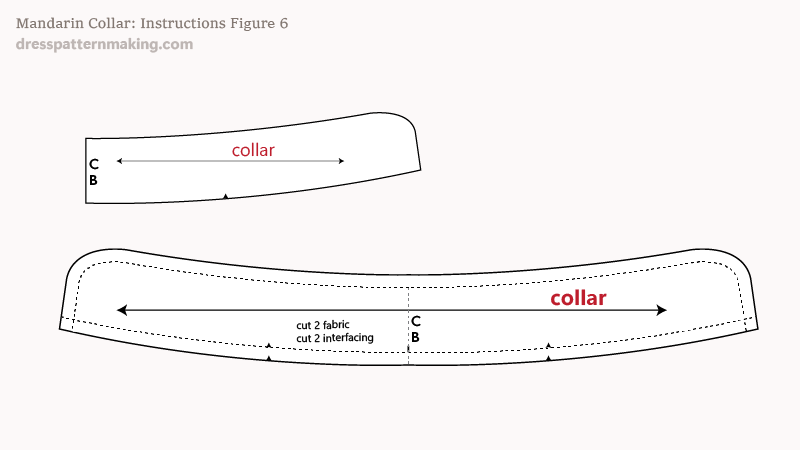
- Add seam allowance.
- Cut out your collar and open it up.
- Make sure your shoulder notches are marked.
- Label, and mark cutting instructions.
