Walking a Seam
Matching seam lengths on a curved path. This requires turning one of the pattern pieces each time the paths of the two pattern pieces diverge, and continuing the pivoting & matching at each divergence point until the seam line/s end.
Example
In this example, the Bodice Back and the Bodice Front armholes need to be walked along the sleeve head to check that there is sufficient ease to fit the sleeve. The sleeve cap measurement should be at least 1.25 inches more than the combined back and front armhole measurements. (While you could just measure the armholes and the sleeve cap, this is just another way to do the same thing. It also helpful to SEE the amount of ease).
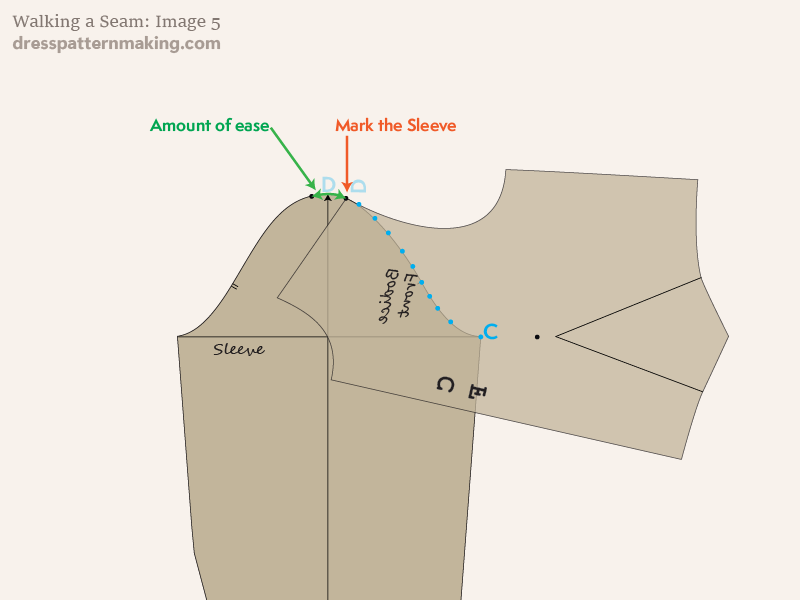
Image 1: The Back Bodice armhole will be walked from A to B along the Sleeve Head back.The Bodice Front will be walked C to D along the Sleeve Head front. The sleeve cap should be at least 1.25 inches more than the armhole measurements.
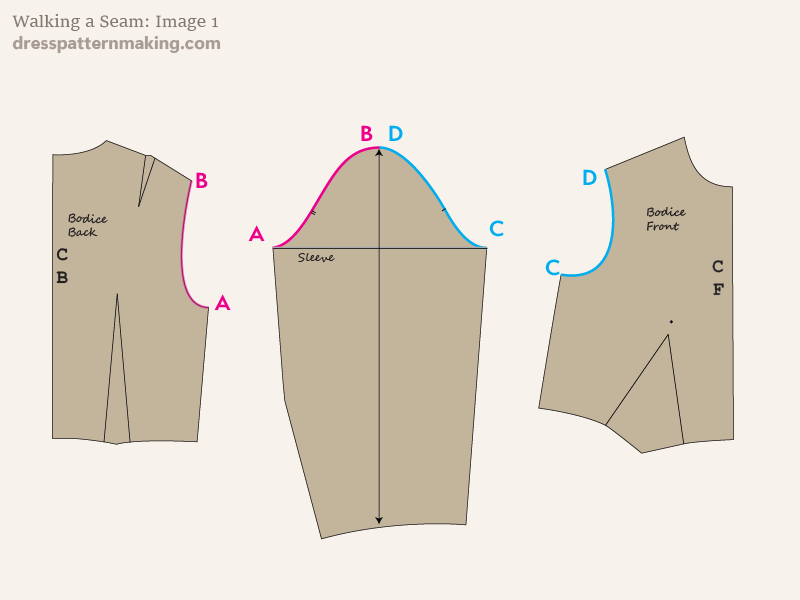
Image 2: Turn the Bodice Back over sand place the armhole point on the bicep line on the back of the sleeve (A to A). Hold the Bodice Back down at the underarm point and pivot the block until the two paths align - they will only match up for a few millimeters and then start to diverge. Where it starts to diverge is where you will next need to hold it down and pivot again (which will be shown in image 3).
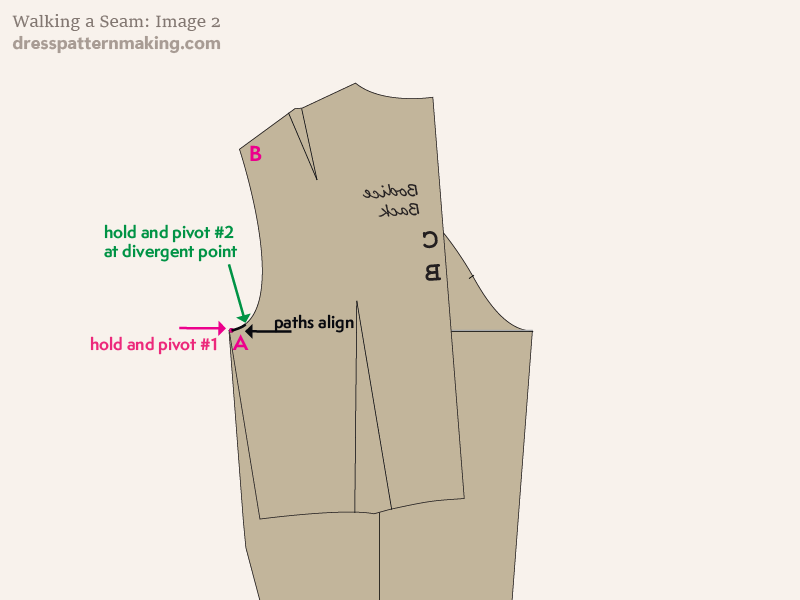
Image 3: Hold the Bodice Back down the point where they diverge and pivot until the lines are aligned again.
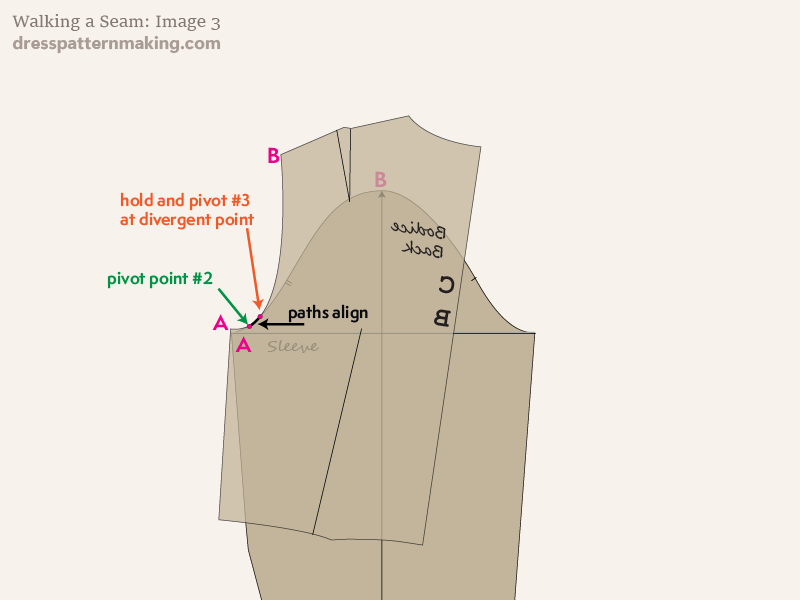
Image 4: Continue until you until you reach the end of the armhole. Then mark that that final point (where the armhole finished) on the Sleeve Block. In this image, the pink dots represent all the pivoting points for "walking" the seam.
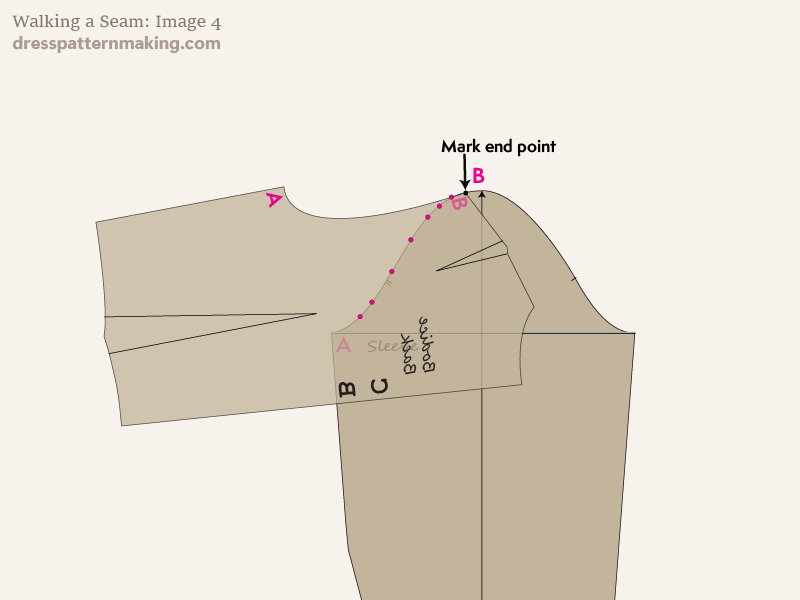
Image 5: Repeat with the Bodice Front. Turn the block over and place the underarm point at the sleeve (front) underarm point. Holding it at that point, pivot the Bodice Front until the two lines match up.
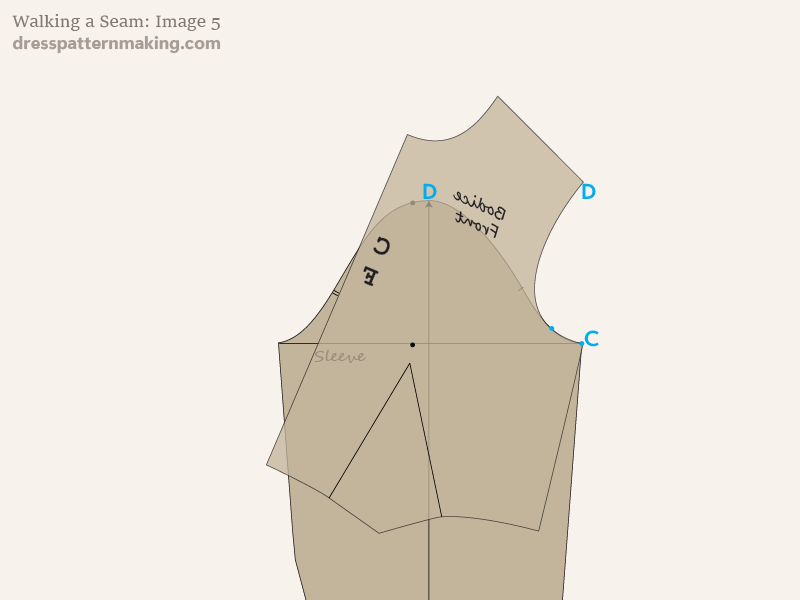
Image 6: The point of walking the seam for the armholes/sleeve cao was to check the amount of ease in the sleeve cap. The distance between the two marks (indicated by black dots on the image) is the amount of ease on the sleeve cap.
