Finishing Darts - Bodice Front Waist A
Finishing off darts when you are working with paper is easily done by folding the dart out and using a tracing wheel to draw the line. When opened up you have the shape of the dart. When working with thick patternmaking paper it is not so easy or even necessary to do that. It is easy enough to draw in the shape of the dart by finding the center point of the dart, drawing a line through the center point to be the same length as the dart legs, then finishing off the curve. There are four examples given in these pages. This example is using a waist dart where the mid-dart point is straight down from the Bust Point i.e. This is where you have a dart 1.75-inch wide or less. (For 1-dart blocks with one very large waist dart, see Finishing Darts Bodice Front Waist B on the menu on this page.)
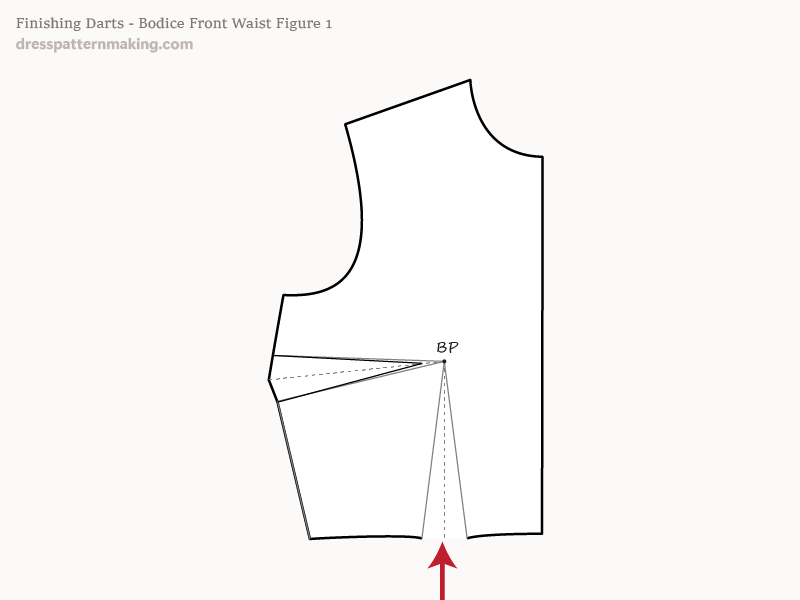
Finishing off Bodice Front Waist (A) - Figure 01
This is the starting point: we have the block and the placement of the waist dart. In this case, the mid-dart point is straight down from the Bust Point, i.e. parallel to the CF line, and at right angles to the waist line.
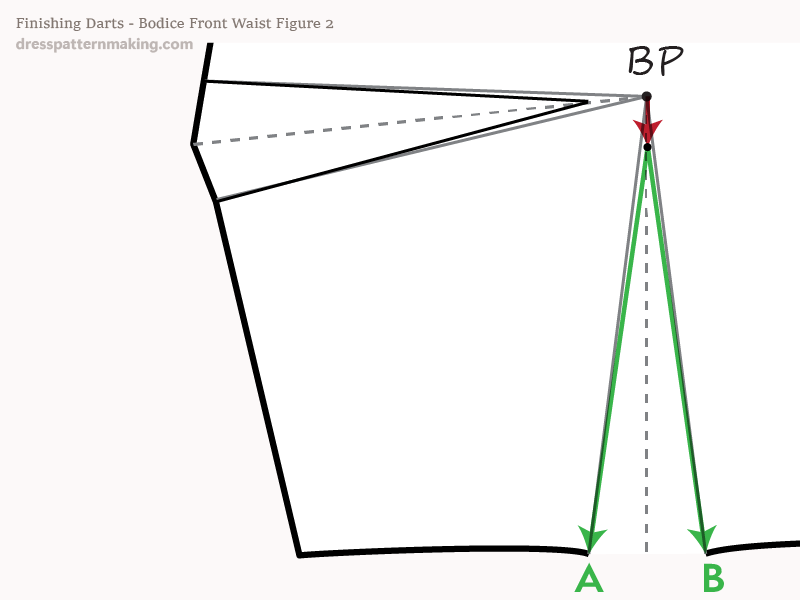
Finishing off Bodice Front Waist (A) - Figure 02
Using the Bust Point to Dart Point table as a guide for the placement of the Dart Point:
- measure from the Bust Point, along the mid-dart line, and mark the Dart Point
- draw the dart legs from the Dart Point to points A and B
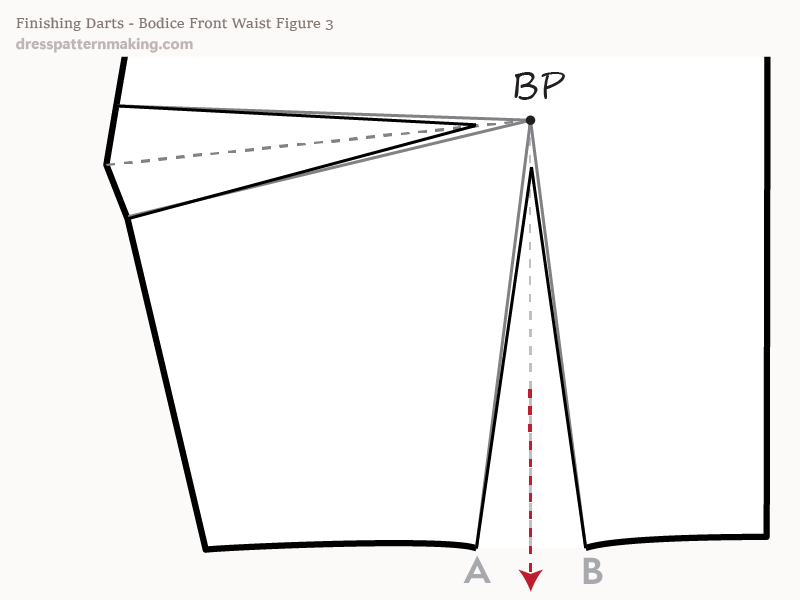
Finishing off Bodice Front Waist (A) - Figure 03
- Extend the mid-dart line for some distance below the waistline.
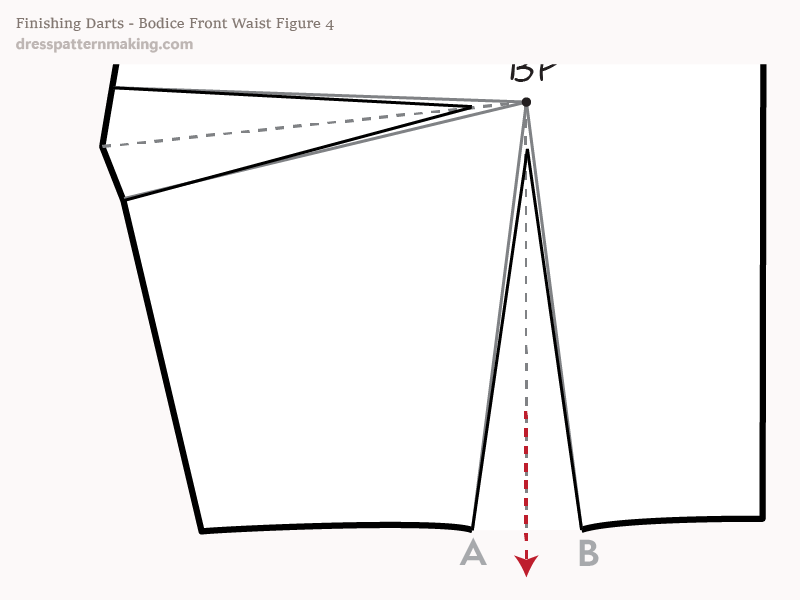
Finishing off Bodice Front Waist (A) - Figure 04
- Continue the curve* from the CF waist to through point B so that it touches the mid-dart line.
*When creating the block, the dart legs were extended 3/16-inch below the horizontal waistline. This means that the lines from the CF to dart leg A, and from dart leg B to the side seam are curved. If you are unclear about this curve, look at the menu on this page for the articles on Curving the Waist.
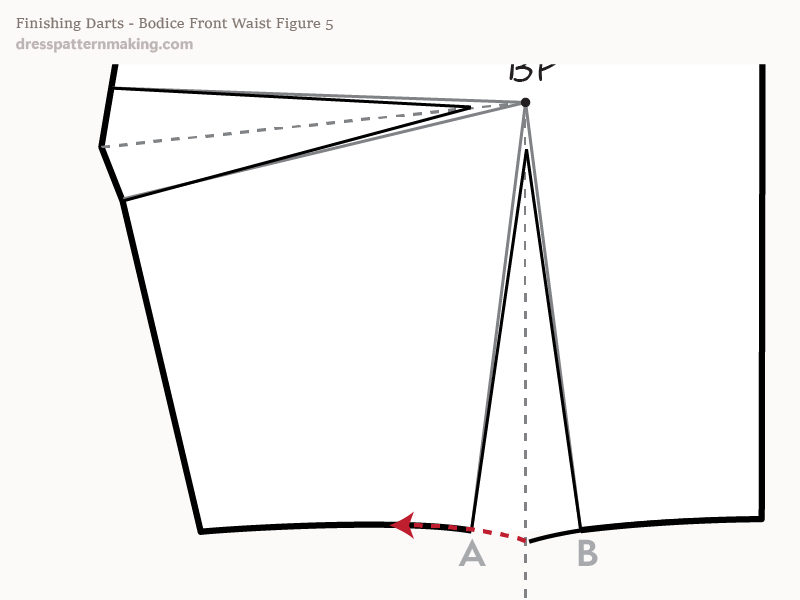
Finishing off Bodice Front Waist (A) - Figure 05
- Return the curve to dart leg A, blending with the curve from A to the side seam.
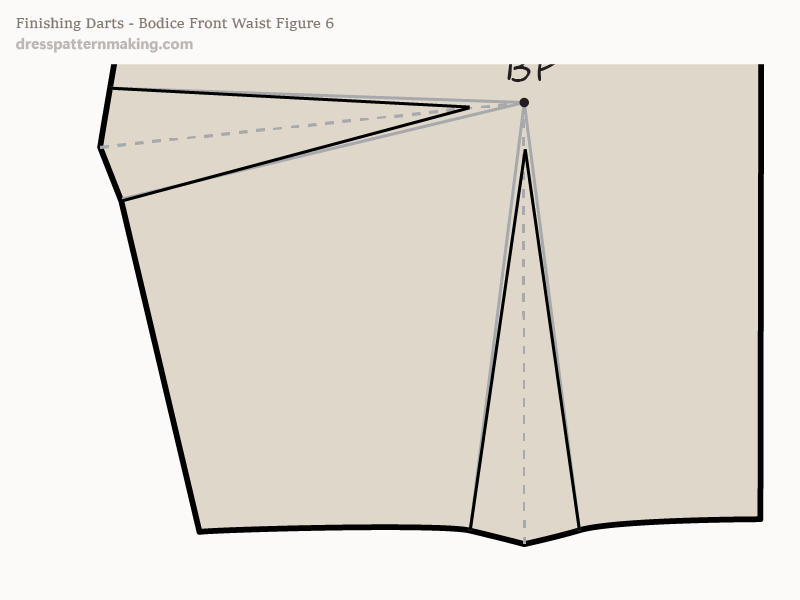
Finishing off Bodice Front Waist (A) - Figure 06
- Your waist dart is finished, your block should look something like this.
