Adding a Button Extension to a Pattern
When creating a pattern with buttons, you need to add an extension to both adjoining pattern pieces to allow the fabric to overlap.
Symmetrical vs. Asymmetrical Designs
- In a symmetrical garment, the adjoining pieces have identical button stands.
- In an asymmetrical garment, the button stands will be different.
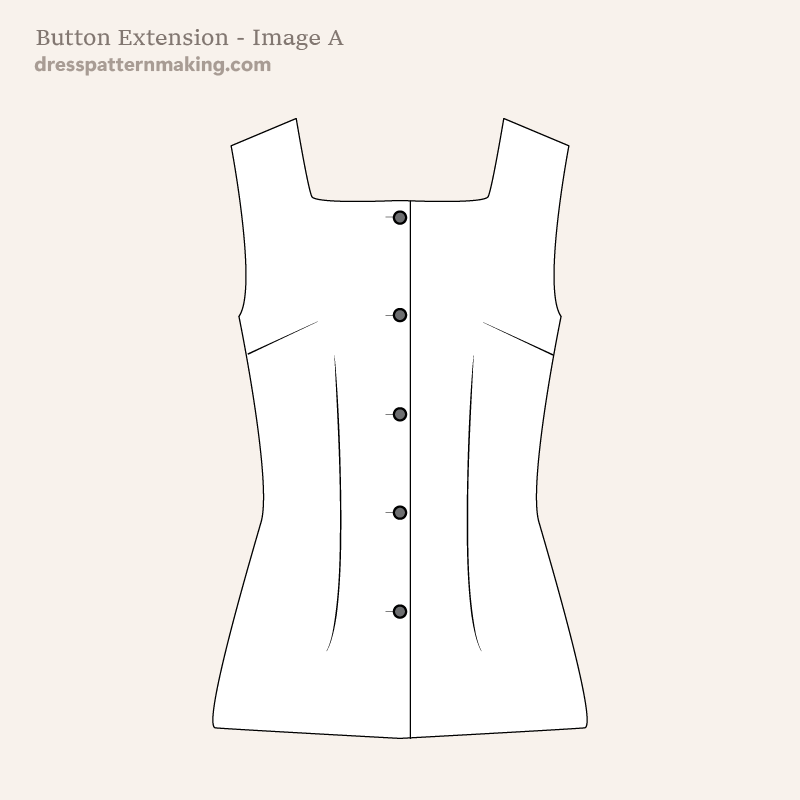
This guide covers a basic symmetrical design, using the top shown in Image A as an example.
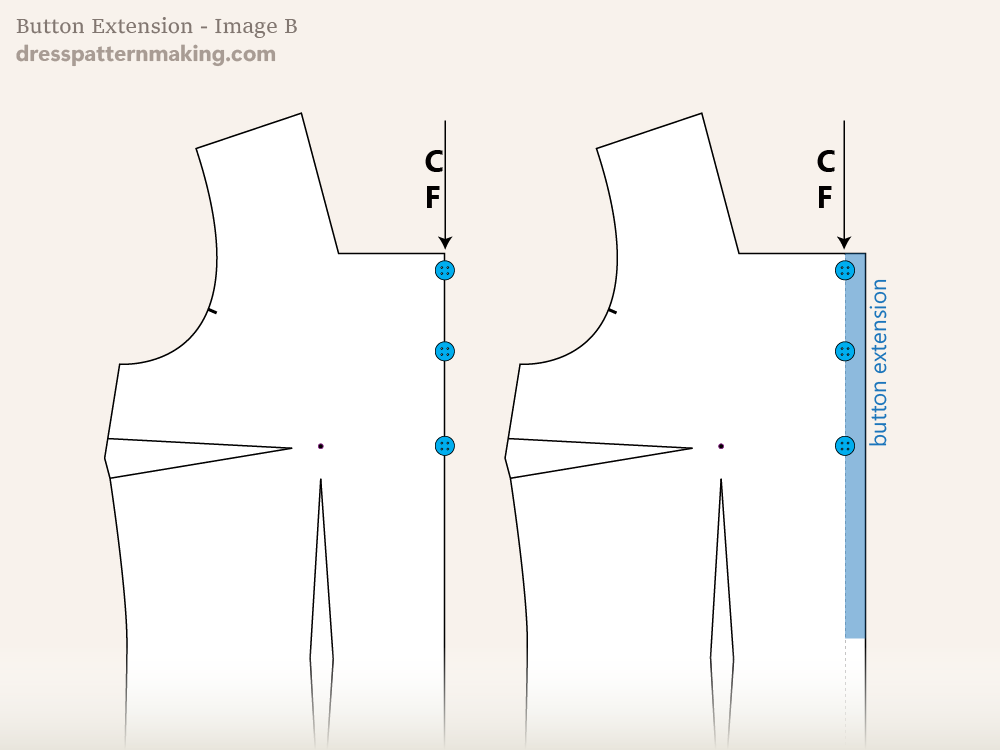
Understanding the Button Placement
In Image B (below), the buttons are positioned along the Center Front (CF) line of the pattern:
- Half of each button sits within the bodice block itself.
- The other half extends past the CF line and requires additional fabric beyond the edge of the bodice.
For the adjoining piece:
- The buttonhole is mainly within the bodice block, but a small portion extends past the CF onto the button extension.
- Both sides of the pattern must have extra fabric to accommodate the buttons and buttonholes.
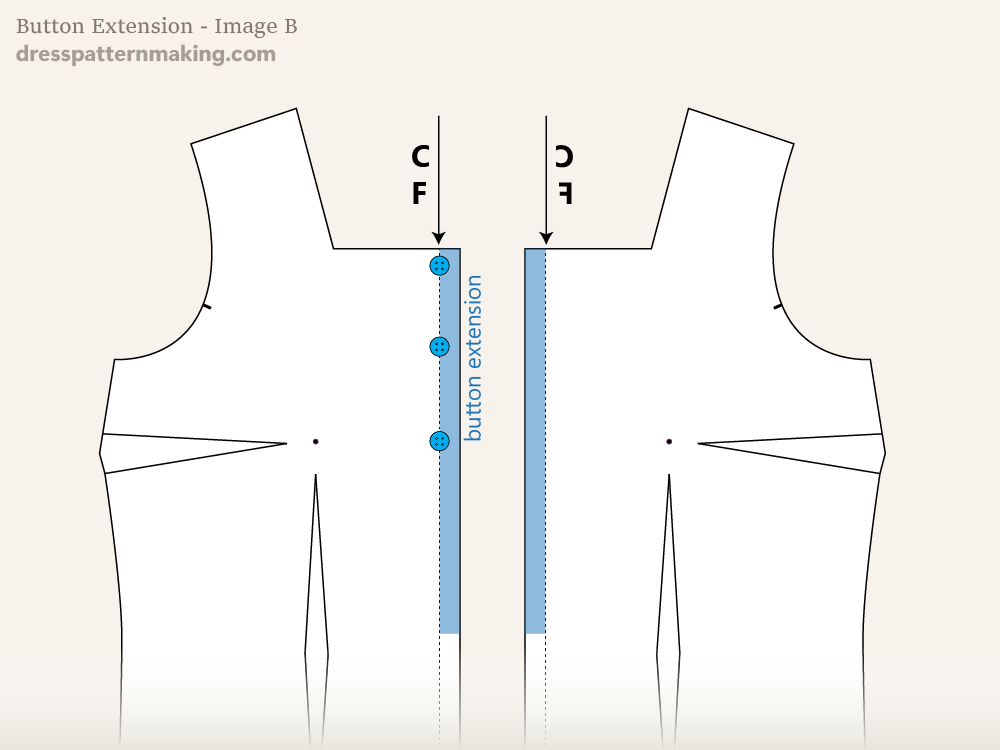
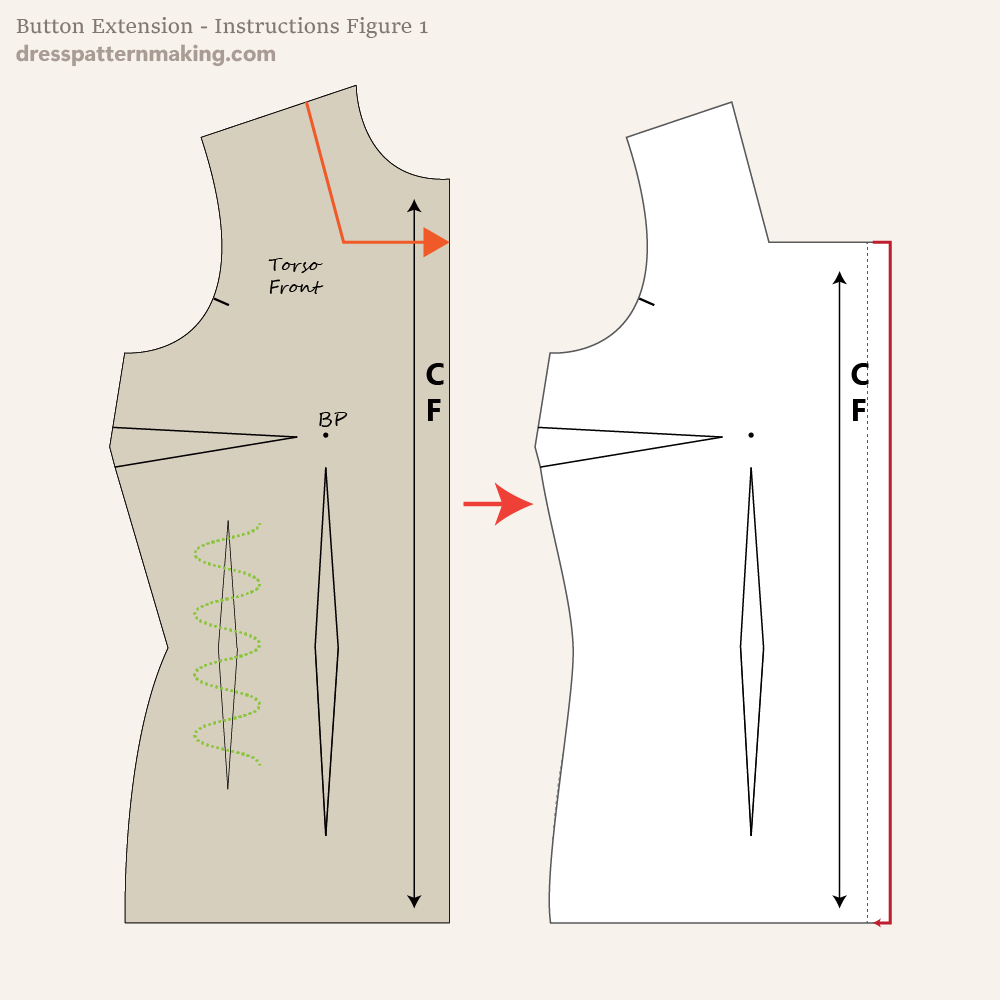
Example: Adding a Button Extension
In Image C:
- The Torso Block has been traced to create the top design shown in Image A.
- On the left, buttons are placed along the Center Front line—you can see that half of each button extends past this line.
- On the right, a button extension (shaded for emphasis) has been added.
- The extension must be wide enough for half of the button, plus a little extra.
Determining the Width of the Button Extension
- The extension should be at least the width of the button.
- For small buttons (e.g., 0.38-inch), the extension should be 1.5 times the width of the button.
Creating the Button Extension: Step-by-Step
1. Determine the Button Stand Width
- The width of the button stand is based on the diameter of the button.
2. Draw the Button Stand
- Mark the button stand width beyond the CF line.
3. Mark the Button Placement
- Place the first button approximately 5mm from the top.
- Place another button at the Bust Point level.
- Distribute the remaining buttons evenly along the CF.
4. Mark the Buttons and Buttonholes
- Since this is a symmetrical design, all markings are made on one pattern piece, which will be labeled Cut Two or Cut Pair.
5. Add Seam Allowance and Facing
- Seam allowance is required to sew the button stand and facing together.
- Facing is typically added for a clean finish.
- (Details on adding facings are covered separately—see the links at the bottom of this guide.)
Step-by-Step: Adding the Button Extension (Illustrated Steps)
- Trace the block based on the design lines for your garment.
- Calculate the button stand width:
- Example: If the button diameter is 0.5-inch (1.5cm), the extension should also be 0.5-inch.
- Draw the extension (marked in red).
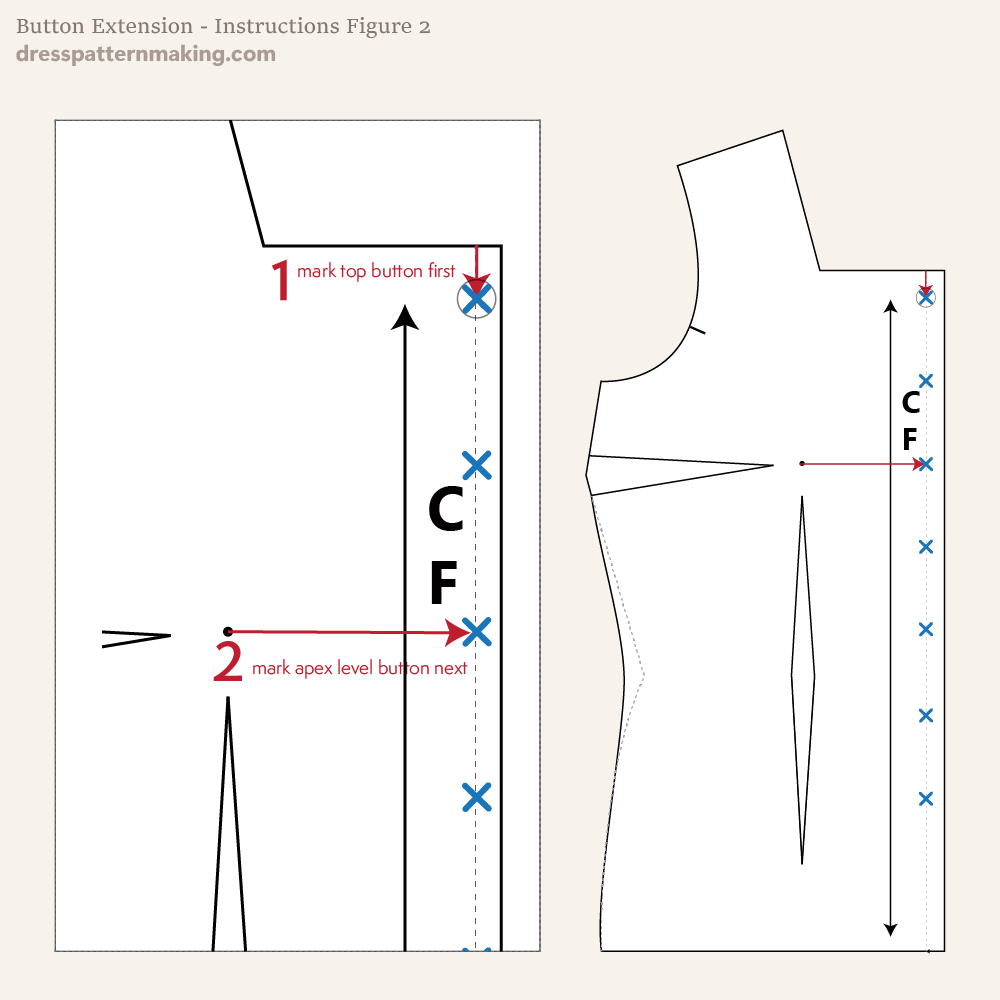
- Measure down from the CF neck point by the same amount as the button extension width (e.g., 0.88-inch) and mark the first button.
- Mark a button at the bust level.
- Evenly distribute the remaining buttons.
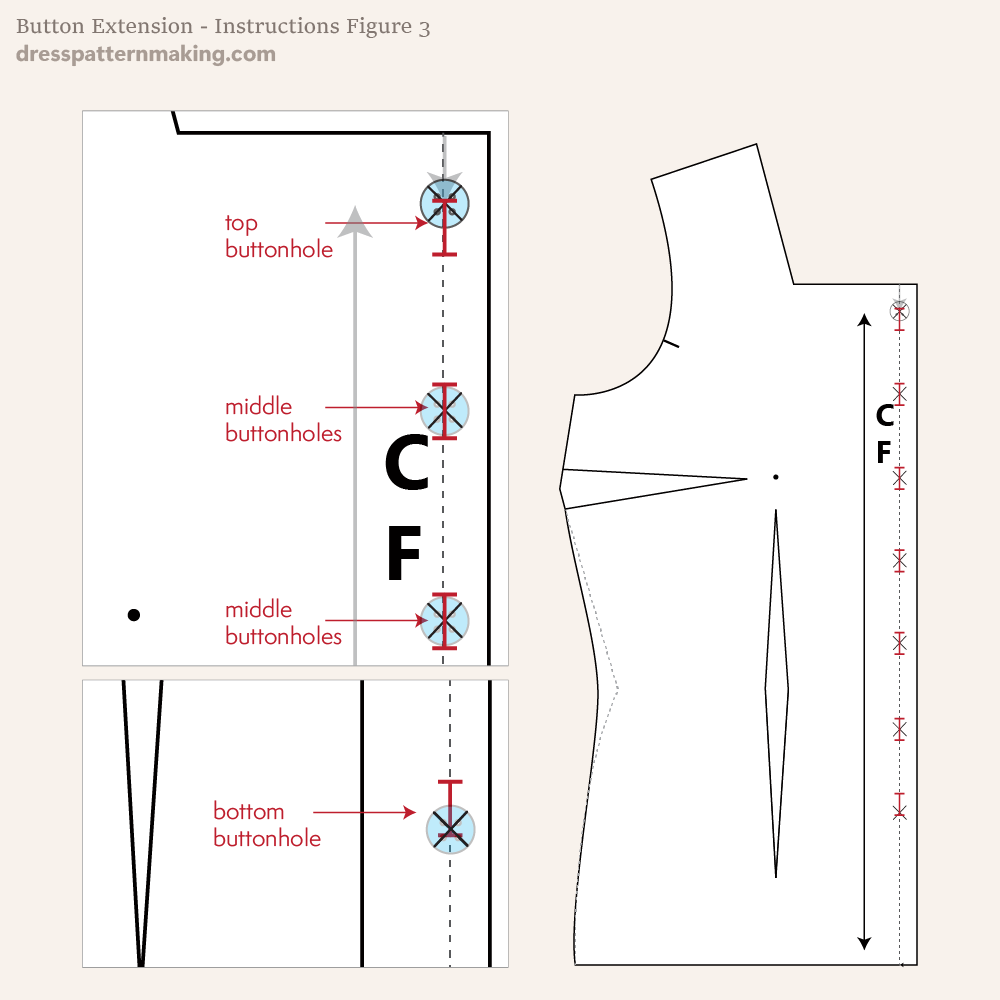
- If using horizontal buttonholes, place them so that 1/8-inch extends into the button extension, with the rest within the bodice.
Important: Seam Allowance & Facing
- This pattern still needs a facing and seam allowance added.
- For instructions on adding facing, see:
- All-in-One Facing (applies to this pattern with a button stand).
- Grown-On Facing (applies to this pattern with a button stand).