Flared Skirt 2
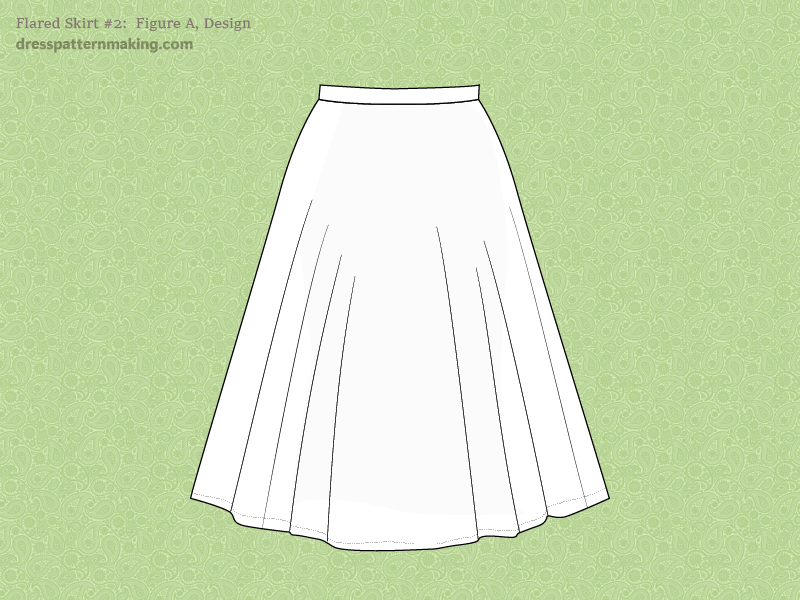
This flared skirt is created with the 1-Dart Block and has a substantial amount of flare. If you wanted any more flare you would draft the three-quarter or full circle skirts. (Scroll down to the bottom of the A-Line & Flared Skirts page to see a comparison of the final shapes of the 2 A-line and 2 Flare skirts in this menu).
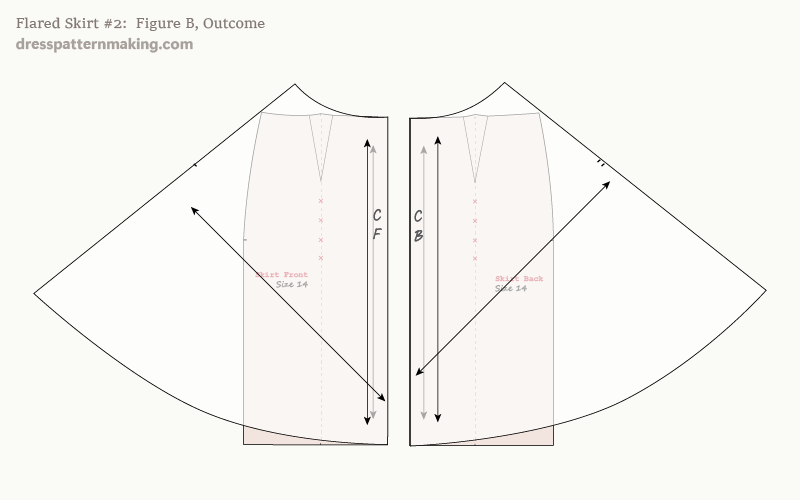
Example: Outcome
Figure B shows the final flared skirts overlaid on the original 2-Dart block.
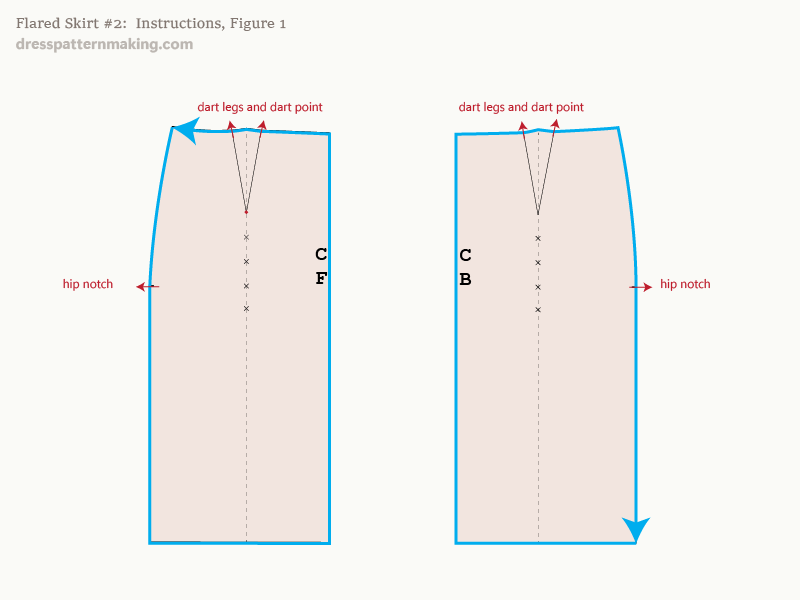
Instructions: Drafting Flared Skirt 02 - Figure 1
- Trace the 1-Dart Block onto paper.
- Make sure you mark the dart legs, the dart points and the hip notches.
Important Note: I am showing you the drafting of the Front and Back at the same time, but you would normally first draft the Front, then when finished that, draft the Back.
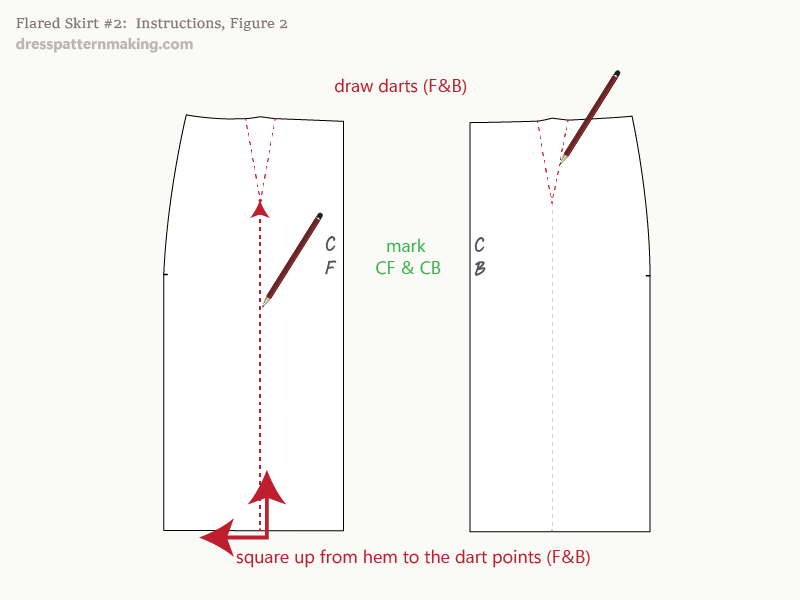
Instructions: Drafting Flared Skirt 02 - Figure 2
Remove your block after you have finished tracing and marking points, then:
- Draw in the darts.
- Mark the CF and CB on the working pattern pieces.
- Draw lines from the hem to the waist dart points, squaring up from the hemline.
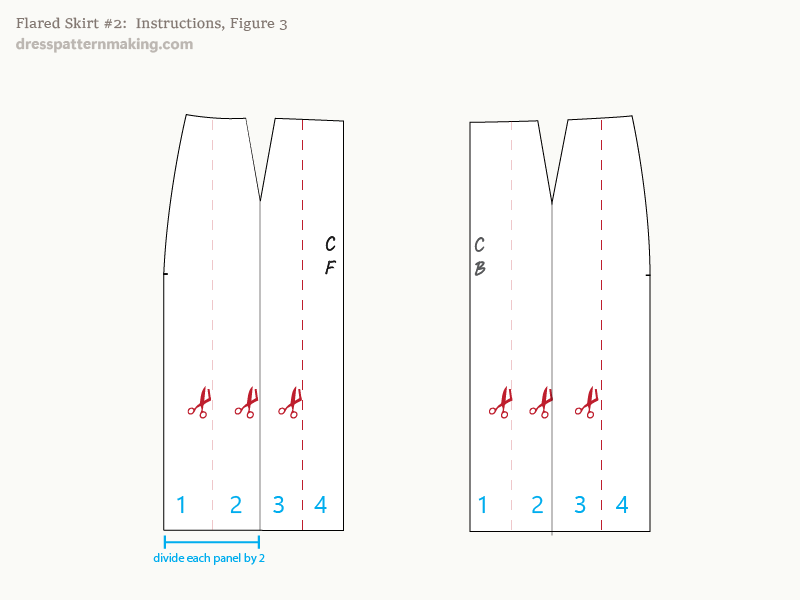
Instructions: Drafting Flared Skirt 02 - Figure 3
- Add two more lines on both front and back, dividing each panel at the hem and squaring up. These will be cutting lines.
- Cut out the darts completely.
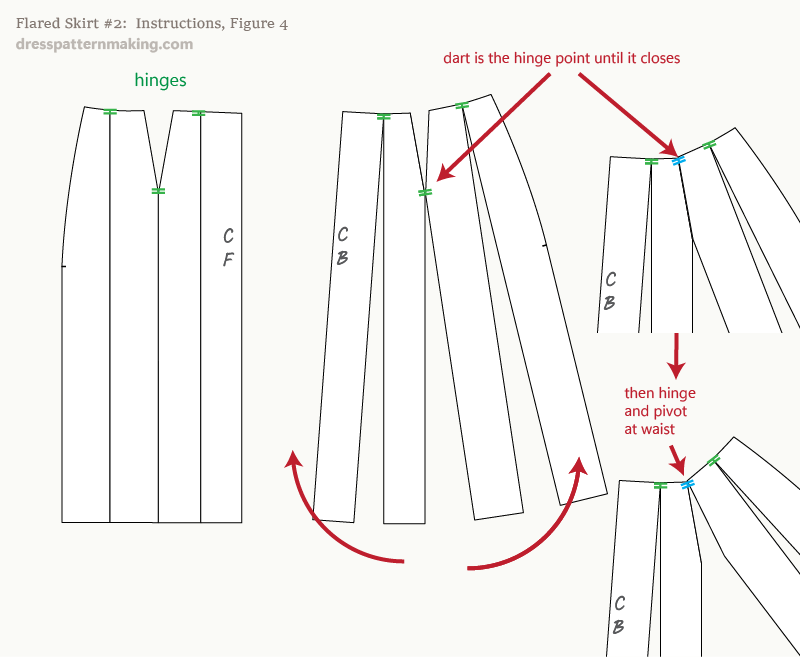
Instructions: Drafting Flared Skirt 02 - Figure 4
- Cut along the lines, leaving hinges at the dart point for the center line, and at the waist for the other two (shown on the Front pattern in the image).
- We will cut and spread so there is a 5 inch insertion in the three openings (for the front and back).
Note the following:
- In the center where the dart is, you will need to pivot on the dart point.
- If you close the dart and you still do not have a 5-inch insertion, then hinge and pivot from the waist after that point. (This will happen if you have a large waist and therefore a small dart).(Shown in the Figure 4 with the back pattern piece)
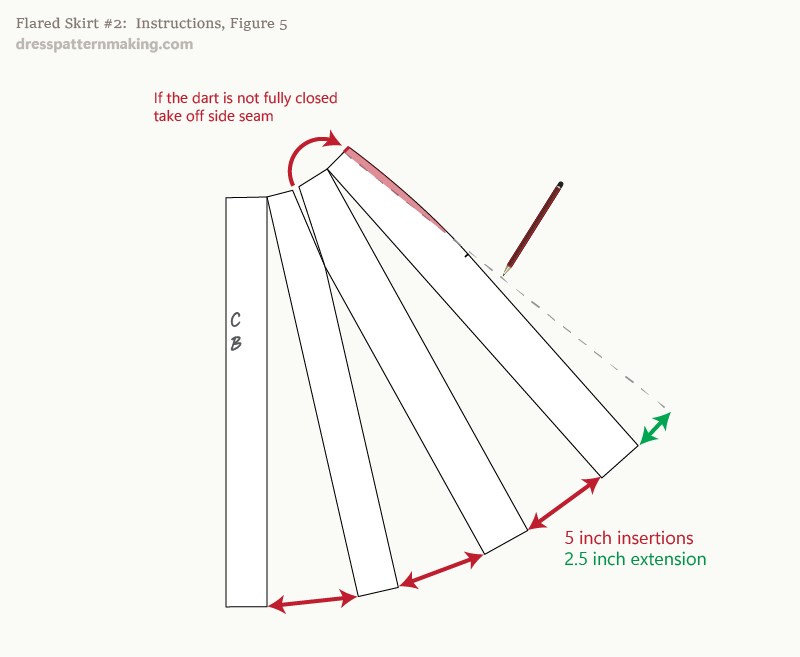
- Note that if the dart does not fully close when you have added the 5 inches in the hem, you can shave off the value of the dart from the side seam. (Shown in Figure 5).
Instructions: Drafting Flared Skirt 02 - Figure 5
In this image I am showing you just the back, and you will need to repeat with the front.
- Spread so there is 5 inches (12.5cm) in each insertion.
- Add 2.5 inch (7.5cm) extension at the side.
*This skirt may be too wide for some fabric
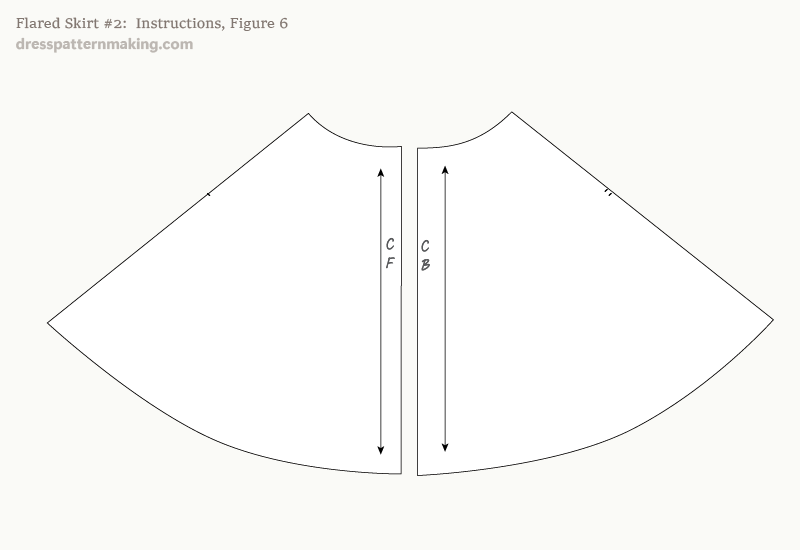
Instructions: Drafting Flared Skirt 02 - Figure 6
- Draw out the final shape
- Mark the grainline. (This skirt can be cut on the bias, see the Notes section following).
- You may need to rework the hem after creating the garment and letting it hang for a while.
Final Notes
This is the working pattern. You still need to add seam allowance, cutting instructions, draft a waistband, add details, etc. This skirt can be cut on the bias, but then the hem sweep would not look like the introductory image. See the Bias Flare skirt in the menu for an indication of how this skirt would look cut on the bias, and a comparison of the skirt sweeps.

