Turnover Collar
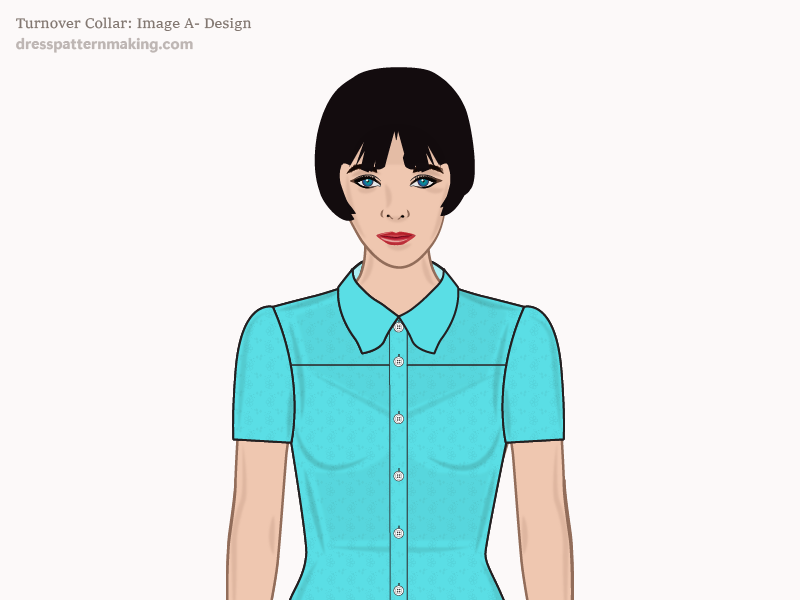
The Turnover collar is a close-fitting stand up collar. All you need to make this collar is the neckline measurements of your block; the front neck and the back neck measurements. Note that the Turnover collar is also the base for the two-piece shirt collar; i.e. the two pieces consist of a stand (also called a band) and the top collar - the top collar part is the Turnover collar (and the stand is the Mandarin with a 1-inch extension for the button). When making the turnover collar to be used by itself, you include a stand width, when making it to be attached to a band (Mandarin) collar, you leave out the stand width.
Example: Outcome
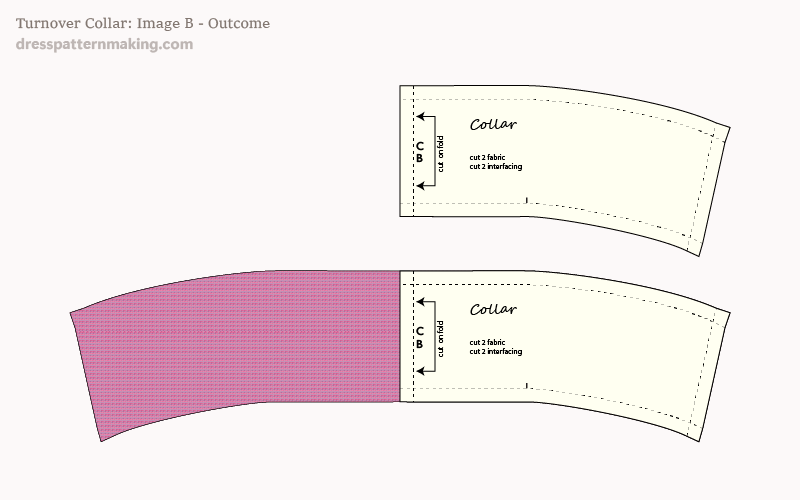
Figure B shows the collar that will be created in the step-by-step instructions below. Note that the collar is drafted as a half-collar. If you want to create a whole pattern piece, you need to fold a piece of paper and put the CB on that fold before drafting the pattern piece. The same pattern piece is being used for the collar and the under-collar; you can create a separate under-collar that is slightly smaller so that the seam-line is not seen. If you want to draft an under-collar, see the last steps of both the Basic Collar and the Peter Pan collar to see how it is done.
Instructions (Turnover Collar) - Figure 1
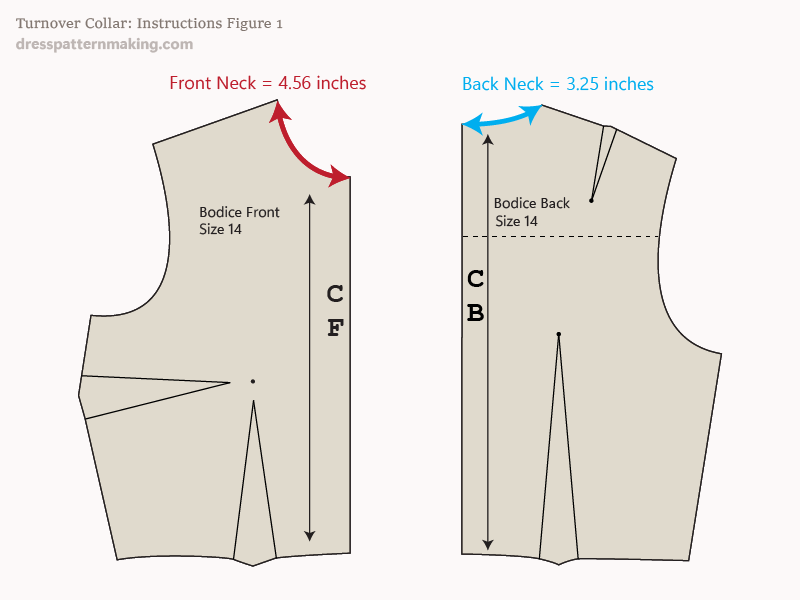
- Measure the Back Neck curve and Front Neck curve of your Bodice Block.
- Add these two measurements together
In this example the Front Neck is 4.56 inches and the Back Neck is 3.25 inches. Total neckline measurement (for half-block) = 7.81-inches.
Instructions (Turnover Collar) - Figure 2
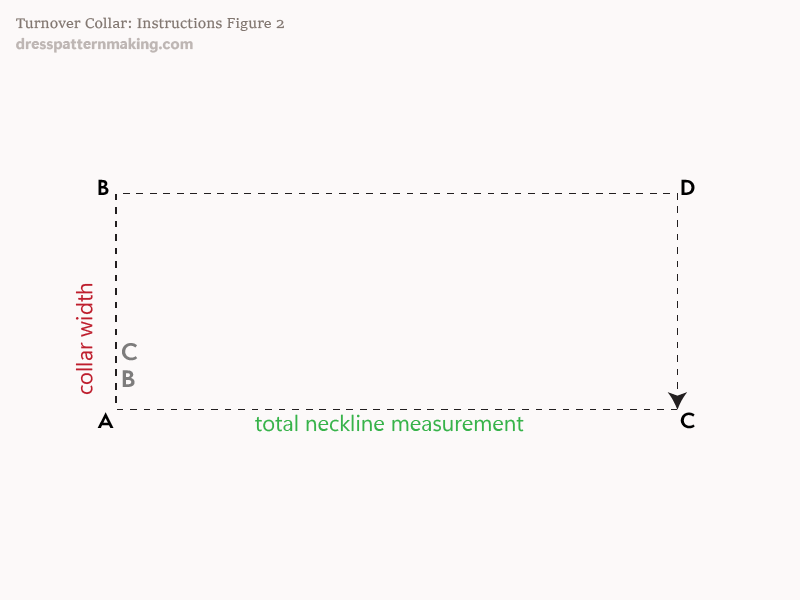
As mentioned in the introduction, the Turnover collar can be drafted to be used by itself as a one-piece collar, or drafted as part of the two-piece collar. In this example I am creating it as a one-piece with a width of 3-inches; this includes the stand and fall. If you were drafting it as the top of a two-piece, you would probably create it between 2 and 2.75-inches. We are going to draft a half-pattern; you can choose to draft it so the CB is on a folded piece of paper so that you end up with the whole pattern piece if you wish. Draw a rectangle:
- the height of the rectangle is the collar width (A to B) - 3 inches.
- the length of the rectangle is the Total Neckline measurement (A to C). In my example 7.81 inches.
Instructions (Turnover Collar) - Figure 3
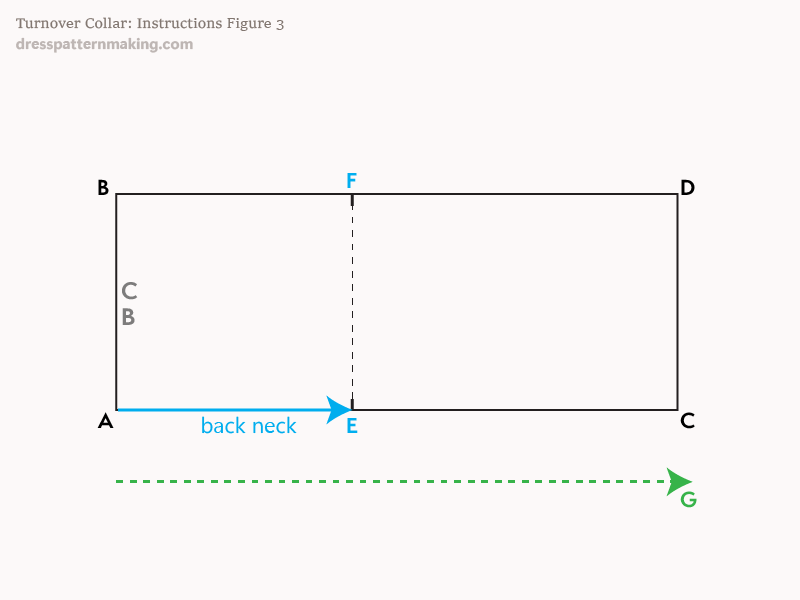
- Using the Back Neck measurement, measure from point A and mark the Shoulder Point E.
- Square up from E to the B~D line and mark point F.
- Draw another line 1-inch below and parallel to the A~C line, and mark the end point G.
Instructions (Turnover Collar) - Figure 4
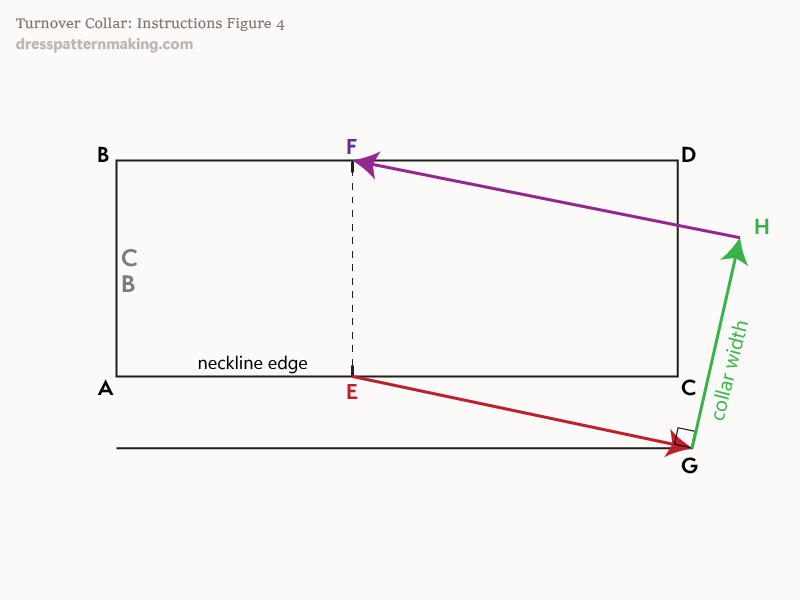
- Draw a line from E to G.
- Draw a line from G at right angles to the E~G line; the length of the line being the collar width (in this example 3-inches). Mark point H. (Of course, this line should be the same length as A~B.)
- Draw a line from H to F.
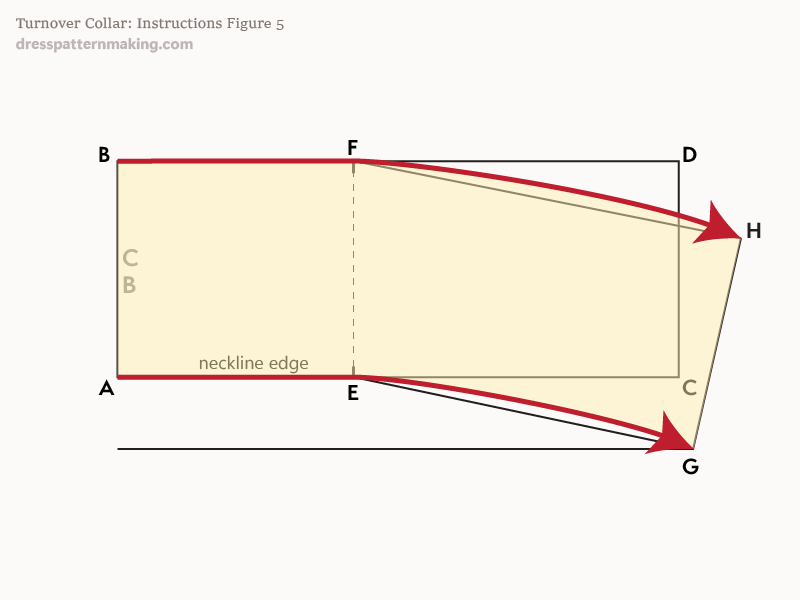
Instructions (Turnover Collar) - Figure 5
To finish off the basic shape:
- Draw a curved line from F to H.
- Draw a curved line from E to G.
There are numerous ways you can shape the collar edge of the collar, and you can also finesse the neckline edge as well (to make the fit a little better). Click on the links to see these details.
Instructions (Turnover Collar) - Figure 6
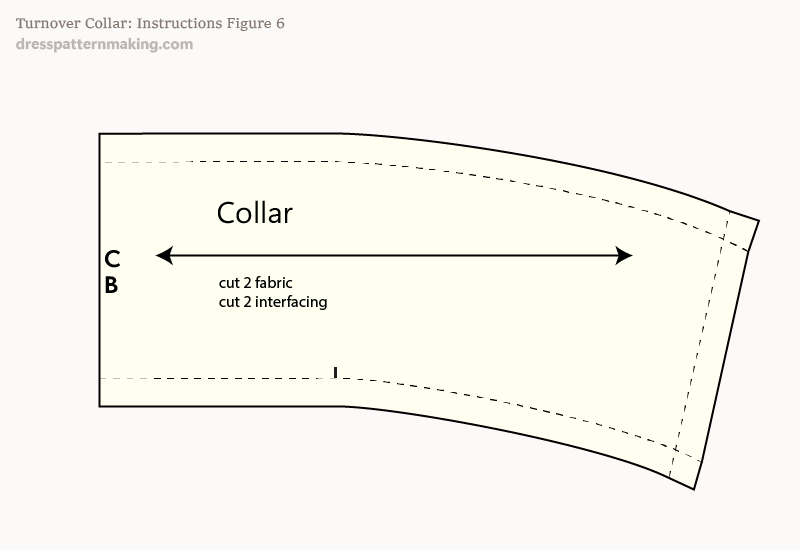
- Add seam allowance.
- Make sure your shoulder notch is marked.
- If you were making this as the top part of a two-piece collar you would also notch where this collar joins the band.
- Label, and mark cutting instructions.
