Bodice Front Style 27
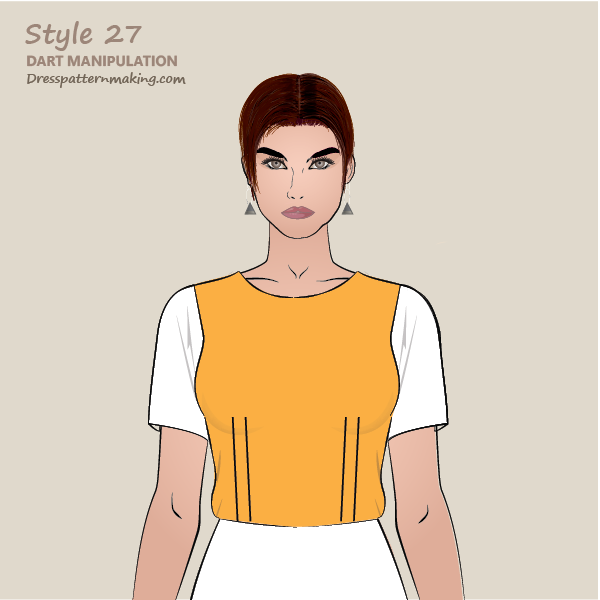
The bodice of this garment has two parallel darts in the waist of the half-block.
Example: Outcome
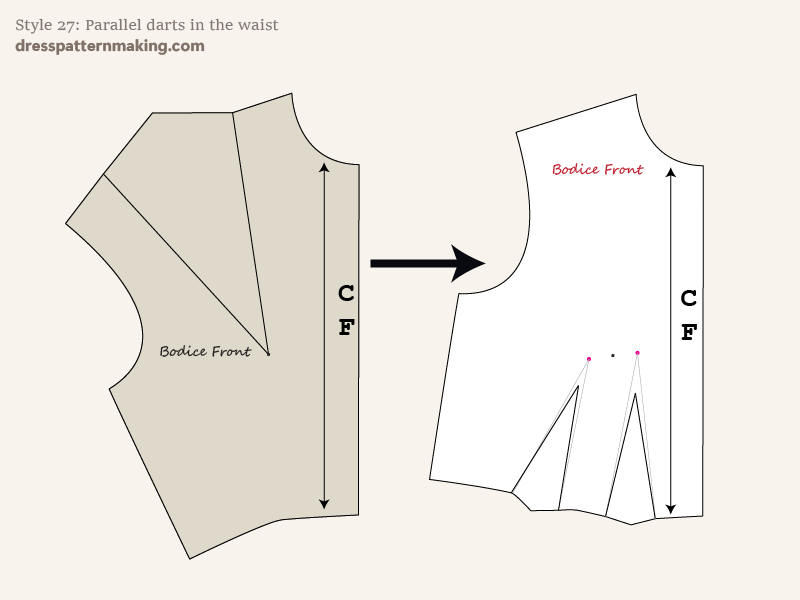
Figure B shows the block being used on the left (1-Dart Block; dart in the shoulder - i.e. non-standard block for this website), and the pattern that will be created (Style 27) on the right.
The focus of these instructions is covering the theory and practice of manipulating darts and the exercise finishes after the dart manipulation has been done. For production ready patterns you would need to take further steps to add seam allowance, pattern labels, pattern piece numbers, the grainline, etc.
In this example, I am using a non-standard block (non-standard for this website). Using the 1-Dart Block, I have pivoted the full value of the waist dart into the shoulder seam, but I did this on patternmaking paper so that it is easy to trace. If I had just pivoted the dart into the shoulder using paper, it would be difficult to use for the purposes of this exercise, using the pivoting method. This block has the darts running to the Bust Point, rather than finishing at a Dart Point. This is because the block is being used solely to create patterns, and the Dart Point is not required.
Instructions (Style-27) - Figure 1
In these images I have used color for emphasis only. Use a hard pencil (4H-6H) when hand drafting patterns.
You will be using a hard (4H-6H pencil). In this exercise, we will not be pivoting on the Bust Point. This is because we are creating parallel darts, and by it's very nature, both darts cannot be pointing towards the same point. See the page on Complex Dart Manipulation if you have not already done so (if you click on the link, it will open in a new window).
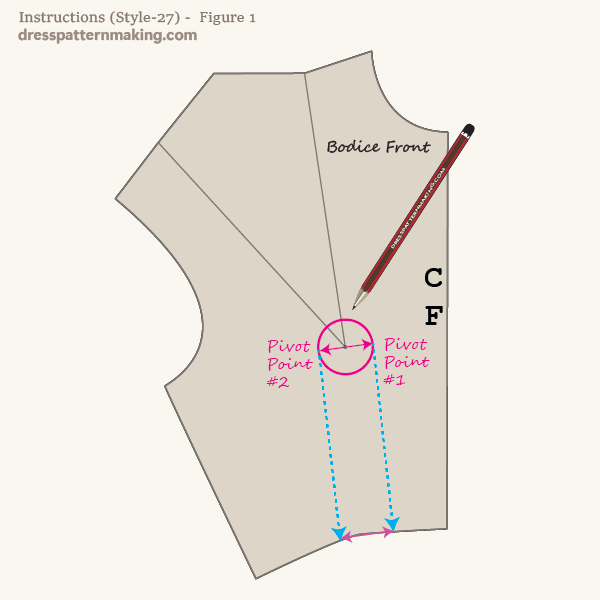
- Draw a circle, with the Bust Point at the center, with a radius of 1 inch (2.54 cm). This means the diameter will be 2-inches, and the parallel darts will be 2 inches apart.
- Draw a line from one side of the circle (Pivot Point 1, where the arrow tip touches the pink circle) to the waist.
- Draw a parallel line to the first line, from the other side of the circle (Pivot Point #2, where the pink arrow tip touches the pink circle) to the waist.
Since the darts are parallel, the distance between the two dart lines are the same at the top (2 inches, the diameter of the circle) and the bottom (2 inches at the waist).
Instructions (Style-27) - Figure 2
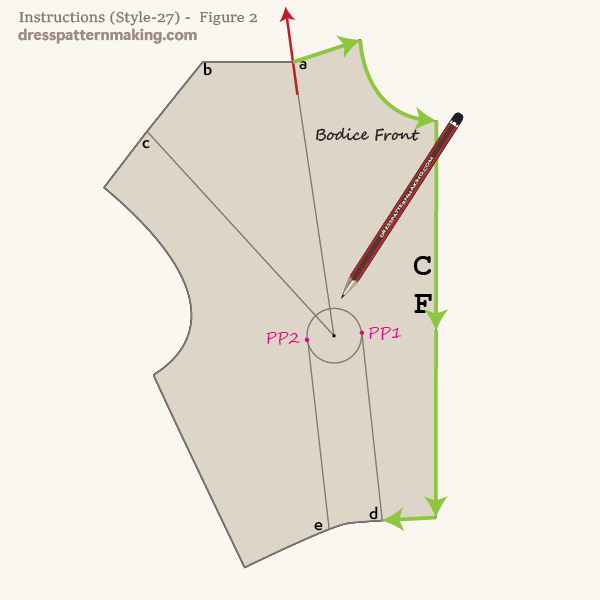
- Extend dart leg A out onto the paper for some distance.
- Trace the block from dart leg A in a clockwise direction, until you reach the new style-line D at the waist.
- Mark the Bust Point AND Pivot Point #1 AND Pivot Point #2 on the paper underneath by piercing holes through the cardboard with an awl.
Instructions (Style-27) - Figure 3
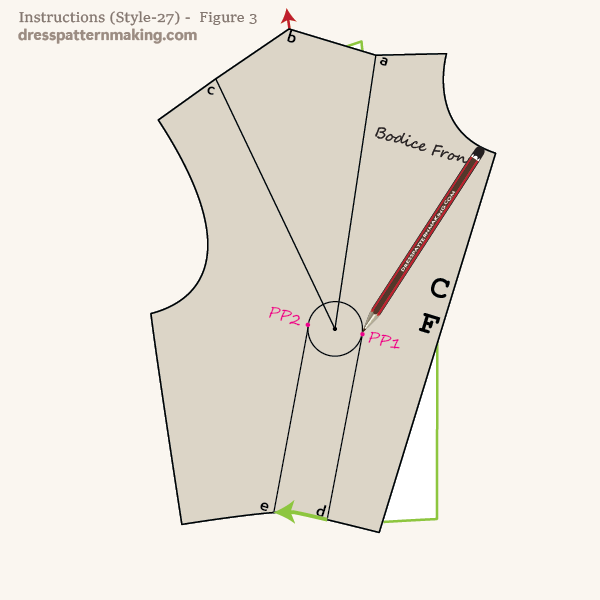
- Hold down the block at Pivot Point #1, and turn the block in a clockwise direction to close half the shoulder dart. Closing half the dart means that the mid-dart point B will reach the red arrow.
- Trace the block from point D to E (in-between the two parallel dart lines).
Instructions (Style-27) - Figure 4
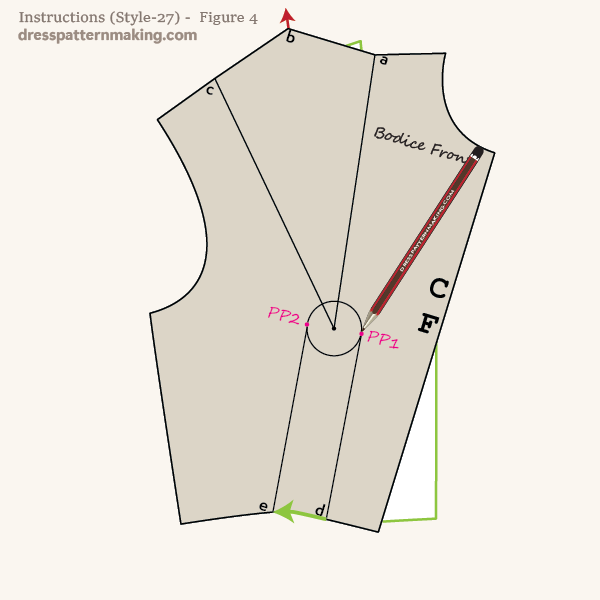
- Holding the block at Pivot Point #2 this time, pivot the rest of the shoulder dart closed; i.e. until dart leg C reaches the red arrow.
- Finish tracing the block from point E to point C.
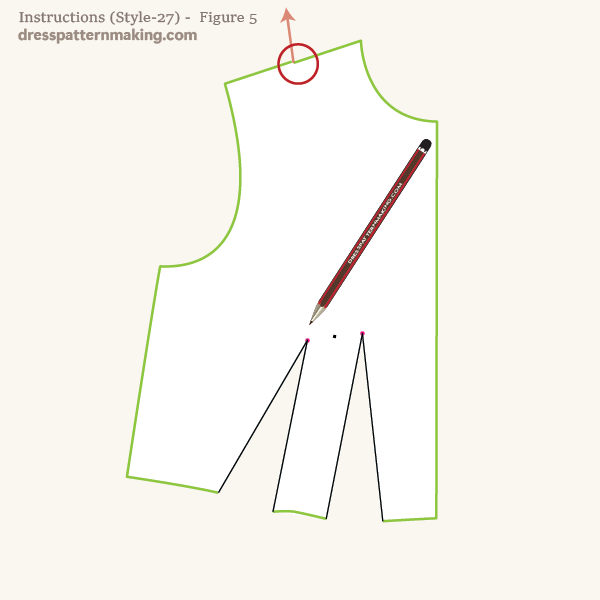
Instructions (Style-27) - Figure 5
You can lift up the block and put it aside.
- Draw the dart legs to PP1 and PP2.
- The shoulder line may not be straight (due to pivoting on points that are not the Bust Point). You will need to true the shoulder line.
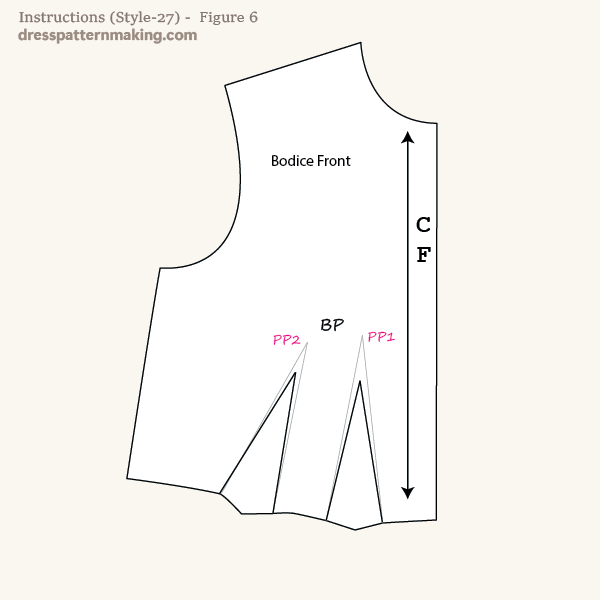
Instructions (Style-27) - Figure 6
- Draw the new dart legs from Pivot Point 1 and Pivot Point 2 (not from the Bust Point which is in between the two).
- Finish off the darts, remembering that the Dart Point stops some distance before the Bust Point, and in this case even further than would be the case when the dart is pointed to the Bust Point.*
- Of course, if this was a pattern, you would need to add seam allowance, cutting instructions, grainline, label the pattern piece, etc.
*Note that when the Dart is not pointing towards the Bust Point, the Dart Point needs to be further away. For example: with one dart pointing towards the Bust Point, the Dart Point finishes about .63-inch before the BP (for a B-Cup). In THIS case however, using Pivot Point 1 & Pivot Point 2 as alternate Bust Points, the Dart Points need to be quite a bit further away than .63-inch. See the explanation on Complex Dart Manipulation if you have not already done so (if you click on this link, it will open the page in a new window). If you are unsure about how to finish off the dart, see the pages on Finishing off Darts, which gives a few step-by-step examples.
