Creating a 1-Dart Block (using your 2-Dart Block)
If you have created a 2-Dart Block for your patternmaking, you may want to create a 1-Dart Block. The instructions here use the pivoting method.
1-Dart Block from 2-Dart Block: Figure 1
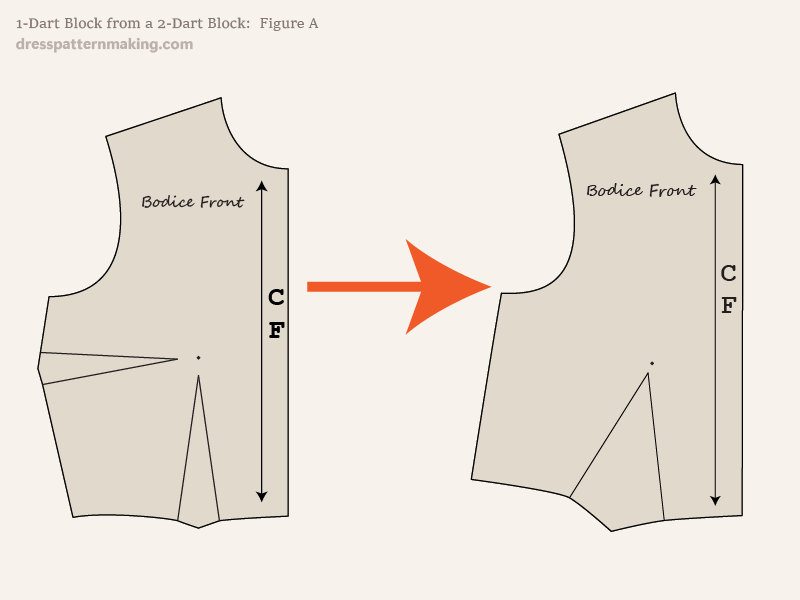
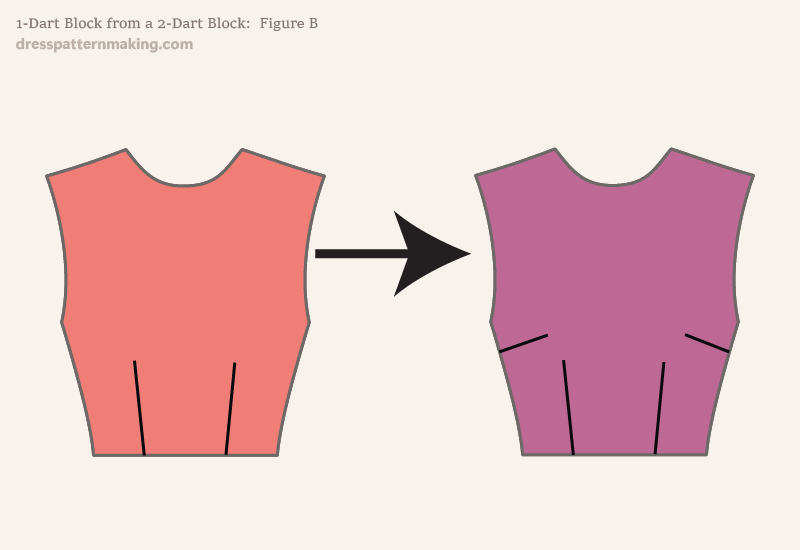
Figure A above shows the starting block (2-Dart Block) and the 1-Dart Block you will be creating from it, by pivoting the side seam dart into the waist dart. Figure B shows what the Technical Flats for those designs.
1-Dart Block from 2-Dart Block: Figure 1
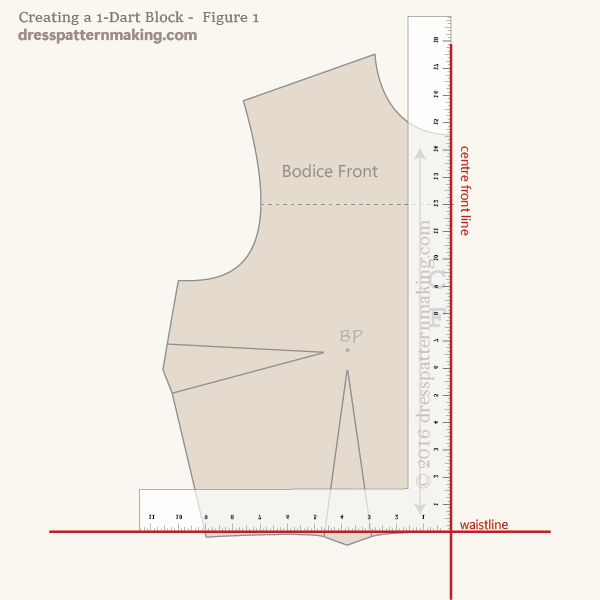
Although we can just trace around the block, we will just make sure our Center Front line is straight, and draw that line with the ruler.
- Using your block as a guide for placement on your cardboard, draw the following lines with your ruler:
- Center Front Line
- Waistline - making sure this is at right angles to the Center Front Line
1-Dart Block from 2-Dart Block: Figure 2
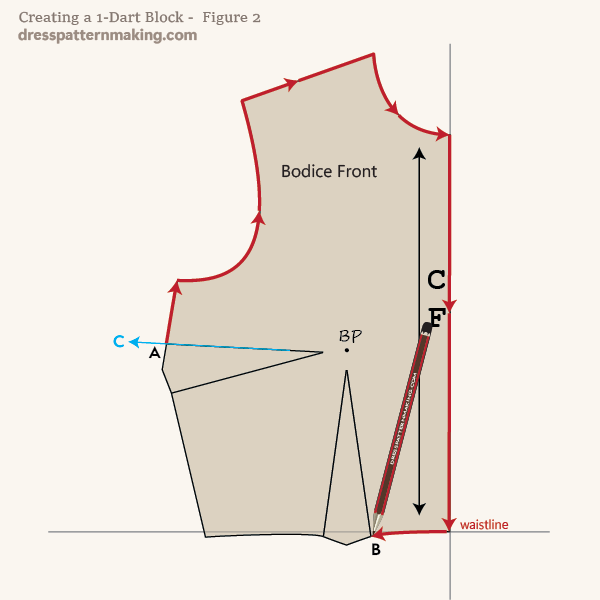
Holding the Block firmly in place:
- trace around the block, from the top side seam dart leg, around to the first waist dart leg (which I have marked A to B on the image).
- mark the dart point on the cardboard underneath (you should have punched a hole through the BP so you can put the pencil tip through the hole)
- extend the top dart leg out - marked as line C on the image; this line will assist in the next step when we pivot the block
1-Dart Block from 2-Dart Block: Figure 3
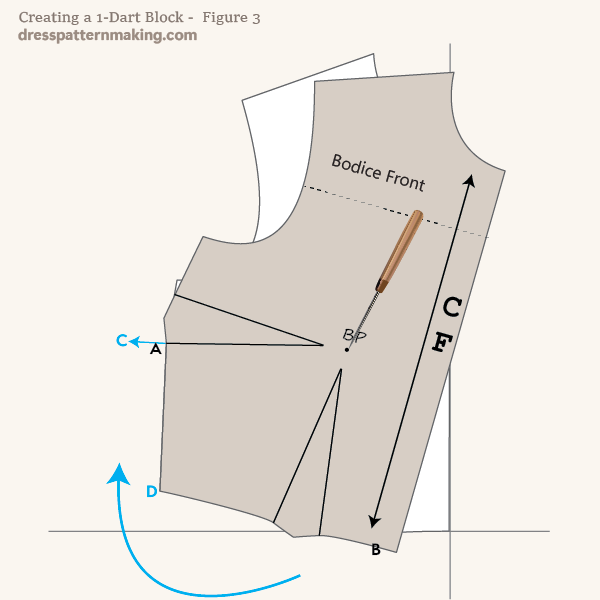
- Holding the block down at the Bust Point pivot the block in a clockwise direction, until the side seam dart is closed. (the bottom side seam dart leg will reach the line C. If we had not drawn the line, it might be difficult to tell when the dart is closed).
1-Dart Block from 2-Dart Block: Figure 4
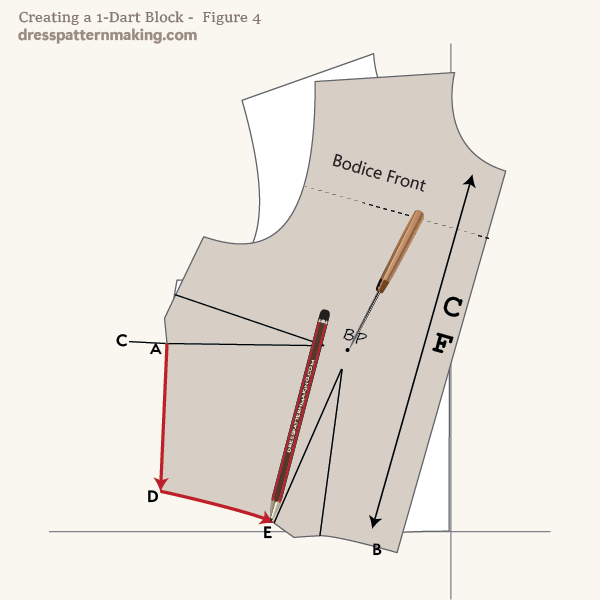
- Trace the block from where the side seam dart leg touches the line C, around past the waist side seam point D, and to the waist dart leg E.
- You can now lift your block up.
1-Dart Block from 2-Dart Block: Figure 5
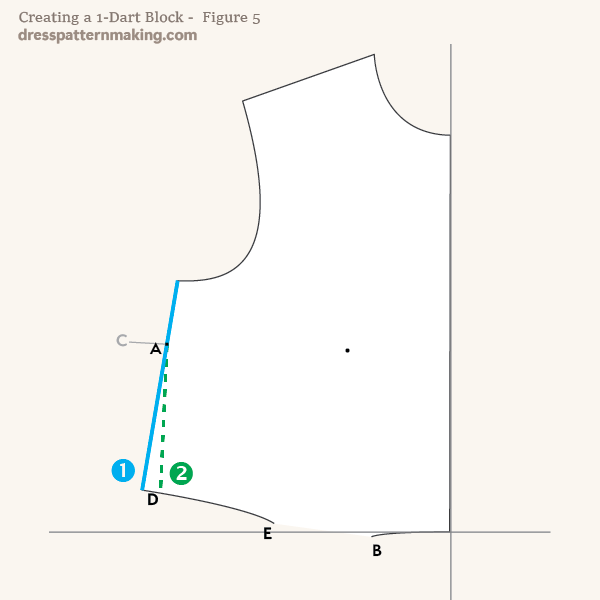
This is what you will have on your cardboard when you lift up the block:
- If you did not have to move some of the waist dart into the side seam, your side length will be straight, like the blue line in the image (No.1). In this case, you just need to finish off the waist dart - go to Figure 8.
- If you did move some of the waist dart into the side seam, your side length will not be straight, it will look like the green line in the image (No.2.) You will need to move the side seam dart amount back into the waist dart - see Figure 6.
1-Dart Block from 2-Dart Block: Figure 6
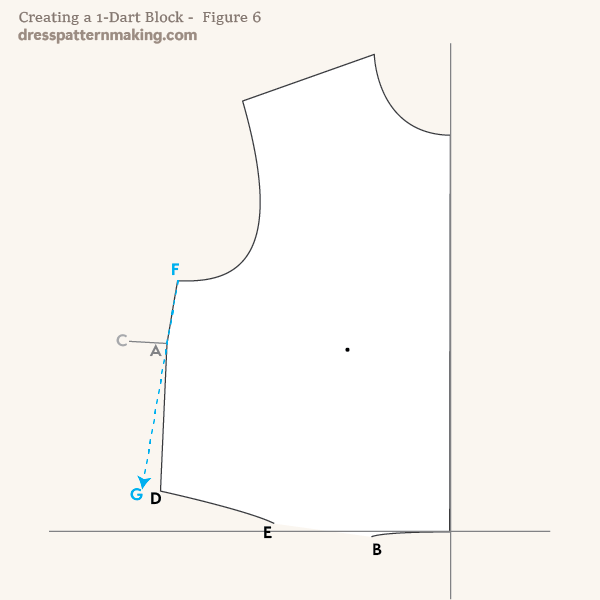
To straighten up the side length and put the dart value taken off the side seam back into the waist dart:
- Measure and add together: from (F to A) PLUS (A to D). (Alternatively, look at your measurement chart to see the side length, or measure the Bodice Back side length, which will be one straight line).
- Draw a straight line from F to go from F to A and continue to the value of the side length, to the end point G.
1-Dart Block from 2-Dart Block: Figure 7
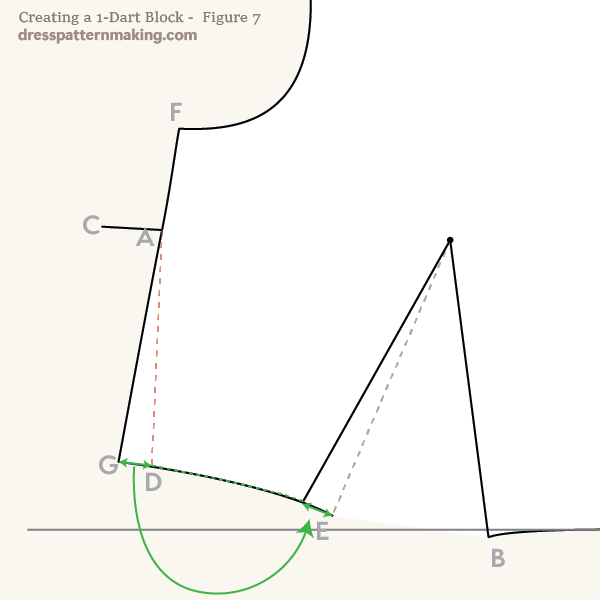
- Measure between G and D.
- Increase the waist dart by this amount.
- Measure from the Dart Point to B.
- Draw the second dart to be the same value as the first dart leg. (It will probably end a bit before the original red waist line).
- Redraw the waist line (green dashed line).
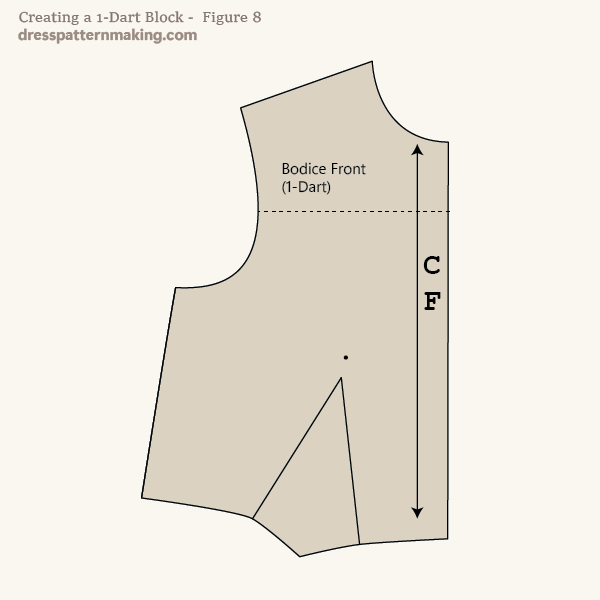
1-Dart Block from 2-Dart Block: Figure 8
- Finish off your dart (If you are still unsure how to do this see the page on: Finishing off Darts)
- Cut out your block
- Label it
- Mark CF
- Draw grainline
- Notch
- Punch holes through the Bust Point and the Dart Point
